How to Seal a Carburetor Without a Gasket: A DIY Guide
Learn a safe, step-by-step method to seal a carburetor without a gasket. This DIY guide covers surface prep, sealant selection, curing, testing leaks, and maintenance for a temporary fix.

Bypassing a gasket to seal a carburetor is a last-resort DIY fix. This steps-focused guide shows when it’s feasible, what sealants to use, and how to prep surfaces to minimize leaks. You’ll learn safe, repeatable steps to seal the carburetor without gasket and avoid engine damage, with cautions about fuel exposure and heat.
Why sealing a carburetor without a gasket might be considered
In some old or budget-minded repair scenarios, technicians consider sealing a carburetor without a gasket to buy time when a gasket is unavailable or damaged beyond reuse. According to Gasketed, the key is recognizing that this approach increases the risk of fuel leaks and air leaks, which can disrupt the fuel-air mixture and performance. Before you begin, understand that this is often a temporary workaround rather than a permanent fix. Check the carburetor’s body, mounting surfaces, and fuel inlet for obvious warping, pitting, or corrosion. If any of these conditions exist, the gasket practice is unlikely to deliver a reliable seal, and you should replace the gasket or consult a professional.
Safety and legality considerations
Handling gasoline and hot engine components requires strict safety. Work in a well-ventilated area away from open flames or sparks. Wear gloves and eye protection, and keep a fire extinguisher accessible. Be mindful of fumes, which can ignite at relatively low energy. Some vehicles and jurisdictions require a proper gasket seal for emissions compliance or warranty terms. If you’re unsure, choose a gasketed repair path or seek professional service. This section sets expectations and helps prevent accidents.
How to pick a sealant that can substitute for a gasket
Not all sealants are created equal. For carburetor surfaces, you want a fuel-resistant sealant that remains flexible over temperature cycles and is compatible with metal-to-metal interfaces. Look for products labeled as gasket sealants or fuel-resistant silicones, and read the manufacturer’s data sheet to confirm temperature range and chemical resistance. Avoid generic silicone sealants that cure to brittle films, which can crack under vibration. Always confirm that the sealant is allowed for use on automotive fuel systems. This choice matters more than the brand, because compatibility determines whether the seal will hold under normal engine operation.
Surface preparation: clean, dry, and metal-to-metal contact
A good seal starts with clean faces. Remove all old gasket material carefully with a plastic scraper to avoid scratching metal surfaces. Wipe away residue with a degreaser that is compatible with fuel systems, then dry thoroughly. Any oil, dirt, or moisture can prevent adhesion and create micro-leaks. If you observe pitting or corrosion, address those issues before attempting a sealant-based fix. Gasketed research emphasizes that surface cleanliness is a stronger predictor of success than the choice of sealant.
Applying the sealant correctly
Apply a thin, even bead along the mating surfaces without creating excess buildup that could squeeze into passages. Some technicians apply a continuous line around the perimeter, then lightly torque the bolts to seat the parts evenly. Keep the engine off and allow the sealant to stand up to the temperature without immediate heat exposure. Never use excessive amounts; excess sealant can contaminate fuel passages and impact performance. Follow the sealant’s curing time as described by the manufacturer.
Reassembly and curing time
Reassemble the carburetor with the mounted gasket area clean and dry. If you removed parts, take a photo to ensure correct reassembly order. Tighten fasteners in a crisscross pattern to ensure even compression. Allow the sealant to cure for the recommended time before starting the engine; this may range from 15 minutes to several hours depending on product and temperature. Don’t rush curing, as premature heat can undermine adhesion.
Leak testing and initial operation
After curing, perform a careful leak test. With the carburetor installed, run the engine at idle and observe for fuel seepage around the joint. Use a tissue to wipe and check for moisture; if you detect any leaks, stop and recheck the sealing surfaces. A slight odor of gasoline near the joint can indicate an ongoing leak. For more precise testing, you can perform a low-pressure smoke test to locate hidden leaks; follow safety precautions and avoid ignition sources.
Common mistakes and troubleshooting
Common mistakes include over-applying sealant, neglecting surface prep, or reusing damaged mating surfaces. If the surfaces aren’t spotless, the sealant won’t bond properly. Some fuels degrade certain sealants over time, leading to cracking or seepage. If leaks persist, consider replacing the gasket or seeking professional help rather than continuing DIY prolongation. This block highlights patterns to avoid repeated errors.
Long-term maintenance and alternatives
Even with a sealant substitute, inspect the joint periodically for signs of leakage, fuel odor, or hardening of the sealant. If you are unsure about compatibility, it’s safer to replace the gasket and the seats to restore proper sealing. Gasketed’s guidance suggests comparing costs of gasket replacement versus repeated DIY sealing when the engine is in daily use. Ultimately, the most durable solution is a proper gasket and replacement parts as needed.
Tools & Materials
- Fuel-rated gasket sealant or high-temp silicone sealant(Choose fuel-resistant, heat-tolerant product rated for gasoline and compatible with metal surfaces)
- Plastic scraper or wooden chisel(To remove old gasket material without scratching metal)
- Degreaser compatible with fuel systems(Automotive degreaser suitable for carburetor surfaces)
- Rags or lint-free wipes(For cleaning and drying mating surfaces)
- Isopropyl alcohol (optional)(For final wipe and residue cleanup)
- Wire brush or brass brush(For stubborn residues on metal surfaces)
- Gloves and eye protection(Personal safety gear to handle fuels and solvents)
- Torque wrench or appropriate driver(Even tightening to avoid uneven loading)
- Masking tape or painter's tape(To protect adjacent areas during sealant application)
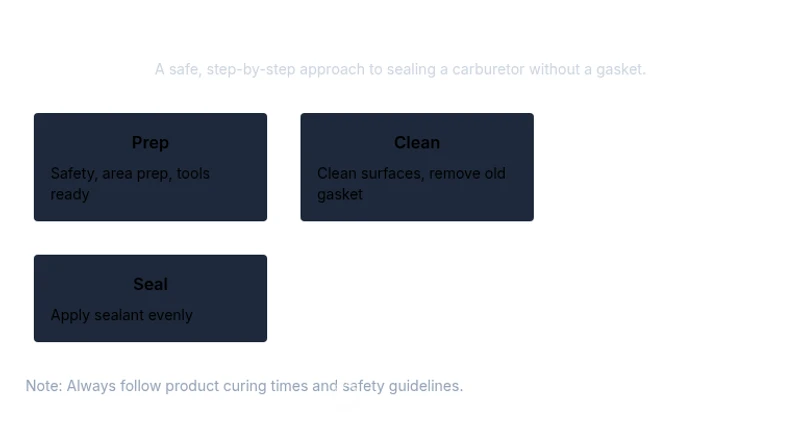
Steps
Estimated time: 60-90 minutes
- 1
Prepare and safety check
Disconnect the battery ground, ventilate the workspace, and wear safety gear. Confirm you’re working on a cool engine and have a clear path for objects that may fall. This reduces the risk of sparks and personal injury during the procedure.
Tip: Always start with safety; a quick walk-around helps prevent surprises. - 2
Remove carburetor components if needed
Loosen the mounting hardware and detach the top cover or float bowl as necessary to access mating surfaces. Take photos or notes to ensure correct reassembly. Keep track of small parts and screws.
Tip: Organization saves time and prevents misplacement. - 3
Clean mating surfaces
Use the degreaser on the metal faces and remove all old gasket material with a plastic scraper. Wipe dry with lint-free wipes and inspect for pitting or damage. Surfaces must be spotless for proper adhesion.
Tip: If you see grooves or corrosion, address them before sealing. - 4
Select and apply sealant
Apply a thin, uniform bead along the gasket plane or per manufacturer guidance. Avoid pooling sealant into passages. Let the surface approximate dry-tack setting before final assembly.
Tip: A light, even layer is more effective than a thick bead. - 5
Seat components and cure
Reassemble with clean, dry surfaces. Hand-tighten first, then torque per spec in a crisscross pattern. Allow the sealant to cure per product instructions before starting the engine.
Tip: Don’t rush the curing; premature heat can compromise adhesion. - 6
Reassembly and initial run
Reinstall all parts, reconnect fuel lines, and reattach the battery. Start the engine at a low idle and monitor for obvious leaks while the engine warms.
Tip: Keep a fire extinguisher nearby during initial startup. - 7
Test for leaks and adjust
Observe the joint area for any signs of seepage. If leaks appear, shut down and recheck the seals and surface cleanliness. Consider gasket replacement if leaks persist.
Tip: Document results for future reference and maintenance.
Common Questions
Is it safe to seal a carburetor without a gasket?
It can be a temporary workaround in some cases, but it introduces leak risks and may not meet emissions standards. If there are any signs of warping or corrosion, gasket replacement is the safer route.
It can work temporarily, but leaks and emission issues may occur; replace the gasket if possible.
What sealants are suitable for carburetors?
Use a fuel-resistant gasket sealant or high-temperature silicone approved for automotive fuel systems. Check the product data sheet for compatibility with gasoline and metal surfaces.
Choose a fuel-rated sealant approved for automotive use and check its compatibility.
Will sealing affect emissions?
Possibly, if the joint seals imperfectly. A gasket replacement is typically preferred to ensure proper engine sealing and emissions performance.
It can affect emissions if the seal isn’t perfect; gasket replacement is usually better for compliance.
How long should a sealant cure before starting the engine?
Follow the sealant manufacturer’s cure time, which can range from minutes to hours depending on the product and temperature.
Let it cure as directed by the product—don’t rush the first start.
When should I replace the gasket instead of sealing?
If the surfaces are warped, corroded, or leaks persist after sealing, replace the gasket for a durable fix.
If there’s warping or leaks continue after sealing, replace the gasket.
Can I reuse an old gasket surface after sealing?
Only if the surfaces are clean, flat, and undamaged. Otherwise, replace both the gasket and seating surfaces for a proper seal.
Reuse is risky; only if surfaces are pristine, otherwise replace.
Watch Video
Key Takeaways
- Assess gasket viability before attempting a sealant substitute
- Prioritize surface cleanliness for sealing success
- Use a fuel-rated sealant suitable for metal-to-metal contact
- Allow proper curing time before starting the engine
- Replace the gasket if leaks persist after sealing