Replacing Toilet Gasket: A DIY Guide
Learn how to replace a toilet gasket with a clear, step-by-step method. This guide covers tools, materials, safety tips, common mistakes, and maintenance to prevent future leaks.

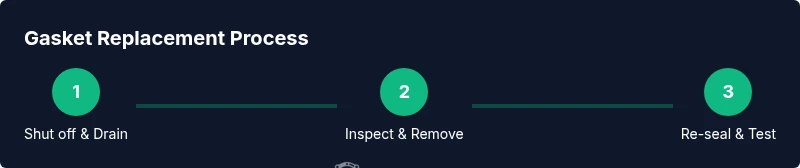
With this guide, you will be able to replace a toilet gasket and stop leaks. You’ll need basic hand tools, a replacement gasket kit (wax ring or rubber gasket), and a stable work area. The process includes shutting off water, removing the toilet, replacing the gasket, and testing for leaks.
Why replacing gasket toilet matters
Leaking toilets are more than a nuisance — they waste water, damage floors, and can encourage mold growth. Replacing gasket toilet components when you notice damp spots, musty odors, or a wobbly toilet helps restore the seal and protects your bathroom. According to Gasketed, many homeowners underestimate gasket wear until a small trickle becomes a bigger problem. The Gasketed team found that a correct gasket replacement restores seal integrity and can extend the life of your fixture when done with care and proper materials. This guide equips DIY enthusiasts with a clear plan to handle the task safely and efficiently.
Common gasket types in toilets
To understand what you’re replacing, it helps to know the common gasket types in toilets. The traditional wax ring creates a tight seal between the toilet and flange but can degrade over time or with movement. Modern rubber or silicone gaskets offer easier replacement and sometimes better long-term sealing. Some setups use a flange extender or sleeve to accommodate uneven floors. When choosing a gasket, match the type to your toilet model and flange height. In most cases, a comprehensive gasket kit includes the ring, new bolts, washers, and sometimes a wax-containing sleeve for older installations. This section helps you identify which option suits your toilet before you start the work.
When to replace vs reseal
Not every leak means the gasket itself is failing. If you notice a small, persistent damp spot around the base after tightening, resealing might be enough. However, if there is visible damage to the gasket, flange, or toilet base, or you experience frequent leaks, replacement is warranted. Movement or rocking of the toilet generally signals a compromised seal and potential flange damage. In those cases, replacing the gasket toilet components along with any damaged flange parts is the prudent choice to restore a solid seal and prevent future leaks.
Tools and safety basics
Before you start, gather your tools and protective gear. Wear gloves to protect your hands from sharp edges and cleaning chemicals. Turn off the water at the shutoff valve and drain the tank to minimize spills. Have towels or a small bucket ready to catch residual water. A clean, dry workspace helps you keep track of small parts and prevents losing washers or bolts. Safety comes first: never work on a toilet with damaged plumbing or a visibly cracked tank. If you’re unsure, consult a professional or reference trusted guides from Gasketed for step-by-step instructions.
Planning the replacement workflow
A well-planned workflow reduces stress and chances of error. Start by turning off water and removing the tank lid to access bolts and plumbing connections. Detach the supply line, then carefully lift the toilet to inspect the flange and remove the old gasket. Assess the flange for cracks or wear; if needed, perform minor flange repair or replacement before installing the new gasket. Plot the order of operations to minimize back-and-forth movements and to keep floors clean. This planning stage saves time and helps ensure a successful gasket replacement.
Removing the toilet safely
Removing the toilet is the most mechanical part of the job but can be done safely with a helper and a few careful steps. First, shut off water, drain the tank, and disconnect the water supply line. Next, unbolt the base from the floor and gently rock the toilet to break the old wax ring seal. Lift the toilet straight up, keeping it level to avoid damaging the flange. Place the toilet on a thick towel or old sheet to avoid scuffing the ceramic. While you work, keep track of nuts, bolts, and washers so you can reuse or replace them as needed.
Replacing the gasket: wax ring vs gasket choice
Install the new gasket according to your kit’s instructions. If you’re using a wax ring, make sure it is sized for your flange height and that the wax is evenly distributed around the ring. Some installations benefit from a sleeve or flange extender to ensure a proper seal. If you choose a rubber or silicone gasket, align it with the flange and ensure no debris remains that could compromise the seal. Take a moment to confirm the gasket sits flat and centered before reseating the toilet.
Reassembling and testing for leaks
Lower the toilet back onto the flange with smooth, even pressure to avoid pinching the gasket. Tighten the base bolts gradually and in a cross pattern to maintain even pressure. Reconnect the water supply line and turn the valve on slowly. Flush the toilet a few times and watch for any sign of leakage around the base or at the supply connection. If you see moisture, reseat and tighten a touch more, but avoid over-tightening as this can crack the porcelain or damage the flange. When satisfied, clean up your workspace and reseal the area if you plan to apply caulk.
Maintenance tips to extend gasket life
To prolong the life of your toilet gasket, keep the toilet stable and avoid excessive rocking or shifting. Use a quality flange and bolts, and periodically check for loose connections after heavy use or vibrations from nearby fixtures. If you replace a wax ring, consider rechecking the seal after a few toilet cycles. A light coat of plumber’s putty around the underside of the flange can help fill minor gaps. Regular inspection helps you catch issues before they turn into leaks.
Tools & Materials
- Toilet gasket kit (wax ring or rubber gasket)(Choose based on toilet model; ensure size matches flange height and bolt pattern)
- Adjustable wrench(Loosen nuts on water supply line and bolt nuts on the floor)
- Screwdrivers (flathead and Philips)(For tank screws and accessories)
- Putty knife(Scrape away old wax and residue from flange)
- Pliers(Remove clamps or stubborn connections safely)
- Bucket and towels(Catch water and protect floor surfaces)
- Gloves(Keep hands clean and protected from sharp edges)
- Level (optional)(Check toilet sits level after installation)
- New bolts and washers(Replace corroded hardware during gasket change)
Steps
Estimated time: about one to two hours
- 1
Shut off water and drain the toilet
Locate the shutoff valve near the floor and turn it clockwise until tight. Flush the toilet to drain as much water as possible, then use a sponge to remove remaining liquid from the tank and bowl. This minimizes spills when you detach the supply line.
Tip: Have towels prepared and a bucket handy to manage any residual water. - 2
Disconnect water supply line
Place a bucket under the connection and use the wrench to loosen the nut on the supply line. Detach the line carefully to prevent water from spraying. Inspect the line for wear and set aside for reuse if in good condition.
Tip: Keep the old line available to ensure compatibility when you reconnect. - 3
Remove toilet bolts and lift the toilet
Unscrew the floor bolts from beneath the toilet base. Gently rock the toilet to break the wax seal, then lift straight up. Place the toilet on a thick towel to protect the ceramic while you work.
Tip: Ask a helper to offer steady support; toilets are heavy and awkward to maneuver. - 4
Inspect flange and remove old wax ring
Examine the flange for cracks or damage and replace if needed. Remove the old wax ring and clean the flange surface with a putty knife. Ensure a clean, smooth surface for the new gasket to seal properly.
Tip: Take photos of the flange setup for reference when reinstalling. - 5
Install new gasket kit
If you use a wax ring, center it on the flange with even distribution. For rubber gaskets, align the gasket per the kit’s instructions and verify orientation. Ensure the gasket sits flush and centered before lowering the toilet.
Tip: Do not twist the gasket; misalignment can cause leaks later. - 6
Reseat toilet and bolt down
Lower the toilet onto the flange with steady, even pressure. Tighten the base bolts gradually, alternating sides to avoid tilting. Reinstall washers and nuts and snug them securely without over-tightening.
Tip: Check that the toilet remains level using a small spirit level if available. - 7
Reconnect water supply and test for leaks
Reconnect the supply line and slowly turn on the shutoff valve. Flush several times and inspect around the base and supply line for leaks. If moisture appears, reseat and adjust the bolts slightly, then re-test.
Tip: Begin with a slow water flow to minimize initial ripple leaks as seals set. - 8
Finish and clean up
Confirm the toilet sits stably and all connections are dry. If desired, apply a bead of silicone caulk around the base for a neat finish, and wipe away excess sealant. Return the area to normal use once everything is dry.
Tip: Store spare parts and keep a spare wax ring for future maintenance.
Common Questions
Do I need to remove the toilet to replace the gasket?
Yes, access to the seal requires removing the toilet from the flange. This allows you to inspect the flange and replace the gasket properly.
Yes, you usually need to lift the toilet to replace the gasket and inspect the flange.
Can I reuse the old bolts and washers?
It's best to replace corroded or damaged bolts and washers with new hardware to ensure a secure and leak-free seal.
It's best to use new bolts and washers for a solid seal.
What are common signs a gasket is failing?
Look for persistent dampness around the base, a musty odor, or visible leaks after flushing. A wobbly toilet can also indicate a compromised seal.
Dampness at the base or a wobble usually means the gasket or flange needs attention.
Is this job safe for beginners?
Yes, with careful attention to safety steps, but you should be comfortable handling basic plumbing tasks and lifting a heavy object with help if possible.
Yes, but take your time and follow steps carefully.
What if the toilet rocks after replacement?
Re-check the bolts and flange, and ensure the floor is level. Minor adjustments may be needed, and a shim can be used if recommended by a professional.
Check bolts and flange and re-level the toilet if it rocks.
How can I prevent future gasket leaks?
Use quality hardware, ensure proper seating, and inspect the flange for damage during installation. Regular checks after installation help catch problems early.
Use good bolts, seal properly, and inspect the flange to prevent future leaks.
Watch Video
Key Takeaways
- Plan the replacement workflow before starting
- Choose the right gasket type for your toilet
- Seal quality depends on flange condition and proper seating
- Tighten bolts evenly to avoid damage
- Test for leaks and tidy the workspace afterward