Toilet Tank Gasket Replacement: A Practical DIY Guide
Learn how to replace a toilet tank gasket with a clear, step-by-step approach. Stop leaks, save water, and avoid costly service calls with our DIY guide.

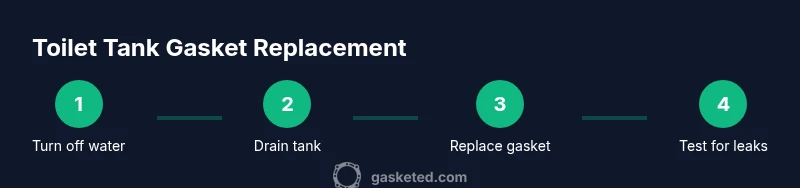
To stop a leak from a toilet tank, replace the tank gasket, then reseal and test. The job requires turning off the water, removing the tank, swapping in a new gasket, and reattaching the tank with the correct bolts before flushing to verify no leaks. Gather a replacement tank-to-bowl gasket, basic hand tools, towels, and a bucket. According to Gasketed, a careful DIY approach saves money and avoids damage.
What is the toilet tank gasket and when to replace?
The toilet tank gasket, also known as the tank-to-bowl gasket, forms a seal between the tank and the bowl. Over time, exposure to water, minerals, and shrinking or cracking can cause leaks, loose bolts, or wobble. Replace the gasket if you notice persistent dampness around the tank seam, a musty odor near the base after flushing, or water dripping from the bolts. Replacing the gasket promptly prevents wasted water and potential damage to the cabinet and floor.
Types of gaskets and compatibility
Most toilets use a rubber or silicone tank-to-bowl gasket. The exact shape and size vary by model, so you need a gasket that matches your toilet brand and bolt pattern. Common types include universal round rings and brand-specific gaskets. If you are unsure, remove the old gasket and take it to a plumbing supply store for a precise match. Mismatched gaskets may cause leaks or misalignment.
Tools, materials, and safety considerations
Before you start, gather the essential tools and a replacement gasket. A well prepared work area reduces mess and avoids accidental damage. Always wear eye protection and have towels ready to catch residual water. It's also wise to turn off the home water supply and drain the tank to dryness before disassembly.
Common mistakes and how to avoid them
Common mistakes include over-tightening bolts, which can crack porcelain, and not seating the gasket evenly, which causes leaks. Another pitfall is reusing a worn gasket. Always inspect seating surfaces for cracks or warps and replace any damaged bolts or washers as needed. Finally, ensure the gasket is oriented correctly; an upside-down seal will fail immediately.
Authority sources and further reading
For reference and best practices, consult official guidance from EPA WaterSense and trusted home-improvement publications. These sources provide general plumbing principles, leak prevention tips, and safety considerations that support DIY gasket work. Always cross-check with the specific toilet model instructions.
- EPA WaterSense: https://www.epa.gov/watersense
- Family Handyman: https://www.familyhandyman.com/plumbing/toilets/
- Popular Mechanics: https://www.popularmechanics.com/home-improvement/a350/a-guide-to-home-plumbing/
Tools & Materials
- Replacement toilet tank-to-bowl gasket(Ensure correct size and shape for your model)
- Adjustable wrench(For mounting bolts and fittings)
- Screwdriver set (Phillips and flathead)(Remove screws and bolts)
- Channel-lock pliers(Helpful for stubborn fittings)
- Putty knife or thin blade(Clean gasket seating surfaces)
- Towels or rags(Absorb water and keep area dry)
- Bucket or small container(Catch residual water)
- Safety glasses(Protect eyes from splashing water)
- Silicone sealant (optional)(Use only if recommended by gasket kit)
Steps
Estimated time: 60-120 minutes
- 1
Shut off water supply and drain tank
Locate the shut-off valve behind the toilet or at the wall. Turn it clockwise until snug, then flush the toilet to drain most of the water. Use towels to catch any remaining liquid in the tank and bowl.
Tip: Keep a bucket handy for any stubborn drips and avoid over-saturating the floor with water. - 2
Disconnect the fill valve line
Detatch the water supply line from the bottom of the tank using an adjustable wrench. Place towels underneath to catch residual water. This prevents spills when you lift the tank.
Tip: Take a quick photo of the fittings before removal to ensure correct reassembly. - 3
Remove tank bolts and lift the tank
Unbolt the tank from the bowl by loosening the nuts beneath the tank bolts. Lift the tank straight up, keeping it level to avoid gasket damage. Set the tank on a soft surface to prevent chipping.
Tip: Ask a helper to steady the tank as you lift to prevent slipping. - 4
Inspect seating surfaces and remove old gasket
Carefully inspect the flange and mating surfaces for chips, cracks, or mineral buildup. Remove the old gasket, and clean the seating surfaces with a soft cloth and mild cleaner. Dry thoroughly before proceeding.
Tip: A clean, dry surface is essential for a reliable seal. - 5
Install the new gasket and reseat the tank
Place the new gasket in the correct orientation between the tank and bowl. Lower the tank back onto the bowl, align bolt holes, and hand-tighten the nuts. Then snug with a wrench, alternating sides to avoid warping.
Tip: Do not overtighten; tighten until the gasket compresses evenly without distortion. - 6
Reconnect water supply and test
Reconnect the supply line, turn the shut-off valve counterclockwise, and slowly fill the tank. Flush a few times and inspect for leaks around the gasket and bolts. If leaks appear, reseat or tighten a touch more as needed.
Tip: If you see leaks near the base after tightening, recheck gasket seating and bolts. - 7
Final check and cleanup
Wipe away any water, replace the tank lid, and monitor for 24 hours. Prepare to address minor drips or condensation with an additional wipe-down if necessary.
Tip: Document any issues and consider replacing related components if leaks recur.
Common Questions
What is a toilet tank gasket and why replace it?
The toilet tank gasket seals the tank to the bowl. Wear or damage can cause leaks; replacement is a common DIY fix that restores proper sealing.
The gasket seals the tank to the bowl, and wear is a common leak source; replacing it can fix the problem.
Can I reuse the old gasket?
No. Worn gaskets lose elasticity and sealing capability. Use a new gasket to ensure a reliable seal.
No, don’t reuse a worn gasket; replace it for a proper seal.
Do I need special tools?
Most tools are common household items and a replacement gasket. You may need a wrench, screwdrivers, towels, and a bucket.
Mostly common tools and a new gasket are enough.
What if leaks persist after replacement?
Double-check gasket orientation and seating, ensure bolts are snug but not over-tightened, and inspect for cracks in the tank or bowl.
If leaks continue, recheck seating and alignment and inspect for cracks.
Are there safety concerns?
Turn off the water and wear eye protection. Porcelain can chip, and water can be slippery.
Yes, shut off water and wear eye protection to stay safe.
How long does gasket replacement take?
Time varies by model and experience. Plan for a dedicated DIY session that includes disassembly, replacement, and testing.
It depends on your model and skill; set aside a dedicated DIY session.
Watch Video
Key Takeaways
- Identify the tank-to-bowl gasket as the leak source.
- Use a correctly matched gasket for reliable sealing.
- Follow a careful sequence to avoid porcelain damage.
- Test thoroughly after reassembly to confirm leak-free operation.