Toyota 4Runner Head Gasket Repair: A DIY Guide
A complete, practical guide for diagnosing, removing, and replacing a head gasket on the Toyota 4Runner. Learn safety, tools, steps, and maintenance to prevent recurrence.

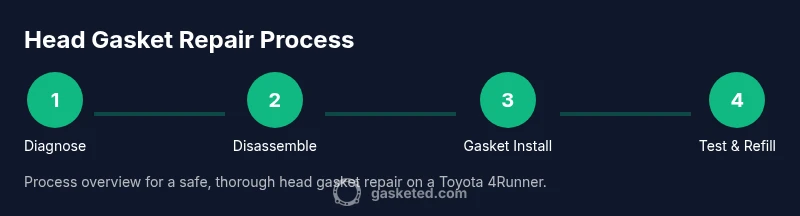
Repairing a Toyota 4Runner head gasket yourself is feasible with careful diagnosis, the right tools, and a patient, step-by-step approach. Begin by confirming gasket failure signs, drain fluids, safely remove the cylinder head, replace the gasket, reseal, and reassemble with proper torque. This guide outlines essential steps, safety considerations, and a realistic workflow.
Understanding Head Gasket Failures in the Toyota 4Runner
Head gasket failures in a Toyota 4Runner can arise from overheating, warping of the cylinder head or engine block, improper cooling system maintenance, or manufacturing variances. Common symptoms include white exhaust smoke, milky oil, bubbles in the radiator, unexplained loss of coolant, and occasional misfires. According to Gasketed, diagnosing a blown head gasket requires careful correlation of symptoms, tests, and mechanical inspection. The goal is to differentiate a head gasket issue from other cooling or combustion problems, such as a warped head, cracked block, or a faulty water pump. By understanding the typical failure modes, you reduce the risk of unnecessary disassembly and ensure your repair plan targets the correct problem.
Tools & Materials
- Torque wrench(Essential for proper bolt sequencing and torque values; consult the factory service manual for exact specs.)
- Socket set (metric)(Common sizes for 4Runner engines; include deep sockets for accessible bolt heads.)
- Breaker bar(For initial loosening of stubborn bolts without harming components.)
- Gasket scraper and cleaning solvent(Carefully clean old gasket material without scoring metal surfaces.)
- Head gasket kit(Replace the head gasket and related seals/valve cover gaskets as recommended.)
- Coolant drain pan(Have on hand to capture coolant safely without spills.)
- Sealant or gasket maker (as required)(Only use where your service manual specifies.)
- Shop towels and lint-free rags(Keep surfaces clean and free of debris during reassembly.)
- Engine oil and coolant(Replace with correct specification and new coolant as needed.)
- Manual or digital service guide(Factory torque sequences, clearances, and procedures.)
Steps
Estimated time: 8-12 hours
- 1
Disconnect battery and relieve system pressure
Disconnect the negative terminal of the 4Runner battery to prevent shorts. Relieve any pressure in the cooling system by carefully opening the radiator cap only when cooled. This prevents accidental fluid spray and protects electronics.
Tip: Always disconnect the battery first to avoid any electrical shorts during work. - 2
Drain coolant and oil
Place a drain pan under the radiator and engine, drain coolant completely, and then drain engine oil if required by the repair scope. Proper drainage prevents spills and ensures clean surfaces for gasket removal and reassembly.
Tip: Dispose of old coolant properly and replace with the correct type for your climate. - 3
Remove intake components to access the head
Loosen and detach the intake plenum, throttle body, and any hoses that block access to the cylinder head. Label connections to simplify reassembly. This step provides clear access to the head bolts and gasket surfaces.
Tip: Take photos or label hoses to minimize confusion later. - 4
Remove valve covers and related assemblies
Unbolt the valve covers, rocker arms, and related components if required to access the cylinder head. Ensure the cam(s) stay aligned as you work to avoid timing issues.
Tip: Keep hardware organized to avoid misplacement during reassembly. - 5
Loosen and remove the cylinder head bolts in sequence
Follow the factory sequence to loosen and remove head bolts gradually. This prevents warping of the head and ensures an even separation from the block. Use a breaker bar for initial loosening if needed.
Tip: Do not skip the sequence; improper removal can cause damage. - 6
Inspect head and block deck surfaces
Carefully inspect the mating surfaces for warping, corrosion, or pitting. Send the head to a machine shop if resurfacing is needed; verify deck flatness and check for cracks.
Tip: Note any signs of warping; misalignment will cause gasket failure again. - 7
Clean and prepare mating surfaces
Use approved cleaners and a plastic scraper to remove all gasket material. Re-clean the block and head surfaces to ensure a uniform seal with the new gasket.
Tip: Avoid metal scrapers that can gouge the surface. - 8
Install the new head gasket and components
Place the head gasket with proper orientation, reattach the head and other components, and re-establish the timing as per service manual if applicable.
Tip: Ensure dowels align properly to prevent misalignment. - 9
Torque and reassembly
Tighten head bolts in the correct sequence to spec using a torque wrench, then perform any necessary angle-tightening as required by the manual. Reinstall valve covers, intake components, and hoses.
Tip: Double-check all connections and gaskets before firing the engine. - 10
Refill fluids, bleed air, and test
Refill engine oil and coolant, bleed air from the cooling system if necessary, and start the engine. Check for leaks, watch temperature, and verify no coolant/oil mixing occurs.
Tip: Run the engine to operating temperature and monitor for unusual noises or leaks.
Common Questions
Is head gasket repair feasible as a DIY project for a Toyota 4Runner?
Yes, a head gasket replacement can be tackled by a skilled DIYer with a well-equipped workspace, proper manuals, and patience. It is a multi-step job that requires careful attention to torque sequencing and cleanliness. If you are unsure about timing or machine-work needs, seeking professional help is advisable.
Yes, a head gasket replacement is doable for a capable DIYer with the right tools and manuals. If timing or head work worries you, consider getting professional help.
What are the most common signs a 4Runner has a blown head gasket?
Common signs include white exhaust smoke, milky oil, coolant loss without leaks, overheating, and occasional misfires. Always validate with tests such as a compression check and cooling system inspection before disassembly.
Watch for white smoke, milky oil, overheating, and coolant loss. Do proper tests to confirm before you pull apart the engine.
Will I need to remove the engine to repair the head gasket on a 4Runner?
Most head gasket repairs on a typical 4Runner do not require full engine removal, but access depends on engine layout and drivetrain components. Some models may require significant component removal to access the head assembly.
Generally you don’t remove the whole engine, but access and components around the head may need removal.
What tools are essential for a reliable head gasket replacement?
A quality torque wrench, a complete socket set, gasket scraper, coolant/oil drainage equipment, and a service manual with torque sequences are essential. Having a clean workspace and good lighting also helps reduce errors.
You’ll need a torque wrench, sockets, scrapers, and a service manual. A clean workspace and light are key.
How long does a typical head gasket repair take for a DIYer?
For a careful DIYer with a typical work setup, plan for a full day or weekend. More complex engines or if machine work is required can extend this timeframe.
Usually a full day or weekend when done carefully; longer if extra machine work is needed.
Watch Video
Key Takeaways
- Diagnose thoroughly before disassembly.
- Follow the correct torque sequence to avoid warping.
- Replace all relevant gaskets and seals.
- Bleed the cooling system and test for leaks after reassembly.
- Document and label components to ease reassembly.