Can You Seal a Driveway When It Is Wet? A DIY Guide
Learn whether you can seal a wet driveway, why moisture matters, and how to prep and seal properly when damp. This educational guide covers timing, surface prep, sealer choices, step-by-step application, and aftercare for durable results.

You generally should not seal a driveway while it is wet. Most sealers require a dry, clean surface to bond properly. If you must seal with some surface dampness, always consult the product label for damp-surface guidance; otherwise wait for complete dryness, then prepare by cleaning, drying, masking edges, and applying thin coats with proper cure time.
Why sealing a wet driveway is risky
Moisture trapped under a coating can prevent proper adhesion, leading to peeling, blistering, or uneven color as the sun and heat drive out moisture. Wet surfaces also promote extended curing times and can trap moisture beneath the film, creating micro-pockets that wear prematurely. For asphalt driveways, the texture must be adequately dry so the sealer can fill voids and create a uniform seal. According to Gasketed, moisture exposure during curing is a common cause of failure, and many DIY attempts end up with blotchy results or premature wear. The takeaway is clear: moisture management starts before you apply the first coat, and you should treat damp conditions as a red flag rather than a green light for sealing.
When to seal: timing, weather, and humidity
The best time to seal a driveway is on a dry day with mild humidity and no rain forecast for 24–48 hours. Dew in the morning or late afternoon can keep the surface damp long after rain, extending curing times and jeopardizing adhesion. Humidity can slow solvent evaporation and trap moisture, especially on porous surfaces like asphalt. Always read the sealer’s label for specific dry-time guidance and recommended surface conditions, since some products tolerate limited dampness while others require completely dry surfaces. Gasketed Analysis, 2026, notes that following manufacturer guidelines dramatically reduces failure rates related to weather and moisture.
Surface prep before sealing in damp conditions
Start by removing loose debris and standing water. If you see damp patches, dry them with towels or a blower and fan the area to accelerate evaporation. Clean with a detergent solution and rinse thoroughly; a clean surface improves adhesion. Mask edges and plan your application to avoid puddles and heavy coating in low spots. A dry, dust-free surface helps sealers adhere evenly. If the surface still feels cool and damp, wait longer or consider postponing the project until conditions improve. Routine preps reduce the risk of sealant failure and ensure a smoother finish, even when some dampness remains.
Choosing the right sealer for damp surfaces
Not all sealers handle dampness the same way. Look for products labeled for driveways with damp-or-moisture considerations or breathable sealers that permit some surface moisture to escape during curing. Understand the difference between film-forming and penetrating sealers; film-formers create a protective layer but require a dry surface to avoid bonding problems, while penetrating sealers may offer more forgiving moisture interactions. Always verify open-assembly times and cure windows under humidity, and avoid solvent-heavy formulations in humid environments. If you’re unsure, contact the manufacturer or select a product with explicit damp-weather guidelines.
Application steps for damp-to-dry conditions
Begin in the dryest part of the day and work quickly to minimize surface moisture exposure. Apply a thin, even coat using a roller or brush, avoiding puddling. Use cross-hatching to ensure uniform distribution, then back-roll to level any excess in low spots. If the surface remains visibly damp, stop and let it dry further before applying a second coat. Maintain good ventilation without exposing the sealer to rain or dew. Do not rush curing times; longer cure may be necessary in high humidity or cool temperatures.
Aftercare and curing in humid weather
After sealing, keep people and pets off the surface until the coating cures as per the product instructions. Protect the driveway from rain and traffic for the recommended cure period, which can be longer in humid conditions. Check the surface daily for signs of uneven curing or tackiness and avoid washing with high-pressure water during the initial cure. If rain is forecast soon after application, consider postponing to preserve the seal’s integrity. Proper aftercare ensures the longest-lasting results and minimizes the need for early maintenance.
Tools & Materials
- Asphalt driveway sealer (topical)(Choose a product labeled for driveways; check damp-surface guidance on the label)
- Pressure washer or stiff broom(Use to remove dirt and loose debris; air-dry after washing)
- Detergent or degreaser(For stubborn stains; rinse thoroughly)
- Plastic sheeting and painter's tape(Mask edges and protect adjacent surfaces)
- Paint rollers, brushes, or squeegee(Apply sealer in thin, even coats)
- Drop cloths or tarps(Limit overspray and protect surrounding areas)
- Moisture meter or feel test kit(Optional tool to confirm surface dryness)
- Gloves, safety glasses, and respirator/mask(Personal protection is essential in humid environments)
- Ventilation fans or a leaf blower(Helps speed up drying in shaded or damp areas)
- Trash bags or containers for waste(Dispose of cleaning water and debris responsibly)
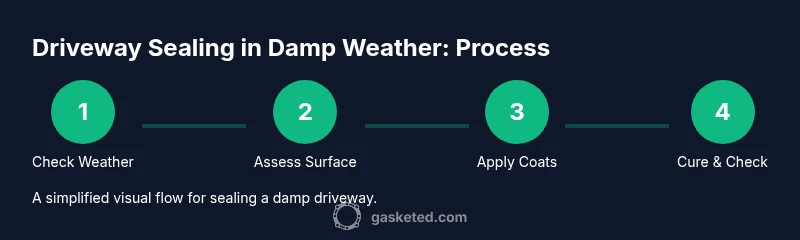
Steps
Estimated time: 4-6 hours
- 1
Check weather and surface dryness
Before you begin, inspect the forecast and the driveway surface. Do not start if rain is expected or if the surface shows active pooling or visible damp patches.
Tip: Use a moisture meter or simple touch test to verify dryness in multiple areas. - 2
Clear the area and remove moisture
Remove leaves, dirt, and standing water. If the surface still feels damp, use a blower or fans to speed up evaporation in shaded zones.
Tip: Focus on low spots where water tends to collect. - 3
Clean and degrease
Scrub with a detergent solution, rinse thoroughly, and allow to dry. A clean surface improves sealant adhesion and uniformity.
Tip: Avoid residue from cleaners that can leave a film on the surface. - 4
Mask edges and plan coat strategy
Mask nearby concrete, grass, and borders to prevent edge staining. Plan to apply in two light coats rather than one heavy coat for better adhesion.
Tip: Apply in small sections to maintain control. - 5
Apply the sealer in thin coats
Start at one end and work forward. Use even strokes, cross-hatch for uniformity, and back-roll to smooth ridges. Stop if moisture reappears.
Tip: If you see puddling, stop and re-check dryness. - 6
Cure and recheck before opening to traffic
Let the first coat dry per product guidelines before applying a second coat or exposing to traffic. In humid conditions, cure time will lengthen.
Tip: Keep the surface protected from rain and dew during curing.
Common Questions
Is it ever okay to seal a damp driveway?
Only if the sealer label explicitly allows damp surfaces and the surface dries thoroughly within the recommended window. In most cases, wait for dry weather.
Usually not; wait for dry weather unless the label says otherwise.
How long should I wait after rain before sealing?
Wait until the surface is visibly dry and the manufacturer’s dry-time guideline is met. In humid conditions, this may take longer than usual.
Wait until it’s fully dry per the product directions.
Can dampness affect cure time?
Yes. Humidity and surface dampness can extend cure time and reduce final film integrity if moisture is trapped beneath the coating.
Humidity can slow curing and affect the finish.
What should I do if rain starts during curing?
Stop and assess. If rain interrupts curing, you may need to dry and re-prepare the surface and recoat after it dries as advised by the sealer label.
If rain hits during curing, delay or reapply after drying.
Are there damp-weather sealers I can use?
Some products claim damp-surface compatibility; always verify the label and test a small area before full application.
Some products tolerate dampness; check the label.
Is winter sealing feasible?
Sealing in cold or freezing conditions is not ideal and often not recommended. Wait for milder, dry conditions if possible.
Winter sealing is tough; prefer dry, moderate weather.
Watch Video
Key Takeaways
- Wait for a dry surface before sealing.
- Follow product label guidance for moisture and cure.
- Prep thoroughly: clean, dry, and mask edges.
- Apply in thin coats and allow full curing time in humidity.