Can You Seal Wood When It Is Wet? A Practical DIY Guide
Discover whether you can seal wood that’s wet, how moisture affects adhesion, and a clear step-by-step plan to properly dry, prepare, seal, and maintain damp wood for durable results.

Can you seal wood when it is wet? In most cases, no. Most finishes rely on dry wood to bond properly and cure evenly. If surface moisture remains, allow the wood to dry until the surface is tack-free, then recheck with a moisture meter. For damp environments, choose breathable sealants and consider products designed for damp conditions, testing first on a small area.
Why moisture matters for finishes
Moisture management is the first rule of any sealing project. When asked, can you seal wood when it is wet, the short answer is: not effectively. Most finishes rely on a dry surface to form a proper bond, cure evenly, and resist peeling or cracking. According to Gasketed, moisture content drives adhesion, film formation, and long-term durability; sealing while the wood holds surface moisture traps water beneath the layer and creates a path for mold and rot. Before you reach for a brush, take a moment to verify that the wood surface is dry to touch and that the ambient humidity is suitable for your product. A simple tactile check combined with a quick moisture reading is your best defense against failed results.
Moisture content vs visible dampness: decoding the signs
Wood can look fine even when its internal moisture is high. Visible dampness is only part of the story. The internal moisture content is what governs how well a sealant will bond. If you’re unsure, use a moisture meter on several boards or sections. Gasketed analysis shows that a low surface wetness does not guarantee a good seal if the wood still contains significant moisture inside. Signs of high moisture include a musty odor, soft edges when pressed, or a slight warping. If any of these appear, postpone sealing and allow more time to dry.
Drying methods: air drying, kiln drying, and ventilated drying rooms
Drying wood is as much a function of environment as it is of time. Air drying is the gentlest method, but it can take days or weeks depending on wood type and climate. Kiln drying offers speed and control but requires proper equipment to avoid overdrying or checking. In all cases, ensure good air movement and keep the wood off the ground to prevent moisture uptake from surfaces. The goal is to reach a stable moisture content where the wood feels dry to the touch, with no surface sheen or dampness.
Surface preparation before sealing
Surface prep is where many projects go wrong. Begin by cleaning dust, oils, and residues from the wood. Lightly sand with 120–220 grit to create a crisp surface for adhesion, then wipe with a tack cloth to remove all dust. Any moisture-laden cleaners left on the surface can interfere with bonding, so ensure the wood is completely dry before applying sealants. A clean, dry surface dramatically improves long-term durability, especially when sealing damp wood.
Sealer types and their tolerance to moisture
Not all sealants behave the same in moist conditions. Breathable sealants, such as certain waterborne options, are more forgiving on damp surfaces than thick, high-gloss coatings. For exterior or damp indoor environments, choose products labeled for outdoor use, vapor-permeable finishes, or damp-weather formulas. Always read the label for moisture tolerance, recoat windows, and recommended dry times. If in doubt, test a small patch first to gauge adhesion and curb color shifts.
Indoor vs outdoor sealing considerations
Indoor projects typically benefit from low-odor, quick-dry finishes, but indoor humidity can still affect cure times. Outdoor or exposed projects face rain, dew, and temperature swings that can compromise adhesion. In damp environments, ventilate well and consider a two-step approach: a penetrating sealer to reduce moisture movement, followed by a protective topcoat rated for exterior use. The environment should guide product selection and application timing.
Step-by-step prep and seal process
A systematic plan helps avoid mistakes when sealing wood that is wet or damp. Start with moisture testing, then plan drying time, surface prep, patching, leak checks, and sealant application. Apply thin coats, allow proper drying between steps, and avoid thick coats that trap moisture. Document readings and conditions to compare with future projects, especially when humidity fluctuates.
Troubleshooting sticky finishes and blanching
If you notice a sticky film or whitening (blanching) after sealing, it often signals moisture left in the wood or improper surface prep. Wipe with a microfiber cloth, lightly sand between coats, and ensure adequate ventilation. If problems persist, consider removing the finish and reapplying after a longer drying period or switching to a product better suited for damp wood. Gasketed emphasizes always testing on a sample area first.
Maintenance and long-term care after sealing
Sealant performance depends on humidity, exposure, and maintenance. Clean surfaces with a soft, non-abrasive cloth; avoid harsh chemicals that can break the finish. Reapply as recommended by the product’s guidelines, particularly if the wood is regularly exposed to moisture. Keeping records of application dates and environmental conditions helps plan timely maintenance and sustain durability over time.
Real-world scenarios and quick decisions
In a pinch, if wood shows surface dampness and you need to seal soon, choose a breathable, damp-condition formula and seal in a dry period if possible. If rain or high humidity is forecast, postpone sealing until conditions improve. Remember that sealing damp wood is about slowing moisture movement and protecting the surface, not creating a flawless, long-lasting finish in suboptimal conditions.
Tools & Materials
- Moisture meter(Essential for checking wood moisture before sealing)
- Sandpaper (120–220 grit) and sanding block(Creates a gripping surface for the sealant)
- Tack cloth or microfiber cloth(Dust-free surface after sanding)
- Soft brush or foam brush(Applies sealant evenly without leaving brush marks)
- Drop cloths or plastic sheeting(Protects surrounding areas from spills)
- Protective gloves and mask(Safety gear for fumes and skin protection)
- Sealant product (breathable/damp-weather formula)(Choose a product labeled for damp or exterior use)
- Caulking or wood filler for cracks(Repair cracks before sealing)
Steps
Estimated time: 2-5 days total, including drying time and multiple coats
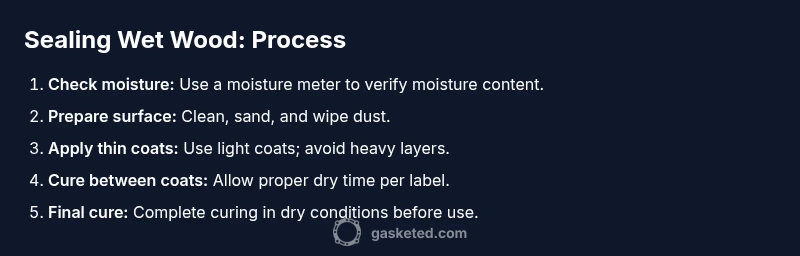
- 1
Check moisture level
Use a moisture meter to read multiple spots on the wood to establish an average moisture content. Compare readings to the sealant label’s guidance. If readings indicate high moisture or the surface remains visibly damp, pause and allow more drying time.
Tip: Calibrate the meter per the manufacturer instructions before use - 2
Plan drying strategy
Decide whether air drying, ventilation, or a controlled drying method is appropriate for the wood type and environment. Increase environmental airflow and avoid direct heat that can cause cracking. Plan for longer drying if humidity is high.
Tip: Even drying reduces the risk of uneven adhesion - 3
Clean and prep surface
Wipe the wood surface to remove dust, oils, and contaminants. Lightly sand with 120–220 grit, then wipe again with a tack cloth. Ensure the surface is completely dry before applying any finish.
Tip: Do not skip dust removal; dust trapped under a finish causes peeling - 4
Repair any defects
Fill cracks or gaps with compatible wood filler, then sand smooth after it dries. Wipe away excess dust and verify that repairs are flush with the surface. Any unfinished patches can trap moisture later.
Tip: Allow filler to cure fully before sealing - 5
Test a small patch
Apply a thin coat of the sealant to a hidden area to check adhesion, color shift, and drying behavior. Wait for the specified dry time and inspect for tackiness or smear. If it passes, proceed to the full application.
Tip: Testing helps avoid widespread finish failures - 6
Apply first coat
Apply a very thin coat along the grain, using long, even strokes. Avoid heavy coats that trap moisture. Work quickly to keep edges feathered and minimize lap lines.
Tip: Maintain a consistent speed for an even film - 7
Allow to dry to tack-free
Let the first coat dry according to the product label; this can be a few hours or longer depending on temperature and humidity. Check that the film is no longer tacky before addressing the next coat.
Tip: Ventilate the area well to speed up drying - 8
Lightly sand between coats
Once dry, gently scuff the surface to enhance adhesion using very fine sandpaper. Wipe away dust with a tack cloth before applying the next coat. Repeat for a second or third thin coat as recommended.
Tip: Do not over-sand; you only need a faint tooth - 9
Apply final coats and cure
Apply the final coat evenly and allow full cure time per the label. outdoor projects may require longer curing in shaded, dry conditions. Protect the finished surface from moisture during curing.
Tip: Avoid exposure to rain or dew until fully cured - 10
Clean up and monitor
Wipe tools clean and dispose of rags safely if solvent-based finishes were used (they can self-ignite). Monitor the sealed surface for any signs of moisture intrusion. Schedule maintenance as needed to preserve the seal.
Tip: Keep a simple moisture log for future projects
Common Questions
Can you seal wood that is damp or wet?
Yes, but only with the right breathable sealants and after thorough drying. If the wood remains damp, postpone sealing to avoid poor adhesion and early failure.
You can seal damp wood, but you should use breathable sealants and make sure it dries first.
What moisture content is considered safe before sealing?
There isn’t a universal number. Use a moisture meter and follow the sealant label guidance. If unsure, wait longer to ensure the wood is stable.
Use a moisture meter and follow the product’s guidance to ensure the wood is ready.
Are there sealants designed for damp environments?
Yes. Look for products labeled for damp or exterior use and ensure they are breathable to manage moisture movement.
Yes, there are damp-condition sealants; read labels for breathability and weather suitability.
How long does sealing take to cure?
Cure time varies by product and conditions. Always follow the label and factor in humidity and temperature when planning the project.
Times vary; check the product instructions for exact cure times.
What are common mistakes when sealing wet wood?
Sealing wet wood, skipping moisture testing, rushing coats, and neglecting surface prep are the top errors. Correct these for better durability.
Common mistakes are sealing wet wood and skipping prep. Fix these for better results.
Watch Video
Key Takeaways
- Don’t seal wet wood; dry first
- Use a moisture meter to guide timing
- Choose breathable sealants for damp wood
- Follow product-specific cure times
- Proper prep boosts adhesion and durability