Can You Seal Wet Concrete? A DIY Guide for Homeowners
Discover whether you can seal concrete while it's wet and how to seal correctly. Learn moisture testing, sealer selection for damp surfaces, and step-by-step preparation to protect concrete from weather and wear.

Sealing concrete while it's still wet is not recommended in most cases. The moisture inside fresh concrete continues to move toward the surface as it cures, and applying a sealer too early can trap moisture, leading to hazing, blotching, or bond failure. According to Gasketed, moisture management is critical when sealing concrete. In practice, you should wait until the surface moisture drops to the level specified by the sealer manufacturer and then apply a penetrating or surface sealer. If you need a damp-surface option, choose a sealer designed for slightly damp conditions.
Can you seal wet concrete? Why moisture matters
Sealing concrete while it’s still wet is a common DIY question, and the short answer is no in most cases. The moisture inside fresh concrete continues to move toward the surface as it cures, and applying a sealer too early can trap moisture, leading to hazing, blotching, or even bond failure. According to Gasketed, moisture management is critical when sealing concrete. In practice, you want to wait until the surface moisture has dropped to a level that the sealer manufacturer specifies. This means testing the slab and choosing a sealer designed for damp or newly cured surfaces when recommended. For homeowners, patience here pays off: a properly cured slab accepts the finish evenly and lasts longer. In this article, you’ll learn how to assess moisture, pick the right product, and apply sealing products safely, so your project stands up to rain, spills, and temperature changes over time.
Concrete curing and moisture behavior
Concrete cures through a chemical reaction that releases moisture. As the mix hardens, water migrates to the surface, and ambient humidity can slow or accelerate drying. On a fresh slab, the surface may feel dry to the touch while interior moisture remains high. Sealing at this stage can trap water and create problems like efflorescence (white salt deposits) and accelerated surface wear. Understanding this process helps you choose the right time and product. The key takeaway is that curing is not a single event but a moisture journey that can last days to weeks, depending on mix, thickness, temperature, and airflow. By recognizing when the surface is near-dry, you set up sealing success and protect the concrete from weather and chemical exposure.
Moisture testing before sealing
Before you seal, test the slab to verify it’s ready. Use a moisture meter (or RH gauge) to measure internal moisture or humidity according to the product label. A plastic-sheet (tarp) test can indicate surface dryness: tape a clear plastic sheet to the concrete for 24–48 hours and look for condensation or darkening under the plastic. Gasketed Analysis, 2026 notes that moisture levels at the surface and within the interior strongly influence sealer performance, so follow the manufacturer’s cited thresholds closely. Record readings for future reference and compare against the sealer’s guidance. If readings stay above the recommended limit, delay sealing and consider alternative moisture-management steps.
Sealer options for damp or wet surfaces
Not all sealers behave the same on damp concrete. Penetrating sealers that cure within the concrete can offer the best results when moisture is present, as they minimize surface film trapping. Water-based acrylics can be suitable in some damp situations but often require a fully dry surface. Epoxies and most solvent-borne coatings are not recommended on wet slabs because they struggle to cure properly and may peel or haze. When dampness is observed, check the product label for “damp or cured concrete” compatibility. The goal is to seal without locking in moisture, keeping the surface breathable where possible while providing surface protection and stain resistance.
Surface preparation and timing: before application
Effective sealing starts with a clean, properly prepared surface. Remove dust, oil, and curing compounds using a stiff brush and a mild cleaner. Rinse and allow the surface to air-dry to a near-surface dryness level before testing again. If you must work during damp conditions, use a dehumidifier or fans to speed up surface drying and reduce ambient humidity. Make sure there’s good ventilation to manage fumes from solvent-based sealers. Planning the job for a dry day can dramatically improve adhesion and finish quality, reducing the risk of ghosting or color inconsistency. Gasketed’s approach emphasizes moisture-aware timing and thorough cleaning for best results.
Step-by-step approach if damp slab must be sealed
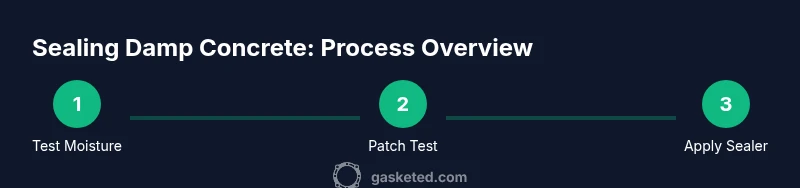
Step 1 — Check moisture level with a meter. Step 2 — Review the sealer’s moisture requirements. Step 3 — Clean and lightly abrade the surface, then dry to a workable surface-dry state. Step 4 — Apply a damp-surface compatible sealer to a test patch first. Step 5 — Follow the product directions for application, curing time, and ventilation. Step 6 — Re-test moisture after sealing and allow full cure before heavy use. This cautious sequence reduces risk and helps you verify compatibility before committing the entire area. Pro tip: always work in sections to monitor drying progress.
Common mistakes to avoid
Common mistakes include sealing too early, not testing moisture adequately, and skipping a patch test. Another pitfall is selecting a sealer that requires a fully dry surface when the slab remains damp; this mismatch leads to hazing and uneven color. Avoid sealing in cold, high-humidity conditions or right before rain. Always follow the manufacturer’s directions and wear proper PPE when handling sealers to protect your eyes and lungs from fumes. The right approach reduces rework and preserves the concrete’s appearance over time.
Maintenance after sealing and monitoring moisture
After sealing, keep the surface clean and free from abrasive debris. Re-test moisture periodically, especially during seasonal changes or heavy rainfall. If moisture returns or the seal shows wear, you may need to re-apply a compatible product according to label directions. Regular maintenance and re-testing help extend the sealer’s life and protect the concrete from staining and moisture intrusion. The goal is a durable, attractive finish that tolerates weather and household use without frequent resealing.
When to call a pro and cost considerations
If your slab covers a large area or involves complex edges and joints, hiring a pro can ensure uniform coverage and proper cure times. A pro can perform professional moisture testing, surface preparation, and application with the right equipment. While DIY sealing can save money, incorrect moisture management often leads to costly rework. The Gasketed team recommends weighing the project scope, local weather, and product compatibility before deciding to seal damp concrete yourself, especially for exterior slabs exposed to rain and freeze-thaw cycles.
Tools & Materials
- Moisture meter or RH meter(Essential to determine when the concrete has dried enough to seal)
- Concrete cleaner or degreaser(Used to remove oils and curing compounds before sealing)
- Broom and stiff brush(For thorough surface cleaning)
- Plastic sheeting or painter's tape(To test moisture and protect areas during curing)
- Protective PPE (gloves, goggles, respirator)(Safety first when dealing with sealers)
- Concrete sealer suitable for damp surfaces(Follow manufacturer guidance for damp or cured conditions)
- Ventilation equipment (fans, dehumidifier)(Helps drying and odor control)
- Paint roller, brush, or sprayer(For applying sealers evenly)
- Water and neutral cleaner(Rinsing and cleanup)
- Notebook & pen(Record moisture readings and curing times)
Steps
Estimated time: 2-5 days
- 1
Check moisture with a meter
Use a concrete moisture meter or RH meter to determine current moisture levels inside the slab. Take readings from multiple spots to get an accurate picture. If readings are above the seal manufacturer’s target, delay sealing until they drop. This step prevents premature sealing and future failures.
Tip: Document the readings for product references and future projects. - 2
Review sealer requirements
Read the sealer label for moisture limits and cure times. Some damp-friendly sealers tolerate slightly higher moisture; others require a fully dry surface. If in doubt, contact the manufacturer or test a small patch first.
Tip: Always use the product’s official guidelines as your baseline. - 3
Prepare the surface
Clean the slab thoroughly with a stiff brush and a mild cleaner; rinse and allow it to dry to a surface-dry state. Remove all standing water and obvious residues that could hinder adhesion. A clean, dry surface improves sealer bonding and finish.
Tip: Avoid leaving any residue that could cause hazing. - 4
Test a patch
Apply the sealer to a small, inconspicuous area to confirm compatibility with damp conditions. Observe for tackiness or unusual color changes after the recommended cure time. If the patch looks good, you can proceed with caution.
Tip: Patch tests save time and prevent widespread issues. - 5
Apply the sealer
Apply the sealer per label directions, using even strokes with a roller or sprayer. Maintain proper ventilation and avoid sealing during rain or extreme humidity. If applying multiple coats, wait the specified cure interval between coats.
Tip: Keep weather in mind to prevent wash-off or dilution. - 6
Cure and re-test
Allow the seal to cure as directed, keeping the area dry and well-ventilated. After curing, re-test moisture to ensure no trapped moisture remains and the finish adheres properly. If readings are acceptable, you’re ready for normal use.
Tip: A final moisture check confirms long-term durability.
Common Questions
Can you seal concrete while it is wet?
Generally not. Sealing during active moisture can trap water, causing hazing, peeling, or weak bonds. Use damp-compatible methods only if the sealer label allows it and after thorough testing.
Usually not. If you must seal damp concrete, use products designed for damp surfaces and test a patch first.
How long should you wait before sealing after pouring concrete?
Wait for the surface to reach a recommended dryness level as stated by the sealer manufacturer. This may involve several days to weeks, depending on conditions and slab thickness.
Check the sealer’s instructions for the exact surface-dry timing.
What tests verify dryness before sealing?
Use a moisture meter or RH gauge to measure internal moisture. A plastic sheet test can indicate surface moisture. Follow the product’s guidance for acceptable moisture levels.
Test with a moisture meter and patch test the sealer on a small area.
Are damp surfaces ever suitable for sealing?
Some sealers claim damp-durable performance; always confirm with the product label and test patch area before full application.
Only if the sealer explicitly allows damp surfaces.
Can sealing on wet concrete cause cracks?
Improper sealing can lead to adhesion problems, hazing, or micro-cracking if moisture is trapped or the surface is not adequately prepared.
Yes, improper timing or application can lead to finish failures.
Indoor or outdoor sealing—does it matter during damp conditions?
Both scenarios require moisture management and product-specific guidance. Outdoor slabs face weather winds; indoors need ventilation and humidity control.
The environment affects curing and sealer performance, so follow product guidance for each setting.
Watch Video
Key Takeaways
- Test moisture before sealing
- Don’t seal wet concrete
- Choose damp-surface sealers when allowed
- Follow product directions precisely
- Re-test moisture after sealing before use