How to Clean Big Green Egg Gasket
Learn how to safely clean the gasket on your Big Green Egg. This step-by-step guide covers tools, methods, and maintenance tips to keep your kamado seal tight and cooking consistent.

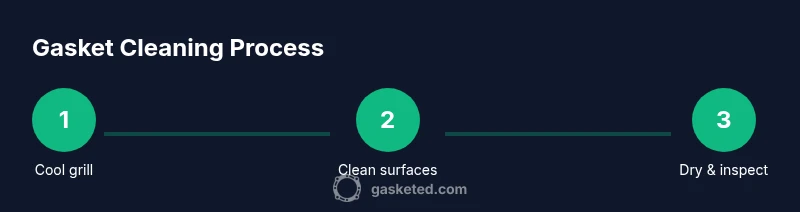
To clean the Big Green Egg gasket, let the grill cool completely, remove loose ash and debris, and wipe the gasket with a damp cloth and mild dish soap. Avoid soaking or scrubbing the gasket aggressively, which can cause tears. After cleaning, dry thoroughly and inspect for cracks or wear; replace the gasket if you see damage or persistent leaks.
Why Cleaning the Big Green Egg Gasket Matters
The gasket around a Big Green Egg is the heart of its seal. A clean gasket helps maintain even airflow, traps heat, and keeps cooking steady. Over time, grease, ash, and baked-on sauces can creep into the gasket grooves, forcing the ceramic dome to leak heat and waste fuel. Regular cleaning reduces this risk and extends gasket life. According to Gasketed, gasket maintenance is not a luxury but a practical habit for any kamado owner. When you know how to clean big green egg gasket safely, you prevent small issues from becoming costly repairs. This guide outlines what to clean, which methods to avoid, and how to tell when it’s time to replace the gasket. Expect a careful, non-abrasive approach that preserves the gasket material while keeping your grill ready for the next cook.
Safety and Prep Before Cleaning
Before you touch the gasket, ensure the Big Green Egg is completely cool. Cleaning a hot grill risks burns and warping. Gather your supplies: microfiber cloths, a soft-bristle brush, mild dish soap, warm water, and a small container for dipping. Open vents to balance airflow during cleaning and plan your path so you can see all the gasket without shadows. Wear gloves to protect your hands from grease. This prep phase reduces risk and gives you better visibility to inspect the gasket for wear. The goal is a safe, thorough start to the project on how to clean big green egg gasket.
Cleaning Methods for the Big Green Egg Gasket
Use a gentle soap solution and a soft cloth to clean the gasket surface. Dampen the cloth with warm water and a drop of mild dish soap, then wipe along the gasket groove and exposed surface. For stubborn buildup, employ a soft brush (toothbrush or nylon) in the grooves—avoid metal tools that could cut or damage the gasket. Rinse the cloth and wipe away soap residue. Do not saturate the gasket; let water skim over the surface and prevent pooling around the seal.
Inspecting for Wear and When to Replace
After cleaning, examine the gasket for cracks, tears, or compressed areas that reduce seal quality. If cracks run across the gasket or the lid does not seal well even with vents adjusted, replacement is recommended. Compare the gasket thickness and check for uneven overlap between the lid and body. A worn gasket can waste fuel and cause temperature instability, so address wear promptly when learning how to clean big green egg gasket.
Cleaning Exterior Surfaces and Vent Areas around the Gasket
Grease and smoke residue often collect near the hinge and vent caps; wipe these areas with a separate microfiber cloth to avoid transferring grease into the gasket groove. Clean vent sliders and exterior ceramic surfaces with a mild cleaner, then dry thoroughly. Keep the gasket dry during this step to prevent swelling or warping. This keeps the seal accurate without introducing excess moisture.
Maintenance Routine: How Often to Clean
Set a simple cadence: inspect after a few cooks and deep-clean the gasket when you notice buildup or signs of wear. If you frequently cook fatty foods, check more often. A quick wipe-down after each cook helps keep buildup manageable and reduces the risk of gasket damage. Regular checks also serve as an ongoing reminder of how to clean big green egg gasket effectively.
Common Mistakes and How to Avoid Them
Mistakes include soaking the gasket, using abrasive brushes, or applying harsh chemicals that can degrade gasket material. Avoid leaving soap residue, which can trap grease. Don’t yank or flex the gasket; cleaning should be gentle and methodical. If you notice swelling, cracking, or ongoing leaks, address them promptly and consider gasket replacement if needed.
Tools & Materials
- Microfiber cloths(Lint-free, for wiping surfaces and gasket grooves)
- Soft-bristle brush (nylon)(Non-scratch brush for grooves)
- Mild dish soap(Use a gentle cleaner, avoid harsh chemicals)
- Warm water(For diluting soap and rinsing)
- Gloves(Protect hands from grease)
- Toothbrush or small scrub brush(Detail cleaning in tight corners)
- Dry rag or second microfiber towel(Thorough drying after cleaning)
- Bucket or bowl(For soapy water if desired)
Steps
Estimated time: 30-45 minutes
- 1
Cool the grill completely
Ensure the Big Green Egg is at room temperature before touching any parts. This prevents burns and avoids thermal shock to gasket and ceramic. Take a moment to assess the area and gather your gear.
Tip: Never start cleaning while the grill is warm or hot. - 2
Remove loose debris from gasket area
Use a dry microfiber cloth to brush away loose ash and grease near the gasket without forcing debris into grooves. Clear visibility helps you inspect wear accurately.
Tip: Keep debris contained in a cloth to prevent it from falling into the grill. - 3
Prepare a mild cleaning solution
Mix a small amount of mild dish soap with warm water in a container. Apply sparingly; you don’t want a soaking bath for the gasket.
Tip: Label your solution and use a dedicated cloth to avoid cross-contamination with other cleaning tasks. - 4
Wipe the gasket surface
Dampen a microfiber cloth with the soap solution and wipe along the gasket surface and groove. Follow the contour of the gasket rather than scrubbing across it to minimize wear.
Tip: Rinse the cloth often to avoid reapplying grease. - 5
Clean grooves with a soft brush
For baked-on grime in the groove, use a nylon brush or toothbrush with light pressure. Avoid metal tools that can nick or tear the gasket.
Tip: Work in small sections to ensure all grooves are addressed. - 6
Rinse and dry
Wipe away any soap residue with a clean, damp cloth, then dry the gasket thoroughly with a dry rag. Do not leave moisture behind as it can lead to swelling.
Tip: Pat the surface dry rather than rubbing aggressively. - 7
Inspect the gasket for wear
Check for cracks, tears, or noticeable compression. If you see damage, note its location and consider gasket replacement to maintain a proper seal.
Tip: Take a photo for your records to track wear over time. - 8
Decide on replacement if needed
If signs of wear persist after cleaning, plan for gasket replacement to avoid leaks during cooking. Replacement may be straightforward with the right part.
Tip: Use OEM or recommended aftermarket gaskets designed for Big Green Egg. - 9
Reassemble and test seal
Close the grill and recheck the seal by checking airflow and heat retention. If the seal feels weak, repeat inspection or replace the gasket.
Tip: A good test is a gentle smoke test to verify tightness without forcing fuel.
Common Questions
How often should I clean the Big Green Egg gasket?
There’s no fixed schedule; inspect after cooking and clean when you notice buildup or leaks. Use a quick wipe between cooks and deeper cleaning as needed.
Check the gasket after each cook and clean when you see buildup or leaks.
Can I use vinegar or strong cleaners on the gasket?
Avoid harsh chemicals like bleach or strong cleaners. Stick to mild soap and warm water to prevent gasket damage.
Stick to mild soap and water; avoid harsh cleaners.
What signs indicate the gasket needs replacement?
Cracks, tears, or a visibly compressed seal that leaks despite proper vent adjustments mean replacement is likely needed.
Cracks or leaks mean replace the gasket.
Is it safe to wipe the gasket while the grill is hot?
No. Wait until the grill is fully cooled to avoid burns and damage to the gasket.
Never clean when hot; wait for cool.
Should I replace the gasket after every big cook?
Not necessary. Replace only when there are clear signs of wear or repeated leaks.
Only replace when you really need to.
What tools are best for cleaning gasket grooves?
A soft nylon brush or toothbrush works well; avoid metal scrapers that can cut the gasket.
Use a soft brush; avoid metal scrapers.
Watch Video
Key Takeaways
- Inspect the gasket before every cook.
- Use mild soap and water; avoid harsh cleaners.
- Never soak the gasket; keep it dry during cleaning.
- Replace worn gaskets promptly to maintain seal.