How to Clean Gasket of Washing Machine
Learn a safe, step-by-step method to clean your washing machine gasket, remove mold and odors, and prevent leaks. This comprehensive DIY guide covers tools, techniques, and maintenance tips for front-load and top-load washers.

Cleaning the gasket of a washing machine removes mold, mildew, and soap scum that cause odors and leaks. This guide shows a safe, step‑by‑step method using mild cleaners, a soft brush, and a microfiber cloth to inspect and scrub the gasket, then dry thoroughly to prevent regrowth. You’ll learn best practices for different washer types and how to avoid damaging rubber seals.
Why cleaning the gasket matters
If you’re tackling the question of how to clean gasket of washing machine, you’re addressing a common source of odors, leaks, and reduced cleaning performance. The gasket, a flexible rubber or silicone seal around the door, traps moisture and debris in its folds. Mold, mildew, and mineral buildup can develop quickly in damp, dark crevices, especially in high‑efficiency washers that use less water. Regular cleaning helps maintain a tight seal, minimizes odor, and extends the life of the gasket itself. This practice is part of a broader washer‑care routine that protects your appliance and keeps your laundry space cleaner and healthier.
Understanding your washing machine gasket
Gaskets come in different shapes and placements depending on washer type. Front‑loading models typically have a large flexible ring around the door with accordion folds that trap residue. Top‑loaders may use a similar seal in the lid area. The gasket can be made of rubber or silicone and may include a window for viewing the drum. Understanding the material and design helps you choose the right cleaners and avoid aggressive scrubbing that could loosen seams or degrade rubber over time.
Safety first: before you start
Always unplug the washing machine and turn off the water supply before touching the gasket area. Wear gloves to protect your skin from cleaners and potential bacteria. Avoid inhaling spray mist in enclosed spaces and keep cleaners away from any electronic components. If you have sensitivities, opt for fragrance‑free products and work in a well‑ventilated area.
Tools and cleaners you’ll need
- Mild dish soap or a non‑alkaline cleaner
- White vinegar for deodorizing and partial disinfection
- Baking soda for gentle abrasion and deodorizing
- Soft‑bristle brush and an old toothbrush for tight folds
- Microfiber cloths for drying and wiping
- Spray bottle filled with water or cleaner mix
- Clean towels or rags for absorption
- Optional: a small flashlight to inspect tight gaps
Having these items on hand makes the process smoother and reduces the risk of damage to the gasket.
Preparing the gasket for cleaning
Begin with a visual inspection to identify mold pockets, loose debris, or any signs of wear. Gently pull back the gasket folds to expose the base and inner edges. If you see heavy mold, address it in layers rather than forcing a deep, aggressive scrub that could damage the material. Remember that the goal is thorough cleaning without compromising the gasket’s elasticity.
Cleaning routine for front-loading washers
Front‑loading washers present the most common gasket challenges due to large folds and moisture retention. Create a mild cleaning solution by mixing a small amount of dish soap with warm water in your spray bottle. Spray the folds, then scrub with the soft brush, paying attention to the areas where soap scum collects. Wipe away residue with a microfiber cloth, rinse with clean water, and dry thoroughly.
Cleaning routine for top-loading washers
Top‑loading models often have easier access but can still harbor debris in the gasket. Use the same gentle cleaner and brush, but focus on the inner ring where the drum meets the lid. Be mindful of any gaskets with integrated hoses or sensors. After cleaning, wipe the area dry and leave the lid open for air circulation to prevent future mold growth.
Addressing stubborn mold and musty odors
If mold persists, a gentle approach works best. Apply a vinegar solution to the folds and let it sit briefly, then scrub again. For persistent odors, sprinkle baking soda on a damp cloth and scrub the folds, then rinse. Do not rely on bleach as the primary cleaner; chlorine bleach can degrade rubber seals and irritate skin. Ventilate the space and repeat as necessary, staying within a safe cleaning routine.
Rinsing, drying, and reassembly
Rinse all cleaned areas with clean water to remove cleaner residues. Wipe dry with a microfiber cloth, then air‑dry with the door ajar for several hours or overnight if possible. A fully dry gasket reduces the chance of regrowth. If your washer has a moisture sensor or indicator, check that it’s functioning after cleaning.
Maintenance to prevent future buildup
Incorporate gasket cleaning into your regular washer maintenance routine—every few months for most households. Run an empty, hot wash with a cup of vinegar or a dedicated washer cleaner to keep the drum and gasket fresh. Wipe the gasket after each load to remove standing water and soap residue. Regular inspections help catch wear early and extend your gasket’s life.
Tools & Materials
- Mild dish soap or non-alkaline cleaner(Use a gentle cleaner to avoid rubber damage)
- White vinegar(For deodorizing and partial disinfection)
- Baking soda(Gentle abrasive and deodorizer)
- Soft-bristle brush(Reaches into folds without scratching)
- Old toothbrush(Target tight corners and seams)
- Microfiber cloths(For wiping and drying without lint)
- Spray bottle(Mix cleaner and water for easy application)
- Gloves(Protect hands from cleaners)
- Towels or absorbent rag(Mop up excess moisture during cleaning)
Steps
Estimated time: 30-60 minutes
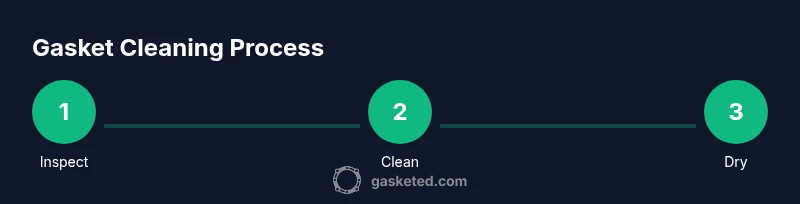
- 1
Power off and unplug
Unplug the washer and turn off the water supply before touching the gasket. This reduces the risk of electric shock and water exposure while you clean.
Tip: If you must move the machine, disconnect hoses first and keep the area dry. - 2
Inspect the gasket visually
Gently pull back the folds to inspect for mold, soap scum, and debris. Note any signs of wear or damage that might require professional attention.
Tip: Use a flashlight to look into tight crevices; avoid forcing folds. - 3
Apply a gentle cleaner
Spray a mild solution along the gasket folds. Let it sit briefly to loosen grime before scrubbing.
Tip: Avoid harsh solvents that could degrade rubber seals. - 4
Scrub folds and edges
Use the soft brush to scrub the folds and the edge where the drum meets the gasket. Wipe away loosened debris with a microfiber cloth.
Tip: Work in small sections to ensure complete coverage. - 5
Tackle stubborn mold with vinegar
If mold persists, apply a vinegar solution to the folds and allow it to act before brushing again.
Tip: Do not mix vinegar with bleach. - 6
Deodorize with baking soda
Dampen a cloth with water, sprinkle baking soda on it, and scrub the folds to neutralize odors.
Tip: Rinse thoroughly after baking soda treatment. - 7
Rinse and wipe clean
Rinse all cleaned areas with fresh water and wipe down with a dry microfiber cloth.
Tip: Ensure no cleaner residue remains in crevices. - 8
Dry completely
Leave the door open to air dry the gasket completely. Moisture left in folds can invite regrowth.
Tip: A quick dry with towels can speed up the process. - 9
Run a maintenance cycle
After cleaning, run a short hot wash or a maintenance cycle with vinegar or a washer cleaner to refresh the drum and gasket.
Tip: Use the hottest safe setting for your model.
Common Questions
Can I use bleach to clean the gasket?
Bleach can degrade rubber seals over time; avoid using it as a routine cleaner. If you must, use it sparingly and only on surfaces that are safe, and rinse thoroughly.
Bleach can damage rubber seals, so avoid it as a regular cleaner; stick to milder options and rinse well.
How often should I clean the gasket?
Clean the gasket whenever you notice musty odors, visible mold, or soap scum buildup. For many households, a thorough gasket check every few months works well.
Check the gasket every few months and clean when you detect odors or buildup.
What signs indicate a failing gasket?
Frequent leaks, persistent odors, or visible cracks and tears in the gasket indicate a gasket that may need replacement.
Leaks or cracks in the gasket suggest it may need replacement.
Is vinegar safe to use on rubber gaskets?
Yes, diluted white vinegar is a gentle deodorizer and disinfectant for rubber gaskets; avoid using it full strength or on sensitive parts with adhesives.
Vinegar is generally safe for gaskets when diluted; use sparingly and rinse well.
Do I need to remove the gasket to clean thoroughly?
Most cleaning can be done with the gasket in place. Some models allow partial removal for deep cleaning; consult your user manual before attempting removal.
Usually you don’t have to remove the gasket; check your manual if you want to take it off.
Will cleaning the gasket affect my warranty?
Routine gasket cleaning performed with standard, non‑abrasive cleaners should not affect warranty. Avoid using aggressive solvents or disassembly that could void coverage.
Cleaning with gentle cleaners generally won’t void the warranty, but don’t take apart parts beyond basic cleaning.
Watch Video
Key Takeaways
- Inspect the gasket regularly for mold and debris
- Use mild cleaners and soft brushes to avoid damage
- Dry the gasket completely after cleaning
- Incorporate gasket maintenance into monthly to quarterly wash routines
- Run a maintenance cycle to refresh the drum and seal