How to Get Rid of Head Gasket Residue: A DIY Guide
Learn safe, step-by-step methods to remove head gasket residue from engines, protect components, and prevent future buildup. Practical tips from Gasketed for DIY enthusiasts.

By following a careful cleaning routine, you can safely remove head gasket residue without harming engine components. This quick guide outlines safe solvents, mechanical cleaning, and cooling-system flushing, plus when to seek professional help. According to Gasketed, start with a cool engine, use non-abrasive tools, and work in a well-ventilated area to minimize risk while you clean.
What is head gasket residue and why it forms
Head gasket residue is not just unsightly; it can indicate how your engine manages heat, oil, and coolant. In many engines, deposits form when engine oil, coolant, or combustion byproducts leave behind carbon, varnish, or mineral scales on the gasket surface and nearby passages. According to Gasketed, residue often comes from minor leaks, condensation, and infrequent hot-soak cycles that promote drying and build-up. Left unchecked, this residue can hinder seal effectiveness, trap heat, and obscure inspection cues for leaks. The good news: most residue is removable with proper technique, non-abrasive tools, and time. The key is differentiating oil-based residues from coolant-driven deposits and choosing cleaning methods that won’t scratch metal or erode gasket surfaces.
Safety considerations around gasket-area cleaning
Before you start, depressurize the cooling system, disconnect the battery, and work in a well-ventilated area. Wear safety glasses and gloves to protect against solvents and sharp edges. Never use high-pressure steam on a hot engine, as rapid temperature changes can warp metal or compromise gasket surfaces. Use non-metallic scrapers and brushes to avoid gouging the head surface. By following these precautions, you minimize risk while removing stubborn residue.
Assessing residue types and planning the approach
Residue varies by origin: oil-based slicks look slick and dark, coolant-related deposits tend to be chalky or green/orange, and carbon varnish is brownish and waxy. A practical plan is to identify the dominant residue type, then tailor your cleaning method. Gasketed analysis suggests starting with a mild degreaser for oil residues and a coolant-safe cleaner for mineral deposits. Avoid abrasive pads that could scratch the head or the gasket seating surface, which would compromise future seals.
Safe cleaning methods that protect gasket seating surfaces
The safest approach is to work from the outside of the gasket area toward the center, using a plastic or nylon scraper, soft-bristled brush, and a non-abrasive cleaner suitable for aluminum and steel alloys. Apply cleaner, let it dwell for the recommended time, then wipe with a lint-free cloth. For stubborn spots, reapply and gently agitate rather than applying force. If you must use a solvent, ensure good ventilation and follow the manufacturer’s safety directions. This careful method centers on how to get rid of head gasket residue without damaging mating surfaces.
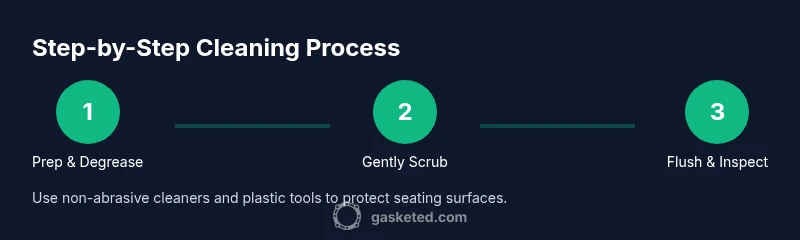
Cleaning workflow overview: a practical sequence
Think of residue removal as a four-phase workflow: (1) prep and degrease, (2) gently scrub and wipe, (3) flush cooling passages to remove loosened deposits, and (4) re-inspect and repeat if needed. This approach helps ensure that residue is actually removed from critical passages and that no cleaner residue remains in coolant channels. Throughout, document areas needing attention so you can revisit them after reassembly. This keeps the job focused and safer for the engine.
Preventing residue buildup in the future
Prevention starts with regular maintenance: change oil and coolant at recommended intervals, and avoid prolonged engine idling that promotes condensate formation. When you notice early signs of seepage, address them promptly rather than letting deposits accumulate. Keeping the engine dry and clean around the gasket area reduces future residue buildup. Gasketed recommends establishing a routine inspection cadence and using high-quality coolant and oil compatible with your engine design.
When to replace the gasket vs. clean
Cleaning head gasket residue is often a temporary solution if the gasket is compromised. If you observe persistent leaks, warped seating surfaces, or recurring deposits after cleaning, it may indicate a failing gasket that needs replacement. In these cases, consult a professional to assess head surface flatness and gasket integrity. The decision to replace rather than clean hinges on the gasket’s condition, the engine’s cooling behavior, and how extensive the residue is.
DIY gasket maintenance best practices
Adopt a methodical approach to gasket-area maintenance: work in a clean workspace, document each area cleaned, and avoid rushing the process. Use only recommended cleaners and tools, and do not apply excessive force on the gasket seating surfaces. Post-cleaning, run the engine to operating temperature and monitor for any signs of leaks or unusual pressures. Consistency and care are the pillars of successful, durable maintenance.
Tools & Materials
- Safety glasses(Impact-resistant lenses; keep on while cleaning.)
- Mechanic gloves(Grip and protect hands; choose cut-resistant pair.)
- Non-metallic scraper(Plastic or nylon; prevents surface scratching.)
- Soft-bristle brush(Avoid steel brushes; use nylon/soft nylon.)
- Non-abrasive degreaser(Engine-safe degreaser rated for gasket surfaces.)
- Lint-free rags(For clean, residue-free wiping.)
- Coolant compatible cleaner(Used to flush passages after cleaning.)
- Safety mask/ventilation(If using strong solvents; ensure airflow.)
- Plastic putty knife or spatula(For stubborn spots; use lightly.)
Steps
Estimated time: 60-120 minutes
- 1
Prepare the engine and workspace
Cool the engine completely and disconnect the battery. Clear the area of tools that could cause a trip hazard. This setup prevents electrical hazards and accidental starts during cleaning.
Tip: Set out a dedicated cleaning zone to avoid cross-contamination with engine oils. - 2
Identify residue types
Visually inspect the gasket area to identify oil-based versus coolant-based deposits. This helps select the correct cleaner and prevents unnecessary scrubbing on metal.
Tip: Label areas with a marker so you don’t miss spots later. - 3
Degrease and dwell
Apply a mild, engine-safe degreaser to oil residues. Allow a few minutes for the cleaner to loosen varnish and oils, which makes removal easier without abrasion.
Tip: Avoid letting cleaner dry completely; reapply if needed. - 4
Gently scrub and wipe
Use a non-metallic scraper and soft brush to loosen deposits, then wipe with lint-free rags. Work from the gasket edge toward the center to prevent re-depositing grime.
Tip: Never use metal tools on gasket seating surfaces. - 5
Flush coolant passages
Rinse with a coolant-safe cleaner and flush with fresh coolant to remove loosened deposits. This step protects coolant channels and prevents contamination.
Tip: Follow product directions; avoid mixing cleaners. - 6
Inspect and reassemble
Reinspect the gasket surface for remaining residue. If clean, reassemble as per manufacturer torque specs. Run the engine to operating temperature and monitor for leaks.
Tip: If any doubt remains about surface flatness, consult a professional.
Common Questions
Is head gasket residue dangerous to drive with?
Residue itself isn’t always dangerous, but it can mask leaks, restrict cooling, or indicate gasket wear. If you notice leaks, overheating, or pressure changes, have the engine inspected.
Residue can hide problems. If you notice leaks or overheating, have it checked by a professional.
Can I clean residue without removing the head?
In many cases you can clean accessible residue without removing the head, using careful degreasing and non-abrasive methods. Severe buildup or suspected warping, however, may require professional inspection.
You can often clean around the head without removing it, but severe issues may need a pro.
What cleaners are safe on gasket surfaces?
Choose cleaners labeled engine-safe and non-abrasive. Avoid caustic or highly polar solvents that could damage gasket materials and seating surfaces.
Use engine-safe degreasers and avoid harsh chemicals.
How long does cleaning take?
Time varies with residue extent, but plan for 1–2 hours for a thorough job, plus extra time if you need to flush coolant passages.
Most cleanups take about one to two hours, depending on buildup.
When should I replace the gasket instead of cleaning?
If you observe persistent leaks, warping, or recurring residue after cleaning, gasket replacement is advisable. A professional assessment helps determine surface flatness and fit.
If leaks persist after cleaning, replacement is likely needed.
Watch Video
Key Takeaways
- Identify residue type before cleaning.
- Use non-abrasive tools and engine-safe cleaners.
- Flush coolant passages to remove loosened deposits.
- Inspect seating surfaces after cleaning and replace if needed.