How to Clean Gasket Off Engine Block: A DIY Guide
A practical DIY guide to safely remove a gasket from an engine block, thoroughly clean the mating surface, and prep for a reliable reseal without damaging components.

By following this guide, you will learn how to clean gasket off an engine block safely and effectively. Gather PPE, a scraper, brushes, solvent, and a plastic scraper compatible with engine surfaces. The process includes cooling the engine, removing the gasket, applying solvent, scrubbing away residue, rinsing, and drying the block before reassembly.
Why Cleaning a Gasket Off Engine Block Matters
A clean gasket surface is essential for a reliable seal. Leftover gasket material, oil, and grime can prevent a new gasket from seating correctly, leading to leaks, reduced compression, or overheating. For DIY enthusiasts, taking the time to remove all remnants and inspect the block surface can save you from costly misfires and engine damage. This guide focuses on common gasket types found on typical automotive engines, including valve cover gaskets and oil pan gaskets, and covers safe removal practices that preserve the block’s mating surface.
In addition to preventing leaks, a clean block surface improves gasket adherence, ensuring even torque distribution when you tighten the bolts. Gasketed seals rely on a uniform, clean surface to compress evenly. Small scrapes or debris can create voids that undermine the seal, so attention to detail at this stage pays off in the long run. The Gasketed team emphasizes applying the correct technique rather than forcing a stubborn gasket, which can cause scoring or damage.
Safety and PPE Essentials
Working on an engine block involves exposure to sharp edges, hot surfaces, and cleaning chemicals. Protect yourself with proper PPE: chemical-resistant gloves, eye protection, and a respirator or at least a well-ventilated area when using solvents. Avoid loose clothing and jewelry that could snag on belts or moving parts. Before starting, disconnect the battery to prevent accidental electrical shorts, and if you must work near fluids, keep a spill kit handy. Handling solvents with care minimizes skin contact and inhalation exposure, reducing irritation and potential health risks. The goal is a safe, controlled work environment where you can inspect the area thoroughly without rushing.
Workspace Setup and Environmental Considerations
Set up your workspace in a well-ventilated area with a sturdy workbench and a drip tray to catch oil and solvent runoff. Lay down disposable rags or shop towels, and keep a trash bin nearby for quick disposal of used wipes. Protect nearby components from solvent spray by masking off areas that aren’t part of the gasket mating surface. If you’re working in a garage, consider a portable fan or exhaust to improve air circulation. A dry, clean environment minimizes dust settling on the cleaned surface and helps you spot contamination more easily.
Required Tools and Materials
Before you start, assemble the following essentials: a plastic scraper or putty knife, scraper blades designed for metal, rust-safe degreaser or gasket remover, carburetor or brake cleaner, a wire brush for stubborn deposits (if needed, but avoid metal when possible), lint-free wipes, a microfiber cloth, and a clean solvent-compatible container for soaking parts. Have a torque wrench and a replacement gasket ready for reassembly. The right tools reduce the risk of surface damage and speed up the process while keeping you safe.
Removing the Old Gasket: Step-by-Step Progression
Begin by loosening bolts or fasteners around the gasket area without forcing them. Carefully pry and lift the old gasket away from the block, taking care not to gouge the metal surface. If the gasket adheres, apply a small amount of gasket remover or solvent to soften it before continuing. Work methodically from one edge to the opposite side to prevent warping or bending mating surfaces. When removed, set hardware aside in a labeled tray for reassembly to avoid misplacement.
Scraping and Gasket Residue Removal: Best Practices
Use a plastic scraper first to lift and remove softened gasket material. Avoid metal scrapers that can scratch aluminum or iron blocks. If stubborn residue remains, apply a light layer of solvent and let it sit for a few minutes before targeting it with the scraper again. Work in small, controlled sections to prevent gouging the surface. Remember to wipe the area clean after each pass so you can clearly see what remains and what needs further attention.
Degreasing and Cleaning the Block Surface
After removing the gasket, degrease the block surface to reveal any hidden debris and oils. Choose a degreaser that is safe for engine metals and follow the manufacturer’s instructions for contact time. Rinse with clean solvent or brake cleaner and dry with lint-free towels. Inspect the surface for remaining gasket particles, corrosion, or scoring. A bright, uniform metal surface indicates readiness for the new gasket seating.
Inspecting the Mating Surface: Flatness and Contamination
Visually inspect the block surface for nicks, burrs, or pitting. Use a straight edge to check for warping or crown differences that could compromise sealing. If you discover irregularities, consult a service manual or a machine shop; small imperfections can sometimes be addressed with careful deburring or resurfacing. Contamination from old gasket material or oil can hide imperfections, so a clean surface is critical for a successful seal.
Drying and Prep Before Reassembly
Ensure the mating surface is completely dry before applying any sealant or installing a new gasket. Moisture can interfere with gasket adhesion and create air pockets that lead to leaks. Use a clean, lint-free cloth to blot dry and allow extra time for thorough drying in tight corners. If you’re using a sealant, follow the product guidelines for application and cure time to ensure a proper seal when the engine is reassembled.
Gasket Sealants and Gasket Materials Considerations
Not every gasket requires sealant, and using the wrong type can compromise sealing performance. Check the engine’s service manual for recommendations on gasket materials and sealants—often a silicone or anaerobic sealant is suitable for some joints, while others rely solely on the mechanical seal. If you choose to use sealant, apply a thin, even bead to the gasket or the surface as directed. Remember that excess sealant can squeeze out and contaminate oil channels or coolant passages, so apply conservatively.
Reassembly and Torque Guidelines
With a clean, dry surface, place the new gasket carefully and align it with bolt holes and passages. Reinstall bolts in a criss-cross pattern to ensure even clamping pressure. Use a torque wrench to reach the manufacturer’s specified torque values; under-tightening can cause leaks, while over-tightening may damage threads or warp the gasket surface. After torquing, double-check all connections and reattach any hoses or components you removed earlier, ensuring nothing binds or interferes with moving parts.
Common Mistakes and Troubleshooting
Common mistakes include rushing the gasket removal, using harsh metal scrapers, skipping surface inspection, and failing to dry the surface completely. If you notice leaks after reassembly, re-check gasket seating and torque values, inspect for missing or misaligned bolts, and verify that no debris remains in oil or coolant passages. For persistent leaks, consider reseating the gasket or replacing with a new gasket kit and review the service manual for any special torque patterns or sealant requirements.
Maintenance Tips to Extend Gasket Life
Prevent gasket failures by performing regular coolant and oil maintenance, using quality gasket materials, and avoiding aggressive cleaning solvents near sensitive seals. When reassembling, apply torque gradually and consistently, and keep the work environment free of contaminates. A routinely cleaned engine block surface, combined with proper gasket selection and installation, increases seal longevity and reduces the chance of future leaks.
Tools & Materials
- Plastic scraper or putty knife(Use to lift gasket without scratching metal)
- Gasket remover or safe degreaser(Choose solvent compatible with metals and gaskets)
- Brass or nylon brush(Gentle scouring for stubborn surface grime)
- Brake cleaner or carburetor cleaner(Flammable; use in a well-ventilated area)
- Lint-free cloths and microfiber towels(For wiping and drying without leaving fibers)
- Rubber gloves and eye protection(Safety first when handling solvents)
- Torque wrench(Follow manufacturer torque specs for reassembly)
- Replacement gasket kit(Have a compatible gasket on hand for reassembly)
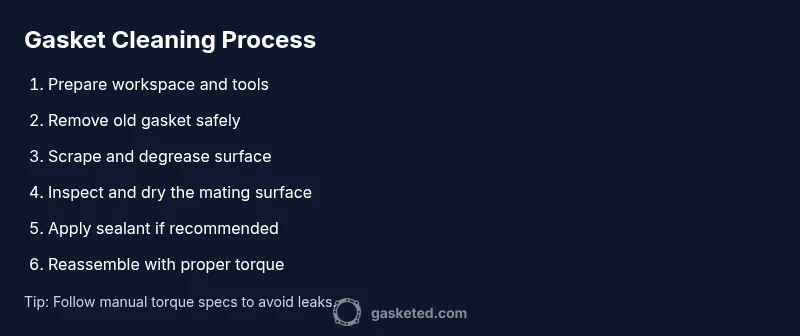
Steps
Estimated time: 60-120 minutes
- 1
Power down and cool engine
Shut off the vehicle and disconnect the battery if accessible. Allow the engine to cool completely to prevent burns and accidental movement while you work.
Tip: If the engine was recently running, wait at least 30 minutes; hot metal can cause severe burns. - 2
Disconnect components around the gasket area
Label and remove hoses, sensors, and any brackets that obstruct gasket access. This reduces the risk of reassembly errors and ensures a clean working surface.
Tip: Take photos before disassembly to aid reinstallation order. - 3
Remove the old gasket
Carefully pry the gasket edge and lift it away from the block surface. Avoid forcing; if it sticks, apply a small amount of gasket remover and recheck after a few minutes.
Tip: Keep the gasket in a labeled bag for reference or disposal. - 4
Soften and scrape residue
Apply gasket remover and let it sit per product guidelines. Use a plastic scraper to lift remaining material in small sections and avoid metal tools that can gouge.
Tip: Work in a well-ventilated area and wipe away softened material immediately. - 5
Degrease and rinse the mating surface
Spray brake cleaner on the surface and wipe with a lint-free cloth. Repeat until the surface is free of oils and residue, then dry thoroughly.
Tip: Do not leave solvent pooled on the block; ensure all edges are dry. - 6
Inspect for damage
Check for scoring, burrs, or pitting. A damaged surface may require refinishing. If severe, seek professional service before reassembly.
Tip: A straight edge test helps identify warping or unevenness. - 7
Prepare for reassembly
If using sealant, apply only as directed. Place the new gasket accurately, aligning bolt holes and passages before tightening.
Tip: Avoid excess sealant that can squeeze into critical pathways. - 8
Torque and reattach components
Tighten bolts in a criss-cross pattern to the specified torque. Reconnect hoses and sensors in reverse order of removal.
Tip: Double-check torque values and ensure no tools are left behind in the engine bay.
Common Questions
Can I reuse a gasket after cleaning?
Most gasket materials deform after removal and cleaning. It’s best to replace with a new gasket to ensure a proper seal. Cleaning alone rarely restores original integrity.
Generally, you should replace the gasket rather than reuse it after removal and cleaning.
What PPE should I wear when cleaning a gasket off an engine block?
Wear chemical-resistant gloves, eye protection, and a mask or good ventilation when using solvents. Keep skin away from solvents and avoid inhaling fumes.
Use gloves and eye protection, plus good ventilation when working with solvents.
Which solvents are safe to use on metal surfaces?
Opt for manufacturer-approved gasket removers or degreasers. Avoid harsh chemicals that can damage seals or paint without guidance from the engine manual.
Use a recommended gasket remover; avoid unknown chemicals on sensitive surfaces.
How do I know if the mating surface is flat enough?
Check with a straight edge or feeler gauge along the surface. Any gap or light under the straight edge indicates a potential issue that may require resurfacing.
A straight edge test helps determine flatness; if you see light gaps, don’t proceed without refinishing.
Do I need to drain coolant or oil during gasket cleaning?
If the gasket covers coolant or oil passages, you may need to drain related fluids following the vehicle manufacturer’s procedure. Always consult the service manual for your specific engine.
Follow the manual; fluid drainage depends on which gasket you are replacing.
How long should solvents dry before reassembly?
Follow the solvent manufacturer’s guidance, but expect at least several minutes to ensure the surface is free of solvent. A longer dry time reduces risk of solvent interference with the gasket.
Let surfaces dry fully according to product guidelines before reassembling.
Watch Video
Key Takeaways
- Plan and assemble tools before starting.
- Work slowly to avoid surface damage and omissions.
- Dry surfaces thoroughly and inspect for imperfections.
- Follow torque specs and use compatible gasket materials.
- Verify no debris remains in critical passages before final assembly.