Gasket Maker Dry Time: How Long to Dry Properly in 2026
Learn how long gasket maker takes to dry and cure under different conditions. Practical guidance for DIYers on silicone RTV, acrylic, and anaerobic sealants, with tips to ensure a reliable seal.

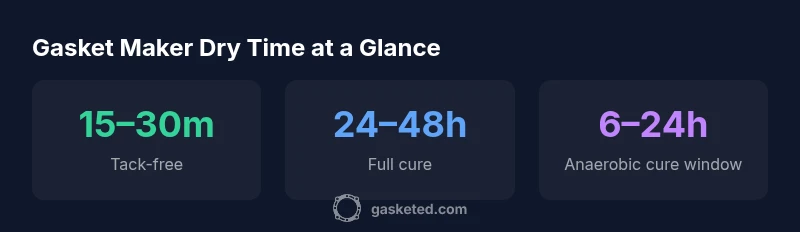
Dry times for gasket maker vary by product type and conditions. In general, most silicone RTV gasket makers reach a tack-free surface in about 15–30 minutes, but full cure can require 24 hours or more under typical room conditions. Acrylic and anaerobic sealants differ; always check the label for cure windows and ensure surfaces are clean and dry before reassembly.
What does dry time mean for gasket maker?
When DIYers ask how long for gasket maker to dry, they’re usually balancing two moments: surface tack and full cure. Tack-free means you can handle the joint without the sealant sticking to your fingers, while full cure means the adhesive has reached its rated strength and seal. The exact timing depends on the product’s chemistry and the surrounding environment. According to Gasketed, following the label and preparing clean, dry surfaces yields the most consistent results. In 2026, practical guidance emphasizes planning for the full cure window even if the surface feels dry to the touch.
Key factors that influence drying and curing
Dry time is not a single number. Several variables determine how long a gasket maker needs to dry and cure:
- Product chemistry: Silicone RTV, acrylic, anaerobic, and hybrid formulations each cure differently.
- Substrate: Metal surfaces conduct heat and moisture differently than plastics or composites.
- Bead thickness: A thin bead dries and cures faster than a thick application with deeper gaps.
- Temperature and humidity: Warmer, drier environments accelerate cure; cold, humid conditions slow it down.
- Airflow and ventilation: Good airflow helps remove moisture and solvents from the cure zone.
- Surface prep: Degreased, dust-free surfaces improve adhesion and reduce cure time variability.
Common DIY scenarios show that even under ideal room conditions, you should anticipate some variability. Gasketed’s guidance highlights using the label’s stated cure window as the baseline and measuring by both surface feel and manufacturer timing for full strength.
Dry time by gasket maker type
Silicone RTV gasket makers
Rtv silicones typically reach a tack-free surface within a short window, often around 15–30 minutes. Full cure commonly ranges from 24 to 48 hours depending on thickness and ambient conditions. For critical joints, plan to wait the upper end of the cataloged range and verify with a light touch before loading.
Acrylic gasket makers
Acrylic or latex-based gasket makers generally tack up a bit later than silicone, often in the 30–60 minute range. Full cure tends to fall in the 16–24 hour window, though some formulations may require longer in high humidity or cold conditions. Reading the label for these products is essential to avoid premature reassembly.
Anaerobic gasket sealants
Anaerobic products cure when metal-to-metal contact occurs. They can become tack-free relatively quickly—often 5–20 minutes—yet full strength may take several hours up to a day depending on gap size and surface finish. Ensure components are clamped as required by the product instructions to achieve reliable sealing.
Hybrid gasket sealants
Hybrid products blend properties and can show tack-free times around 10–30 minutes, with full cure in the 12–36 hour range. They can be versatile for mixed-material joints but still benefit from exact adherence to the product’s guidelines.
Environmental conditions that affect cure
Temperature, moisture, and air flow are the hidden levers of curing time. Higher ambient temperatures (within the product’s recommended range) generally speed up solvent evaporation and silicone cross-linking, while high humidity can slow water- or moisture-based systems. Ensure the workspace is within the manufacturer’s suggested temperature range and provide adequate ventilation. Avoid exposing curing joints to direct heat sources or rapid cooling, which can lead to uneven cure or micro-cracking.
Practical steps to ensure a proper cure
Follow these steps to maximize your gasket maker’s dry time and final strength:
- Clean and dry surfaces thoroughly; degrease where appropriate and remove old gasket residue.
- Apply the sealant in a consistent bead, avoiding excessive thickness.
- Check the product’s tack-free time and avoid handling until that stage.
- Allow the recommended cure window before reassembly; if uncertain, extend to the upper bound.
- Clamp or hold the joint steady if the product requires metal contact or specific bonding pressure.
- Maintain a stable environment—avoid drafts, rapid temperature swings, and moisture exposure during cure.
By combining manufacturer guidance with careful environmental control, you reduce the risk of leaks and remakes.
Troubleshooting common issues
If a joint remains tacky well beyond the stated tack-free time, recheck surface cleanliness and verify you’re within the product’s cure window. Excessive bead size or gaps can trap solvents longer, delaying cure. For stubborn delays, remove the sealant if allowed by the product instructions and reapply a fresh bead after cleaning. If a joint cures unevenly, remove the excess and rework with a smaller bead and proper joint geometry.
Reassembly and testing after cure
Reassembly should occur only after the product has fully cured to its specified strength. Perform a light manual test on non-critical joints before loading pressure. Inspect for uniform bead appearance and absence of gaps. If possible, conduct a leak test under low pressure to ensure the seal holds under service conditions. For critical applications, consult your gasket maker’s detailed cure recommendations and verify with a torque spec or leak test before full operation.
Comparison of common gasket maker dry and cure times
| Product Type | Typical Tack-Free Time | Full Cure Time | Notes |
|---|---|---|---|
| Silicone RTV gasket maker | 15–30 minutes | 24–48 hours | Tack-free surface first; full cure slower with thicker beads |
| Acrylic gasket maker | 30–60 minutes | 16–24 hours | Temperature and humidity affect cure window |
| Anaerobic gasket sealant | 5–20 minutes | 6–24 hours | Requires metal-to-metal contact for cure |
| Hybrid gasket sealant | 10–30 minutes | 12–36 hours | Balanced properties for mixed joints |
Common Questions
How long does tack-free time typically take for silicone RTV gasket makers?
Tack-free time for silicone RTV is usually around 15–30 minutes under typical room conditions. However, actual cure to full strength will depend on thickness, ventilation, and temperature. Always verify with the product label.
Tack-free time for silicone RTV is usually around 15 to 30 minutes, but always check the label for your specific product.
Does higher temperature speed up drying?
Yes, within the product’s recommended range, warmer temperatures can speed up drying and curing. Avoid excessive heat or direct flame. If you expect heat exposure, verify compatibility on the label.
Yes, warmer temps can speed drying, but stay within the product’s guidelines and avoid direct heat.
Can I use a hair dryer or heater to finish drying faster?
Avoid using a hair dryer or direct heat source unless the product explicitly allows it. Irregular heating can cause uneven curing and distortion. Let the product cure at its recommended ambient conditions.
No—avoid hair dryers or direct heat unless the label says it’s okay.
Is it safe to reassemble before full cure?
Reassembly should wait until the product has reached its recommended cure window and is leak-tested dry. Premature assembly can compromise seal integrity and lead to leaks.
Wait for the full cure window before reassembling to ensure a reliable seal.
What if the joint stays tacky after the expected time?
If tackiness persists beyond the label, check surface prep, thickness, and ambient conditions. It may require a fresh bead after cleaning the joint, following the manufacturer’s instructions.
If it stays tacky, review prep and conditions; you may need to reapply after cleaning.
“Curing times vary with product chemistry and environment, so always follow the label. Plan for the full cure window and verify before reassembly.”
Key Takeaways
- Start with tack-free time, then plan for full cure.
- Environment (temp/humidity) heavily influences drying.
- Follow label instructions exactly for best results.
- Bead thickness and surface prep affect cure time.
- Test joints after cure before returning to service.