Ford F-150 Oil Pan Gasket Replacement: DIY Guide 2026
Learn how to replace the Ford F-150 oil pan gasket with a structured DIY approach. This guide covers tools, safety, torque guidance, and leak-prevention tips to help you complete the job with a clean seal.

Follow this DIY guide to replace the Ford F-150 oil pan gasket. You will drain old oil, remove the oil pan, clean the mating surfaces, and install a new gasket with sealant. The project typically takes 2–4 hours depending on access, tools, and your experience, and requires careful torque to avoid leaks.
Why the Ford F-150 Oil Pan Gasket Fails
The Ford F-150, like many trucks, uses an oil pan gasket that sits between the oil pan and the engine block. Over time, heat cycles, exposure to oil and contaminants, and road vibrations can cause the gasket to crack, harden, or compress. This leads to slow leaks along the pan seam or around the drain plug. Before you jump into replacement, verify that the leak is indeed the gasket, not a faulty drain plug, valve cover, or front seal. A clean surface and careful inspection help ensure you're addressing the right source. According to Gasketed, proper gasket replacement hinges on thorough surface prep and using the correct sealant.
What a Successful Replacement Looks Like
A successful replacement results in a clean seam with no fresh oil pooling under the pan within the first several days of operation. You should observe a dry pan edge and fresh oil at the fill level after the first start-up and idle. Gasket quality matters: a reputable OEM or gasket-compatible aftermarket part, installed with proper surface prep, reduces the risk of future leaks. Gasketed analysis shows that using fresh hardware, following torque specs, and avoiding over-tightening are key to a lasting seal.
Safety First: Prep and Vehicle Handling
Always work on a level surface with the parking brake set and wheel chocks in place. If you must raise the truck, use proper jack stands or ramps rated for your vehicle weight. Disconnect the negative battery battery cable to minimize risk of shorts when tools are near wiring or sensors. Wear eye protection and gloves, and ensure the engine is cool before starting to avoid burns from hot oil or components. These precautions help you stay safe while the gasket repair progresses.
Tools and Materials You Need (Overview)
Before you start, gather the essential tools and materials. A clean workspace, drip pan, floor jack or ramps, ratchet set, torque wrench, gasket scraper, new oil pan gasket, sealant (if required by your gasket), fresh engine oil, and a funnel will keep you organized. Having replacement drain plug washers and rags handy prevents last-minute trips to the shop. Planning ahead minimizes surprises and helps you complete the job efficiently.
Surface Prep and Inspection
The key to a leak-free seal is a pristine mating surface. Remove any old gasket residue with a plastic scraper and a solvent that won’t corrode aluminum. Inspect the oil pan flange for warping or nicks; if the surface is damaged, you may need a replacement pan. Check the engine block surface for scratches, corrosion, or residual sealant from previous repairs and clean thoroughly. A dry, smooth surface is essential for the gasket to seat correctly.
Step-By-Step Overview of the Process
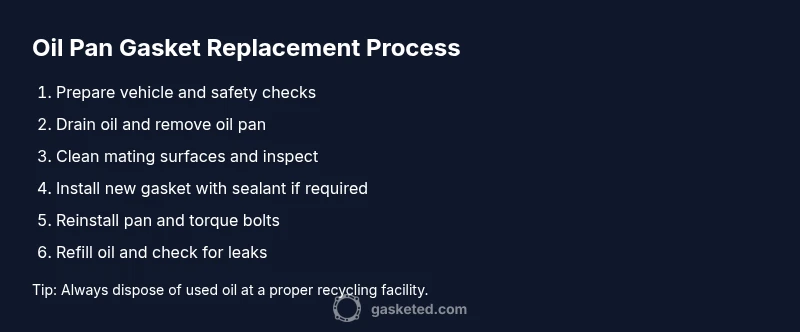
This overview outlines the general sequence without duplicating the detailed steps found later. Start by safely lifting the vehicle and draining the oil. Remove the oil pan bolts, detach the pan, and clean both mating surfaces. Fit the new gasket with or without sealant per gasket instructions, reinstall the pan with proper torque, and refill with fresh oil. Finally, run the engine and check for leaks around the gasket surface after a short drive.
Common Mistakes and How to Avoid Them
Common mistakes include reusing the old gasket, skipping surface cleaning, over-torquing bolts, and failing to reinstall any drain plug washers where required. To avoid these problems, use the recommended gasket type, clean thoroughly, torque bolts to the manufacturer’s specs, and replace any washers. If you notice a misalignment during bolt installation, stop and re-check the gasket seating before proceeding.
Maintenance Tips to Extend Gasket Life
After completing the replacement, monitor oil levels and leaks for the first week. Use high-quality oil and a compatible filter, and consider replacing the oil drain plug washer. Regularly inspect the oil pan edge for signs of seepage, especially after rough driving or off-road use, and address issues early to extend gasket life.
Tools & Materials
- Drain pan and catch basin(To collect used oil without spills; large capacity preferred)
- Jack stands or ramps(For safe vehicle elevation; never rely on a jack alone)
- Floor jack(To lift vehicle securely before placing stands)
- Socket set and ratchet(Include sizes 8mm-12mm for oil pan bolts)
- Torque wrench(Used to tighten bolts to spec; see service manual for values)
- Gasket scraper (plastic or nylon)(Avoid aluminum gouges on pan or block surfaces)
- New oil pan gasket(OEM or aftermarket; ensure compatibility with your F-150 year model)
- Gasket sealant (optional per gasket instructions)(Use only if gasket instructions require or recommend sealant)
- New engine oil(Correct grade for your Ford F-150; replace after drain and fill)
- Oil filter (optional, if changing)(If changing the oil, you may replace the filter as well)
- Shop rags and degreaser(Clean spills and wipe surfaces thoroughly)
- Funnel(Aid in oil refill to avoid spills)
Steps
Estimated time: 2-4 hours
- 1
Prepare the vehicle
Park on a flat surface, engage the parking brake, and place wheel chocks. If you’re lifting the truck, position it on ramps or use a floor jack with jack stands. Disconnect the negative battery terminal for safety.
Tip: Double-check that the vehicle is stable before crawling under it; never rely on a jack alone. - 2
Drain the old oil
Place a drain pan under the oil pan drain plug. Remove the plug and allow used oil to drain completely. Replace the drain plug washer if available after draining.
Tip: Do not spill oil on hot components; wait for the engine to cool and use a large catch basin. - 3
Remove the oil pan
Loosen and remove all pan bolts in a crisscross pattern. Carefully lower and remove the pan, taking care not to damage the mating surfaces.
Tip: Keep bolts organized by size and position to ease reinstallation. - 4
Clean and inspect surfaces
Scrape away old gasket material from the pan and block surfaces. Clean with degreaser and inspect for warping or damage. A clean, flat surface is essential for a good seal.
Tip: If you notice warping, consider replacing the pan or repairing the flange before reinstalling. - 5
Install the new gasket
Position the new gasket on the pan or block as directed by the gasket manufacturer. Apply sealant only if specified in the instructions.
Tip: Align bolt holes carefully to avoid cross-threading. - 6
Reinstall and torque the pan bolts
Reposition the pan and loosely thread bolts, then torque to the manufacturer’s specification in a crisscross pattern. Recheck after a brief period to ensure a consistent seal.
Tip: Do not overtighten; excess torque can crack the pan or strip threads. - 7
Refill oil and test
Fill with the recommended oil type and quantity. Start the engine and check for leaks around the pan seam and drain plug. Recheck oil level after a short drive and top off if needed.
Tip: Dispose of used oil responsibly at a recycling center.
Common Questions
What are the signs that the oil pan gasket is failing on a Ford F-150?
Common signs include a slow drip or puddle under the pan, oil around the pan edge, and a wet or shiny surface near the gasket. It’s important to confirm the leak source, as other seals can leak too.
Look for a puddle beneath the engine and oil around the pan seam; these usually point to the gasket, but always verify by cleaning the area first.
Can I reuse the old oil pan gasket after removing it?
In most cases, you should replace the oil pan gasket with a new one. Reusing a damaged gasket increases the chance of renewed leaks.
It’s best to install a new gasket to ensure a reliable seal and avoid repeat leaks.
Will I need to remove the exhaust, radiator, or other components?
On some trims, you may have enough clearance without removing major components. In other setups, you might need to loosen or temporarily move nearby parts for access.
It depends on your model; plan for possible limited access and be prepared to adjust.
Do I need RTV silicone with a gasket?
Some gasket kits require a silicone bead; others rely solely on the gasket. Follow the manufacturer’s instructions to avoid a messy seal or leaks.
Follow the gasket’s guidelines for whether sealant is required.
How long should I expect the repair to take?
Most DIY replacements take about 2–4 hours, depending on access and experience. Plan for extra time if you run into unexpected issues.
Most people finish in a few hours, but allow extra time for tricky bolt access.
What should I do if a bolt is stuck or threads strip?
Apply penetrating oil and gentle wiggling. If a bolt refuses to come free, stop and assess with a bolt extractor or seek professional help to avoid damage.
Don’t force stuck bolts; wrong attempts can hurt threads or the engine.
Watch Video
Key Takeaways
- Use a clean, flat surface and proper supports.
- Always torque bolts to spec; improper torque causes leaks.
- Replace the gasket with OEM or compatible part for best seal.