Bad Valve Cover Gasket Troubleshooting: DIY Guide
If you suspect a bad valve cover gasket, this practical guide helps diagnose leaks, identify causes, and safely guide you through a DIY repair plan for lasting seal and engine health.

A bad valve cover gasket is a common source of top-end oil leaks and can cause burning oil smells or misfires if left unchecked. Start by inspecting the valve cover area for seepage, oil on the gasket edge, and signs of hardened material, then replace the gasket with the correct type and torque bolts to spec. If unsure, seek professional help before proceeding.
Understanding the Bad Valve Cover Gasket
According to Gasketed, the valve cover gasket seals the valve cover to the cylinder head and keeps oil from leaking into the spark plug wells and timing area. A bad valve cover gasket happens due to aging rubber, heat cycles, oil contamination, or over-tightening during previous repairs. When the gasket degrades, you’ll see oil seeping along the edge of the valve cover, burning oil smell, or a lingering puddle under the engine. In many engines, the gasket also helps maintain crankcase pressure; when it fails, you may observe misfires or reduced performance. The symptom pattern matters: slow, steady leaks vs sudden, heavy seepage. Proper replacement is essential for long-term engine health and reliable performance.
Signs a Valve Cover Gasket Is Failing
Common indicators include oil collecting on the valve cover edge, oil staining around the spark plug wells, and a distinct burnt-oil odor during engine operation. You might also notice a drop in oil level on the dipstick without an obvious external puddle. In some engines, a failing gasket contributes to minor rough running or intermittent misfires due to oil intrusion into ignition components. Detecting these signs early helps prevent more extensive damage and keeps your DIY repair on track.
Why Gasket Failures Happen
Gasket failures are usually the result of aging rubber and repeated heat cycling. Over-tightening valve cover bolts or using a damaged valve cover can distort the gasket seat, leading to leaks. Exposure to motor oil, solvents, or incorrect gasket materials during previous repairs can also reduce gasket life. In high-mileage engines, cumulative wear is common, and the seal may no longer sit flush against the mating surfaces. Understanding these causes helps you choose the right replacement and install it correctly the first time.
Safety First: Prep and PPE
Before touching any engine parts, disconnect the negative battery cable to prevent accidental short circuits. Allow the engine to cool to a safe temperature; hot oil can cause severe burns. Wear eye protection, nitrile gloves, and long sleeves. Work in a well-ventilated area and keep a clean workspace so you can track removed parts and bolts. Having a magnetic tray or labeled containers for bolts helps prevent mix-ups during reassembly.
Quick Diagnostic Checks You Can Do
Visually inspect the valve cover edges for fresh oil seepage and check for oil on the spark plug wells. Clean the area around the gasket mating surface to reveal real leaks. Check valve cover bolts for proper snugness — not too tight, not loose — and verify there is no visible warping or cracks on the valve cover. If oil persists after a careful wipe-down and a pressure test, the gasket is a likely culprit and should be replaced.
Step-by-Step Repair Mindset
A methodical approach reduces mistakes and ensures a durable seal. Always replace the gasket with a new, manufacturer-approved part. Use the correct torque on bolts per the vehicle’s service manual, and reseal any potential cracks in the valve cover or mating surface. Take photos during disassembly to aid reassembly and keep track of phonetic order for reinstalled components.
How to Choose the Right Gasket and Materials
Select a gasket material compatible with your engine design and oil type. Some engines need silicone sealant in specific joints, while others rely solely on a pre-formed gasket. Avoid generic, one-size-fits-all gaskets that don’t match your valve cover’s shape or bolt pattern. When in doubt, refer to the vehicle’s service manual or consult the gasket manufacturer’s compatibility chart to ensure a proper seal and long-term reliability.
Reassembly, Start-Up, and Leak Testing
Reassemble in reverse order of disassembly, tightening bolts in a crisscross pattern to ensure even seating. After reinstalling the intake manifold or other components, start the engine and look for fresh oil leaks around the valve cover. Let the engine reach operating temperature and recheck for seepage after a few minutes of running. If leaks persist, re-evaluate gasket seating, mating surface integrity, and bolt torque.
Common Mistakes and How to Avoid Them
Avoid reusing an old gasket or applying sealant where it’s not recommended. Skipping surface cleaning can trap debris and cause leaks. Under-tightening or over-tightening bolts can warp the seat and compromise the seal. If you observe warped valve covers or damaged sealing surfaces, replacing the valve cover may be necessary for a reliable fix.
Prevention and Long-Term Care
Regular oil changes and using the right oil type help extend gasket life. Periodically inspect the valve cover area for leaks, especially after maintenance work near the gasket. When removing and reinstalling components in the future, re-torque valve cover bolts to the manufacturer’s specification to avoid future leaks. Keeping a maintenance routine reduces the chance of recurring gasket failures.
Steps
Estimated time: 60-90 minutes
- 1
Prepare and safety check
Disconnect the battery, allow the engine to cool, and gather tools. Inspect the work area for clean metal surfaces and proper lighting. Remove hoses or wires that block access to the valve cover, keeping track of connections.
Tip: Use a magnetic tray for bolts and take photos during removal. - 2
Access the valve cover
Remove any engine covers or components obstructing the valve cover. Raise the vehicle if needed and ensure stability with jack stands. Gently pry loose the cover without bending the shims or sensor lines.
Tip: Work slowly to avoid snapping studs or damaging wiring. - 3
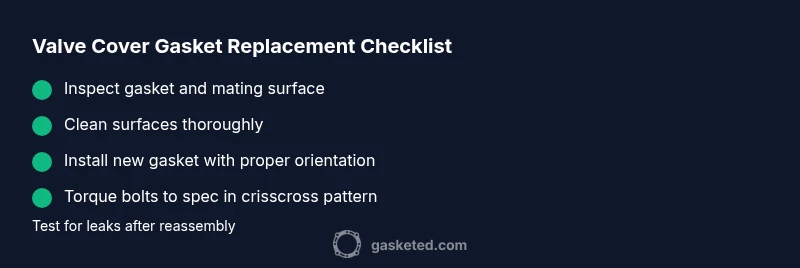
Inspect the gasket and surface
Carefully remove the old gasket, noting its orientation. Clean both sealing surfaces with a solvent and a lint-free cloth. Look for cracks, tears, or warping on the valve cover or head mating surface.
Tip: Check for oil contamination on the gasket surface that can impede seating. - 4
Install the new gasket
Place the new gasket in position, aligning with all holes and corners. If the gasket requires sealant, apply only where recommended by the manufacturer. Reinstall the valve cover, tightening bolts in a cross pattern to spec.
Tip: Don’t overtighten; excessive torque can warp the cover. - 5
Reassemble and torque
Reconnect any hoses and wires, reinstall engine covers, and lower the vehicle. Torque the valve cover bolts to the manufacturer’s specification using a torque wrench.
Tip: Double-check all connections to prevent leaks. - 6
Test for leaks
Start the engine and allow it to reach operating temperature. Inspect the valve cover edges for fresh oil seepage and recheck after a short drive. If leaks remain, re-torque or replace components as needed.
Tip: If you notice coolant mixing with oil, stop and seek professional help.
Diagnosis: Oil leaks around the valve cover area, burning oil smell, or oil on spark plug wells
Possible Causes
- highCracked or hardened valve cover gasket
- mediumLoose or overtightened valve cover bolts
- lowWarped valve cover or gasket mating surface
Fixes
- easyReplace the valve cover gasket with the correct part and reseat bolts to manufacturer torque
- mediumClean mating surfaces, inspect for warping, and re-seat or replace warped components
- hardIf the valve cover itself is warped or seating surfaces are damaged, replace the valve cover assembly
Common Questions
What are the telltale signs of a bad valve cover gasket?
Watch for oil seepage at the valve cover edge, oil on spark plug wells, and burnt oil smell. A rising oil level without external leaks can also hint at gasket issues.
Look for oil around the valve cover, oil on spark plug wells, and a burnt smell. If the oil level drops without a visible leak, you may have a gasket problem.
Can a bad valve cover gasket cause engine misfires?
Yes. Oil intrusion into ignition components can cause misfires or rough running. If misfires appear with oil leaks, the gasket is likely involved.
Oil getting into ignition parts can cause misfires; consider gasket replacement if you see leaks and rough running.
Should I use gasket sealant with a new gasket?
Follow the gasket manufacturer’s guidance. Some gaskets require sealant in specific joints, while others seal on their own.
Only use sealant where the manufacturer says it’s needed; otherwise the seal may be compromised.
Is replacing the gasket a DIY job for a beginner?
Many vehicles allow DIY gasket replacement with basic tools, but some engines require specialized knowledge. If you’re uncomfortable, seek professional help.
It can be a doable DIY task, but if you’re new, consider professional help to avoid mistakes.
How long does a valve cover gasket replacement typically take?
For most models, plan about 60-90 minutes, plus any extra time for partial disassembly or checking for leaks afterward.
Most people spend about an hour or two, depending on engine layout and access.
What if oil leaks persist after replacement?
Re-check gasket seating, surfaces for damage, and bolt torque. If leaks continue, inspect for warped surfaces or consider replacing the valve cover.
If it still leaks, re-check seating and torque, and consider other damaged parts.
Watch Video
Key Takeaways
- Identify the signs early to prevent engine damage
- Use the correct gasket and torque settings
- Follow a clean, methodical workflow
- Test for leaks after reassembly
- Prevent future failures with proper maintenance