Valve Cover Gasket Symptoms: Diagnose & Fix Fast (2026)
Discover common valve cover gasket symptoms, why they occur, and practical DIY fixes. This guide helps homeowners diagnose leaks, spot burning smells, and safely replace the gasket to protect your engine.

Most valve cover gasket symptoms point to a worn gasket or cracked valve cover, which lets oil escape and can cause a burning oil smell. Start with a quick check: look for oil pooling on the valve cover, seepage around bolts, or oil on the exhaust. If found, tighten bolts to spec and replace the gasket as needed. If leaks persist, plan a gasket replacement.
Understanding valve cover gasket symptoms
The phrase valve cover gasket symptoms refers to a set of observable conditions that indicate the gasket sealing the valve cover is failing. When this gasket wears out, oils can seep into the engine bay and onto hot exhaust components, creating telltale signs that DIY enthusiasts can notice without specialized tools. Recognizing valve cover gasket symptoms early helps homeowners prevent more serious engine trouble and costly repairs. In many engines, a gasket issue also increases the chance of misfires if oil penetrates spark plug wells. By learning what to look for, you can tackle the issue before it becomes a larger leak or oil starvation problem. According to Gasketed, early detection saves time and money for DIYers and homeowners tackling gasket repairs.
Oil leaks: the most telling sign
Oil leaks around the valve cover are the most common and visible valve cover gasket symptoms. You may notice dark, slick streaks along the top edge of the engine, oil pooling on the valve cover itself, or a damp, oily residue near the spark plug wells. Leaks often appear after long drives or when the engine reaches operating temperature, where heated oil can wick along surfaces and become more apparent. If you see fresh oil on the valve cover or on the exhaust manifold, it’s time to inspect the gasket and surrounding mounting points. Addressing the leak early reduces the risk of oil catching fire and prevents oil loss that could harm engine lubrication.
Other telltale signs you should not ignore
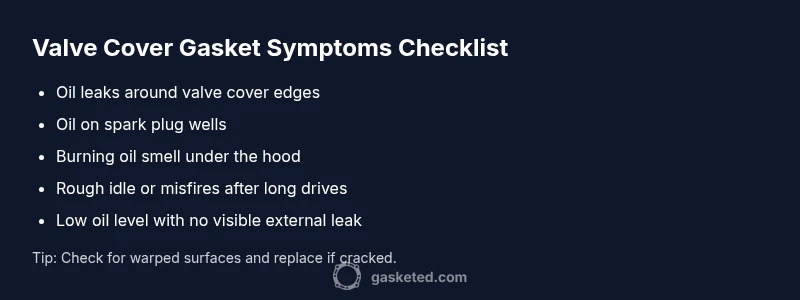
Beyond obvious leaks, several valve cover gasket symptoms may appear. A burning oil smell under the hood is common when oil drips onto hot exhaust components. You might experience a rough idle or occasional misfires if oil seeps into spark plug wells, particularly after extended driving. A low oil level with no external puddle can also signal an internal leak. If the symptoms repeat after cleaning and resealing, the gasket or valve cover may be warped or cracked, necessitating part replacement. Remember: even small leaks can escalate under heat and vibration.
How this problem develops: common causes
Valve cover gasket symptoms arise from several root causes. Gasket material deteriorates with heat cycles, oils and additives can dry it out, and mechanical stress from engine vibrations can loosen the seal. Over-tightening valve cover bolts may distort the gasket, causing leaks. A warped or cracked valve cover itself is another frequent culprit; in some engines, the cover warps over time due to heat cycling. Finally, improper gasket installation or use of the wrong gasket size can create gaps that allow oil to escape. Understanding these factors helps you decide whether a gasket replacement or a head gasket service is warranted.
Quick checks you can perform safely today
Before diving into a full gasket replacement, perform some quick checks you can do safely. Ensure the engine is cool and the car is on level ground. Look for fresh oil near the valve cover edges, and check the spark plug wells for oil intrusion. Inspect the valve cover bolts for looseness and ensure the gasket surface is clean and free of old sealant. If you have a die-hard vacuum or air intake system, verify that connections are snug and not contributing to a leak. These quick checks help you decide whether a DIY gasket replacement is feasible or if you should seek professional help.
How we approach diagnosis and repair planning
When valve cover gasket symptoms appear, a systematic approach minimizes risk and errors. Start with surface cleaning to clearly observe seepage, then inspect the gasket and valve cover for cracks or warping. If the gasket shows wear or the cover is damaged, replacement is the prudent course. For mild leaks with intact surfaces, a reseal and torque-check of the valve cover bolts may solve the issue. Always verify your engine's torque specification, and if you’re uncertain about the surface condition after removal, consult the vehicle’s service manual or a professional.
Replacement options: DIY vs professional help
DIY gasket replacement is feasible for many enthusiasts with basic hand tools and a clean workspace. However, some engines require removing multiple components (intake, coils, hoses) to access the valve cover. If you’re new to auto repair, consider a temporary solution like resealing first while you plan a complete gasket replacement. In vehicles with high mileage, warped valve covers or damaged head gaskets may complicate the repair, making professional service a safer choice. The key is to assess your comfort level, availability of the required torque specs, and the engine design before proceeding.
Prevention: keeping gasket health in good shape
Preventive maintenance reduces the risk of valve cover gasket symptoms reappearing. Regularly check oil level and quality, and use oil that matches your engine’s specification. Maintain a clean engine bay to spot leaks early. Avoid aggressive tightening during maintenance and always follow the manufacturer’s torque specs. If your vehicle has a history of gasket leaks, consider inspecting the valve cover surface for warping and replacing gaskets proactively every few years as part of a gasket maintenance plan.
Steps
Estimated time: 2-3 hours
- 1
Prepare and safety check
Park on a level surface and ensure the engine is cool. Disconnect the negative battery cable to avoid accidental startups. Gather required tools and the correct valve cover gasket for your engine. Label or photograph any hoses or wires you will remove to ease reassembly.
Tip: Wear eye protection and keep a clean workspace to avoid losing small bolts. - 2
Access the valve cover
Remove components that obstruct the valve cover: air intake duct, ignition coils or spark plug wires if applicable, and any brackets. Keep track of removed parts and note their locations for proper reinstallation.
Tip: Photograph connections before removal to simplify reassembly. - 3
Remove the valve cover bolts
Loosen and remove all valve cover bolts in a crisscross pattern to avoid warping. Gently lift the valve cover to inspect the gasket and mating surfaces for debris, cracks, or irregularities. Do not pry with excessive force.
Tip: Place bolts in order and orientation on a tray to prevent mix-ups. - 4
Inspect and clean surfaces
Carefully inspect the valve cover gasket seat and the mating surface on the engine head. Clean all old gasket residue and oil. If you notice warping or damage, replace the valve cover or gasket accordingly.
Tip: Use a plastic scraper to avoid scratching metallic surfaces. - 5
Install the new gasket and reassemble
Install a new gasket with proper orientation. Refit the valve cover and snug the bolts in a diagonal pattern to the manufacturer’s torque specs. Reconnect any removed hoses, wires, and brackets.
Tip: Torque specs vary by engine; using a torque wrench prevents over- or under-tightening. - 6
Test for leaks
Reconnect the battery, run the engine, and observe the valve cover area for leaks. Check for abnormal smells or smoke during initial warm-up. Keep an eye on the oil level over the next few days.
Tip: Take a short test drive and recheck after a cool-down period. - 7
Post-repair maintenance
Document the repair, noting any unusual observations. Schedule a periodic check for gasket seating and cracking, especially after first starts and hot-cold cycles.
Tip: Keep a spare gasket kit and rags handy for future maintenance.
Diagnosis: Oil leaking from the top of the engine around the valve cover or oil on spark plug wells
Possible Causes
- highWorn or cracked valve cover gasket
- mediumLoose valve cover bolts
- lowCracked or warped valve cover
- lowOverfilled or high oil pressure
Fixes
- easyTighten valve cover bolts to the specified torque after cleaning mating surfaces
- easyReplace the valve cover gasket with a new one and inspect spark plug wells
- mediumInspect valve cover for cracks/warp and replace if damaged
- easyCheck oil level and pressure, address overfill or pressure issues
Common Questions
What are the most common valve cover gasket symptoms?
Oil leaks around the valve cover, oil on spark plug wells, a burning oil smell, and sometimes rough idle or misfires are common valve cover gasket symptoms. If you observe these signs, inspect the gasket and surrounding components.
Common valve cover gasket symptoms include oil leaks near the valve cover, oil on the spark plug wells, and a burning oil odor. Inspect the gasket and replace if needed.
Can valve cover gasket leaks damage the engine?
Yes. Prolonged leaks can reduce lubrication, foul spark plugs, and in some cases allow oil to reach hot exhaust components, posing a fire risk and potential misfires.
Yes, leaks can reduce lubrication and cause misfires or fire risk if oil reaches hot exhaust parts.
Will I need to remove other parts to replace the gasket?
In many engines you must remove intake components or coils to access the valve cover. Always consult the service manual for your specific engine layout before starting.
Often you need to remove nearby parts like coils or intake to reach the valve cover. Check your manual before proceeding.
Is it safe to drive with a leaking valve cover gasket?
Driving with a leak is not ideal. Oil on hot surfaces can cause smoke or fire, and reduced lubrication may risk engine wear. Plan a repair rather than driving long distances.
Not ideal to drive long with a leak. It can be unsafe and cause engine wear; arrange a repair as soon as possible.
How much does valve cover gasket replacement cost?
Costs vary by vehicle and labor rates. Expect parts and labor to range depending on engine design, location, and whether you tackle it yourself or hire a shop.
Costs vary; talk to a shop for a quote, or estimate parts and labor for your engine.
How do I tell apart valve cover gasket leak from a blown head gasket?
Valve cover gasket leaks are usually external and oil-based around the top of the engine; a blown head gasket often shows coolant or compressions signs, white mist, or milky oil. If unsure, perform a professional diagnosis.
External oil leaks around the valve cover usually mean the gasket. Head gasket issues often involve coolant leaks or compression problems; consult a pro if in doubt.
Watch Video
Key Takeaways
- Identify symptoms early to prevent leaks from worsening
- Tighten valve cover bolts to spec after cleaning surfaces
- Replace worn gasket promptly to prevent engine damage
- Check for oil on spark plug wells after reassembly
- Follow torque specs and safety guidelines