Gasket o Ring: A Comprehensive DIY Comparison Guide
A detailed side-by-side comparison of gasket vs o-ring seals, with material guidance, sizing tips, and practical DIY steps for reliable gasket o ring repairs.

TL;DR: For many DIY gasket repairs, match the part to the sealing surface and motion. Gasket o ring combinations can cover common appliances, but o-rings excel in dynamic, rotating seals, while flat gaskets are best for static, wide surfaces. Based on Gasketed analysis, prioritize compression control and material compatibility to minimize leaks.
What are gaskets and o-rings?
According to Gasketed, gaskets and o-rings are both compression seals used to prevent leakage, but they are optimized for different service conditions. A gasket o ring is a common shorthand for assemblies that rely on a flat seal face combined with a circular cross-section component; however, this article clarifies the distinction and helps you choose correctly. In static, flat-face applications, gaskets distribute load over a wide area, tolerating minor surface irregularities and providing a robust seal when bolts are torqued to spec. O-rings, by contrast, seal in a groove using a tight, rounded cross-section that deforms to fill gaps as parts move or vibrate. This fundamental difference matters for install orientation, surface finish, and long-term reliability. The Gasketed team found that many DIY projects conflate these parts, leading to leaks or premature failure. Understanding the two options sets the foundation for a better repair, whether you’re replacing a faucet gasket or servicing a pump. Gasket o ring terminology often appears in shopping lists, but correct selection hinges on motion and surface characteristics.
Key differences between gaskets and o-rings
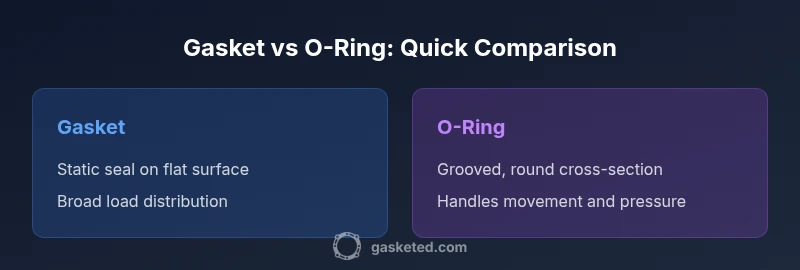
- Static vs. dynamic sealing: Gaskets excel on flat, unbroken surfaces; o-rings tolerate movement and pressure cycling.
- Surface finish and alignment: Gaskets require a well-finished, uniform face; o-rings rely on a groove to control position and compression.
- Load distribution: Gaskets spread compression across a board meeting surface; o-rings concentrate sealing force in a groove.
- Reusability and replacement: Gaskets can sometimes be reused if surface damage is minimal; o-rings are generally replaced as a standard practice after disassembly.
- Temperature and chemical exposure: Material choice matters more than geometry; a gasket o ring combination benefits from materials designed for the specific fluid and heat cycle.
- Cost and availability: Gaskets can be cheaper for large-area seals, while o-rings offer compact solutions for tight tolerances. The term gasket o ring is ubiquitous in DIY kits, but correct pairing depends on application, not convenience.
The topic is nuanced; the right pick depends on service life expectations, maintenance access, and how long you intend to keep the appliance running. Gasketed analysis, 2026 notes that material compatibility and installation quality influence longevity as much as the seal type itself.
When to use gasket vs o-ring: application guide
Choosing between a gasket and an o-ring starts with the service conditions. For static plumbing, replacement in faucets and valve covers often uses a gasket due to its even load distribution and tolerance for minor surface irregularities. In rotating or reciprocating assemblies, such as pumps with moving shafts or impellers, an o-ring provides a reliable seal with less risk of movement-induced leaks. Appliances with flat lid seals or top faces, like some dishwasher gaskets or fridge door gaskets, commonly rely on gasket materials that resist immersion in detergents and temperature swings. In high-velocity or high-pressure environments, consider hybrid approaches where a gasket is used in conjunction with a seal ring or backup ring to prevent extrusion. Always verify material compatibility with the fluid, temperature range, and mechanical load. Gasket o ring terminology can confuse shopping lists, so consult your service manual or manufacturer datasheet for exact part numbers and cross-references.
Material options and compatibility
Materials drive performance for gasket o ring assemblies. Common options include NBR (nitrile) for oil resistance, EPDM for water exposure and hot fluids, silicone for high and low temperature ranges, and fluorosilicone for chemical resistance. Fluorinated elastomers (FKM/Viton) offer excellent chemical resistance at higher temperatures but can be pricier. PTFE cores or fillers improve chemical compatibility and temperature tolerance in some gaskets and o-rings. When selecting materials, check compatibility with the media (acids, solvents, cleaning agents), temperature cycle, and long-term aging behavior. For gasket o ring projects, you may encounter a mix of materials in a single assembly, so ensure the surface finishes and joint geometry support the chosen elastomer. Gasketed Analysis, 2026 emphasizes that a well-matched material profile reduces leaks and extends seal life across household and industrial contexts.
Sizing and fit: how to choose the right gasket o ring
Sizing involves three dimensions: inner diameter (ID), outer diameter (OD), and cross-section (CS). Even a tiny mismatch can cause leaks or extrusion. Measure the groove width and depth, the bore diameter, and any bolts or clamping surfaces that affect compression. Use calipers for precision, and always double-check against the manufacturer’s part number or a trusted cross-reference. In a gasket, look for compatibility with sealing surfaces; for o-rings, verify groove dimensions and surface finish. Don’t rely on generic sizes from a catalog—verify with the service manual or a sample part. This is where practical experience matters: a slightly oversized gasket may crack under torque, while an undersized o-ring can roll out of its groove under pressure. A careful sizing approach reduces the need for resealing later.
Installation tips and best practices
Preparation is key: clean mating surfaces thoroughly, remove old sealant residues, and inspect for nicks or scratches. For gaskets, apply a compatible sealant only when recommended by the manufacturer; for o-rings, a light lubricant compatible with the elastomer reduces installation damage. Align gasket or groove with the face, then tighten bolts in a criss-cross pattern to ensure even compression. If the joint is under pressure, hand-tighten until snug and then finish with the recommended torque, avoiding over-tightening that can crush the seal. Store spare seals in a cool, dry place away from direct sunlight, and rotate stock to keep material from aging in place. Maintain a simple inventory of sizes and material types used in your appliances so replacements are quick and accurate.
Common failure modes and troubleshooting
Leaks often stem from improper seating, surface damage, or incorrect material choice. Extrusion occurs when seals are too large for the groove or subjected to excessive pressure; compression set happens when elastomer loses elasticity after long heat exposure. For gaskets, checking for flatness and surface finish is essential; for o-rings, inspect groove edges for burrs and ensure the cross-section remains intact. Chemical attack can degrade elastomers; in such cases, switch to a chemically compatible material. If a leak persists after resealing, recheck the entire seal length and joint geometry, and consider replacing the flange or seat if wear is evident.
Maintenance and replacement guidelines
Set a replacement cadence based on usage. High-use appliances like dishwashers or water heaters may require more frequent gasket or o-ring checks. Look for visible signs of wear, cracking, or hardening when inspecting seals. Keep spares of the most common sizes and materials used in your home. Label parts after removal to simplify future maintenance. Prioritize a complete replacement rather than patching repeated leaks, especially in critical systems like gas appliances or hot water lines. Gasket o ring assemblies should be inspected during every service and replaced if any deformation is observed or if the seal cannot be seated evenly.
DIY safety and tools
Always disconnect power and depressurize systems before working on seals. Wear eye protection and gloves to prevent chemical exposure and pinch injuries. Useful tools include calipers for sizing, a feeler gauge for gap checks, a straightedge to verify flatness, and a soft-bristle brush for cleaning grooves. Use appropriate solvents or cleaners recommended for the specific gasket material and media. Never use damaged or aged seals; even a small defect can trigger leaks under pressure. When in doubt, consult manufacturer guidelines, and if the system handles hazardous substances, consider professional service.
Real-world scenarios: case studies
Case 1: Replacing a kitchen faucet gasket after a slow drip. The homeowner measured the nut diameter, selected a compatible EPDM gasket, and replaced the old seal. The result was a drip-free connection with a long-lasting seal. Case 2: A washing machine door seal experienced heat aging. By selecting a silicone-based gasket with high heat resistance and a compatible lubricant, the user restored a tight seal without leaks through multiple wash cycles. These scenarios illustrate that choosing materials aligned with exposure and movement yields durable results in a practical DIY context.
Choosing a supplier and getting the right part
Begin with the service manual or existing part numbers. Cross-references help when substitutions are necessary, but verify compatibility with media and temperature. When ordering, specify ID, OD, CS, material, and any groove dimensions to ensure a proper fit. If you encounter ambiguous catalogs, contact customer support with the exact model, media, and operating conditions. Favor suppliers that provide datasheets and compatibility charts, so you can confirm a gasket o ring choice matches your application precisely.
Comparison
| Feature | gasket | o-ring |
|---|---|---|
| Sealing style | flat, surface-based seal | groove-based, circular cross-section seal |
| Best use case | static, wide surfaces | dynamic/moving parts and grooves |
| Typical installation surface | flat mating faces | grooved or recessed seats |
| Material options | rigid and flexible gasket materials | elastomeric rings (NBR, EPDM, silicone, FKM) |
| Maintenance approach | inspect surface finish, reseal as needed | inspect groove, replace with standard sizes |
| Cost considerations | often lower per unit for large areas | often compact, cost varies by material |
Pros
- Clarifies when to use each seal type for DIY projects
- Emphasizes material compatibility to extend seal life
- Provides practical, step-by-step installation tips
- Covers common failure modes and troubleshooting
What's Bad
- Requires careful sizing and measurement; errors lead to leaks
- Material availability varies by region and supplier
- Some scenarios require professional evaluation or specialized tools
Neither seal type is universally better—choose based on motion, surface, and chemical exposure.
For most DIY gasket repairs, start with static, flat-face applications using a gasket. Opt for an o-ring when movement or pressure cycling is present. The right material and accurate sizing are the keys to reliability; with proper selection, both seal types can deliver durable performance.
Common Questions
What is the difference between a gasket and an o-ring?
A gasket creates a seal on a flat mating surface, distributing compression across a broad area. An o-ring seals in a groove with a round cross-section and is better for moving parts or pressure cycling.
Gasket seals flat surfaces; o-rings seal in grooves and handle movement better.
Can a gasket o ring be used in food-grade applications?
Yes, but only if the material is certified for food contact and compatible with the product. Check the manufacturer data sheet for approved grades such as compliant EPDM or silicone.
Material safety data is essential—choose food-grade options where required.
Is it okay to reuse gaskets or o-rings?
Generally, reuse is not recommended for critical seals. Elastomers can harden or deform after removal, increasing the risk of leaks; replace with a new gasket or o-ring.
Replace worn seals to avoid leaks.
How do I measure gasket or o-ring size accurately?
Use calipers to measure inner diameter, outer diameter, and cross-section. Compare with the part number or manufacturer reference and confirm groove dimensions if applicable.
Measure with calipers and verify against the spec sheet.
Where can I buy gaskets and o-rings?
Hardware stores, industrial supply houses, and gasket specialists carry a range of gaskets and o-rings. Look for compatibility charts and datasheets to ensure correct material and size.
Buy from reputable suppliers with clear specs.
Key Takeaways
- Assess motion first: static seals favor gaskets, dynamic seals favor o-rings
- Measure precisely: ID, OD, and cross-section matter for a leak-free fit
- Match materials to media and temperature to extend life
- Inspect seats and grooves for damage before resealing
- Always replace rather than reuse aged seals