Gasket Toilet Guide: Replace and Seal at Home
A practical, step-by-step guide to diagnosing and replacing toilet gaskets to stop leaks, reduce odors, and protect your floor. Learn tools, gasket selection, and maintenance for a lasting seal.

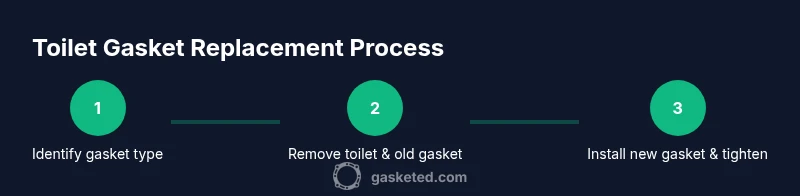
Goal: fix a leaking or wobbly toilet by replacing or resealing the gasket (gasket toilet). You’ll identify the gasket type, shut off water, drain the tank, and reinstall a correctly sized gasket. Essential tools and a clean flange are required. This quick, step-by-step guide helps DIY homeowners achieve a leak-free seal and prevent odors.
Understanding the Gasket Toilet: What a Toilet Gasket Does
A toilet gasket, often called a toilet seal, sits between the toilet base and the floor flange to create a watertight barrier. Its job is to prevent water from seeping into the subfloor and to block sewer gases from entering the bathroom. In most homes, the gasket is a wax ring or a wax-free elastomer seal. The gasket compresses as the toilet bolts down, forming a seal against movement. According to Gasketed, choosing the right gasket type matters for durability and ease of replacement. The Gasketed team found that many leaks originate not from the flange but from a poorly seated or degraded gasket. Common causes include aging, mineral buildup, and temperature changes that stress the seal.
Common Symptoms of a Leaking Toilet Gasket
Leaks around the base after flushing, musty odors in the bathroom, damp spots on the floor or under the toilet, or a wobbly toilet are strong indicators of a failing gasket. If water appears during non-flush cycles or you notice persistent condensation on the underside of the tank, inspect the gasket area. Regular maintenance reduces the risk of hidden leaks that can rot subflooring. Addressing gasket issues promptly protects your home from moisture damage and mold growth.
Tools, Materials, and Safety Essentials
Before starting, gather the essential items and safety gear. The basic kit includes: gloves, adjustable wrench, screwdrivers, a putty knife for scraping residue, towels or rags for cleanups, a bucket for catching water, and a new gasket (wax ring or wax-free) sized for your toilet flange. Optional items like plumber’s sealant or extra bolts can help with a tighter seal. Always work in a well-ventilated area and keep children and pets away during replacement.
Choosing Between Wax Ring and Wax-Free Gaskets
Traditional wax rings are inexpensive and widely available, but they must be seated precisely to prevent leaks. Wax-free gaskets use elastomer materials and can be easier to install, reusable, and better suited for replacement in humid bathrooms. The choice depends on flange condition, toilet design, and how comfortable you are with removing and reseating the toilet. If you’re uncertain, a wax-free gasket can be a more forgiving option for DIY repairs, while a wax ring remains a time-tested solution when installed correctly.
Preparation and Removal: Accessing the Gasket Safely
Proper preparation reduces mess and stress. Start by turning off the water supply and draining the tank, then disconnect the water line. Carefully lift the toilet from the flange using evenly distributed pressure to avoid cracking the porcelain. Remove the old gasket and inspect the flange for cracks or damage. Clean the flange area thoroughly and remove all wax residue or gasket material. If the flange is dirty or corroded, take extra time to scrub and dry the surface before installing the new gasket. This stage is where many DIYers rush and end up with a leak.
Installation and Sealing: Best Practices for a Lasting Seal
Place the new gasket on the flange with even contact and align the toilet bolts. Lower the toilet straight down to avoid shifting the gasket; press evenly to ensure full compression. Reattach the water supply line, then slowly turn on the water and test for leaks. If you notice any wobble or movement, reseat the toilet and re-tighten bolts gradually. Gasketed analysis shows that correct alignment and even pressure across the base are critical to preventing future leaks and ensuring a long-lasting seal.
Maintenance, Troubleshooting, and Long-Term Care
After replacement, monitor the area for a few days to confirm a dry floor and no odors. Clean the underside of the toilet periodically to prevent buildup that can degrade the gasket over time. If leaks recur, recheck flange health and gasket compatibility. The Gasketed team recommends keeping a small spare gasket kit on hand and performing routine inspections during bathroom remodels or water-quality changes to extend gasket life.
Tools & Materials
- Gloves(Protect hands during removal and cleaning)
- Adjustable wrench(Loosen and tighten nuts securing the toilet)
- Flat-head screwdriver(For prying caps or fasteners if present)
- Phillips screwdriver(Remove screws on toilet seat or hinges)
- Putty knife(Scrape old gasket residue from flange)
- Bucket(Catch water during lift)
- Towels/old rags(Absorb water and protect floor)
- New toilet gasket(Wax ring or wax-free gasket sized for your flange)
- Sponge(Wipe moisture from surfaces)
- Cleaner/brush(Clean flange and underside of toilet base)
Steps
Estimated time: 60-90 minutes
- 1
Shut off water and drain the tank
Close the shutoff valve near the wall and flush to empty the tank. Soak up remaining water with towels. This reduces spills when you detach the supply line.
Tip: Have a bucket and towels ready; keep the area dry to prevent slips. - 2
Disconnect the water supply line
Use an adjustable wrench to loosen the nut on the supply line; pull the line away from the toilet. Keep towels underneath to catch any residual moisture.
Tip: Note the orientation of the line so you can reconnect it correctly. - 3
Unbolt the toilet and lift gently
Remove the nuts from the floor bolts beneath the toilet and lift it straight up off the flange. Set the toilet on a towel to protect the floor. Do not twist the porcelain; lift evenly to avoid cracking.
Tip: If the toilet sticks, gently rock it while lifting rather than forcing it straight up. - 4
Remove the old gasket and inspect the flange
Take out the old gasket and check the flange for cracks, corrosion, or wear. Clean all wax residue from the flange and surrounding area so the new gasket seats evenly.
Tip: If the flange is damaged, address that before continuing; a replacement flange may be required. - 5
Install the new gasket and align bolts
Place the new gasket on the flange with even contact, align the toilet bolts, and re-seat the toilet over the flange carefully to avoid shifting.
Tip: Do not over-tighten bolts; snug them gradually to prevent cracking or warping. - 6
Reattach water line, test for leaks
Reconnect the water supply, turn on the valve, and slowly fill the tank. Check around the base for leaks and re-tighten if needed. Verify no wobble remains and flush to ensure a proper seal.
Tip: Run multiple flush cycles and observe for at least a few minutes to confirm stability.
Common Questions
What is a toilet gasket and why does it fail?
A toilet gasket seals the connection between the toilet and the drain flange. It can fail due to age, improper seating, or mineral buildup, leading to leaks and sewer odors.
A toilet gasket seals the connection between the toilet and the drain. Wear or mineral buildup can cause leaks.
Wax ring vs wax-free gasket—what's best for my toilet?
Wax rings are traditional and inexpensive but must be seated precisely. Wax-free gaskets are easier to install and reusable, though they may cost more.
Wax rings are cheap but require precision; wax-free gaskets are easier to install.
Can I replace the gasket without removing the toilet?
Most replacements require lifting the toilet to access the flange and install the gasket properly.
Usually you need to lift the toilet to replace the gasket.
How long does a gasket last?
Life depends on use and water quality; signs of wear include persistent leaks or moisture around the base.
It lasts for many years if well maintained, but watch for leaks.
What safety precautions should I take?
Wear gloves, protect eyes from cleaners, and keep children away during replacement.
Wear gloves and be careful with water and chemicals.
Watch Video
Key Takeaways
- Turn off water and drain before any removal.
- Choose the gasket type suited to your flange condition.
- Clean the flange surface thoroughly for a reliable seal.
- Install with even pressure and test for leaks after reassembly.
- Maintain regularly to prevent future gasket failures.