Replacing Front-Load Washer Gasket: DIY Guide
Learn how to replace the front-load washer gasket with a simple, step-by-step approach. This guide covers safety, parts, tools, and maintenance tips to prevent leaks and extend washer life.

You can replace a front-load washer gasket by safely disconnecting power, removing the front panel and door boot, installing the new gasket with clamps and clips, reseating the boot, and testing for leaks. Expect about 60–120 minutes and gather a replacement gasket kit, basic tools, and silicone lubricant as needed.
Why replacing front load washer gasket matters
According to Gasketed, replacing a worn or damaged front-load washer gasket is more than a cosmetic fix; it prevents leaks, reduces mold growth, and restores energy efficiency. A compromised gasket can allow water to seep into the cabinet, leading to rust on metal components and staining on laundry. It can also create a musty odor that seeps into clothes. In practice, many homeowners encounter occasional drips around the door seam after a cycle; if left unattended, those drips escalate into bigger leaks, potentially damaging floors and cabinets. The gasket isn't just a seal—it's the first line of defense against moisture that can compromise electrical components and create mold hazards. When you replace it, you also gain better door alignment, improved spin performance, and fewer wash-day headaches.
Before you begin, understand that gasket design varies by model: some use a molded door boot that sits between the tub and the door glass, while others use a direct seal around the opening. The right gasket is essential for a snug fit, especially for high-spin cycles that cause vigorous water movement. This guide focuses on standard front-load washing machines with a removable door boot; always check your model's manual for compatibility. With the right gasket, periodical maintenance becomes easier, leaks decrease, and your machine's life extends.
The journey you’re about to take is common among DIY homeowners. By following careful steps and using the correct parts, you can eliminate leaks, reduce odor issues, and save on costly service calls. The goal is a secure seal that holds up under high-spin cycles and frequent use, without damage to the washer cabinet or surrounding floors.
Understanding the gasket and common failure modes
The front-load washer gasket, or door boot, is a flexible rubber or silicone seal that keeps water inside the drum during cycles. Over time, rubber can dry out, crack, or invert, especially where it hugs the tub lip. Mold and mildew thrive in the moist environment behind the boot, causing odors and staining. Common failure modes include tears along folds, staining around the fold line, or a loose boot that sits away from the tub lip. Leaks are most often observed as damp spots along the bottom edge of the door, pooling on the floor, or a continuous drip during or after cycles. Another clue is an uneven door seal that looks misaligned when the door is closed. If you notice such signs, plan for a gasket replacement as part of preventive maintenance. Gasket quality varies by model and by boot thickness, so selecting the right part is essential for long-term reliability.
Mold buildup behind the boot is not just cosmetic; it can injure fabric care performance and corrode components if moisture sits against metal surfaces. Regular cleaning of the boot and the tub opening reduces this risk, but worn gaskets must be replaced to restore a watertight seal. In high-use households, a proactive replacement after several years is a wise move to avoid unexpected leaks and downtime. The gasket’s compatibility with your washer model determines the fit, so always verify part numbers and installation instructions before purchasing a new boot.
By understanding failure modes, you can identify when to replace the gasket and how to prepare for a successful replacement. This preparation minimizes downtime and maximizes the chance of a leak-free seal after reassembly.
Compatibility, parts, and where to buy the right gasket kit
Not all front-load washer gaskets are created equal. The most important step is to confirm compatibility with your specific washer model. Start by locating the model number on the appliance—usually found on a tag behind the door, on the frame, or near the bottom of the front panel. Once you have the number, cross-reference it with the gasket kit catalog or the manufacturer’s replacement parts list. In many cases, the replacement boot is sold as a complete gasket kit that includes the boot, mounting clamps, and sometimes a few clips. Buying a model-specific kit helps avoid fitment issues and ensures that the gasket accommodates your tub diameter and lip form. When possible, purchase from reputable retailers or the manufacturer’s parts channel.
In addition to the boot, you may need silicone lubricant to ease installation and prevent pinching as you seat the boot over the tub edge. Some kits come with pre-attached clamps; others require you to reuse existing clamps or purchase new ones. If your unit uses spring clamps or C-clamps, confirm the clamp type and the recommended torque or seating method from the kit instructions. Finally, consider replacement: if the tub lip is heavily corroded or the boot has deep cracking, a full replacement kit is the safer, longer-lasting option.
Keeping your receipt and noting the model number helps with future repairs and warranty considerations. A correctly matched gasket kit reduces the risk of leaks and ensures the door seals cleanly against the tub during cycles, even at high spin speeds. When a gasket kit aligns with your model and is installed with care, you’ll recover full sealing performance and restore peace of mind to your laundry routine.
Safety and prep before replacement
Safety comes first with any appliance repair. Unplug the washer from the wall outlet to prevent electric shock, and turn off both hot and cold water valves that feed the machine. If your home has older plumbing, you may opt to turn off the main water supply to avoid accidental leaks when disconnecting hoses. Remove any laundry from the machine and place a towel or shallow tray on the floor to catch water that may spill during the process. If your model uses hot water or you suspect blocked hoses, allow the tub to drain completely before starting work. Wear safety glasses and gloves to protect your hands from sharp edges, and keep a flashlight handy to illuminate hard-to-reach areas behind the front panel. Take time to read your model’s service manual or the gasket kit instructions, as some units require partial disassembly of the console or front panel to access the boot.
Clear the surrounding area of clutter to prevent tools from slipping and to reduce the risk of accidentally tugging on hoses. If you aren’t confident with electrical or plumbing tasks, or if the unit is under warranty, you may want to contact a professional. In many instances, a gasket replacement is straightforward, but some models require more extensive disassembly. Budget time for surprises, especially if you encounter stubborn clamps or hidden fasteners. A careful plan, the right parts, and clean work space dramatically increase the odds of a clean, leak-free result.
Tools and workspace setup (the essentials and why each matters)
Before you start, set up a clean, well-lit workspace. A large tub or floor space helps catch spills, and a low-to-the-ground setup makes it easier to maneuver parts without bending awkwardly. Gather the essential tools and materials listed in the Tools & Materials section, and lay out a small tray to hold screws and small parts so they don’t roll away. Having a disposable rag or paper towels on hand speeds cleanup. If you have a camera or phone, take photos at key points during disassembly to help with reassembly later. A magnetic screwdriver makes it easier to keep track of screws, while a non-marring plastic pry tool helps release clips without scratching plastic parts.
Keep a dedicated waste bag for old gaskets and packaging to avoid mixing them with your workspace debris. If you’re working on a noisy, vibration-prone area, consider placing a couple of folded towels under the washer to dampen movement during the procedure. A cordless flashlight can be handy when you’re looking behind the drum or under the boot. Finally, check that you have a sturdy seat or kneeling pad to reduce strain if you’re kneeling during the operation.
Common mistakes and how to avoid them
One of the most common errors is failing to verify model compatibility before purchasing a gasket kit. Always double-check the exact make and model to avoid buying the wrong boot size. Another frequent misstep is not fully removing the old clamps or tearing the boot when taking it off; use plastic pry tools and avoid prying the tub edge with metal tools. Improper seating of the new boot is another risk; ensure alignment marks on the gasket line up with the tub and door. Rushing the reinstallation without cleaning the tub lip can trap grit that wears the new gasket prematurely. Finally, neglecting to test for leaks after reinstalling can leave you unaware of a small, persistent drip. Test with gradually increasing cycles and inspect the door seal during and after each load.
To prevent pinch points, avoid forcing the boot over the lip; if resistance is strong, pause and re-check alignment before continuing. Using too much lubricant can weaken the gasket or attract lint, so apply only a light, even film where specified by the kit instructions. Keep mounting clamps snug but not overtight; overtightening can distort the boot and create leaks.
Reinstallation verification and testing
Once the gasket is seated and the door panel is reassembled, restore power and water supply. Run a short, empty wash cycle with a warm rinse to check for leaks around the door seam. Inspect both the inner tub seam and the outer boot surface after the cycle; if any moisture appears, pause the cycle and re-check seating and clamp tension. A slow, steady rinse with a low water level helps identify leaks without wasting time or water. If leaks persist, power down, drain, and re-check the clamps and the gasket alignment. It’s common to tighten clamps slightly after the first test, then re-test. Record any observations for future maintenance so you can address them quickly if they recur.
With a properly installed gasket, subsequent cycles should be leak-free, even during high-spin operations. If you notice persistent dampness after several tests, consider inspecting the tub lip for damage or seeking professional advice.
Maintenance tips to extend gasket life
After replacement, adopt a light maintenance routine to extend gasket life and prevent future leaks. Wipe the boot dry after each wash to reduce moisture that fosters mold. Periodically inspect the gasket fold for small cracks or tears, especially near the door; early detection helps avoid bigger problems. Keep the area around the door clean and free of lint and detergent buildup which can accelerate wear. When doing laundry, avoid overloading the drum; excessive weight places more stress on the boot and seals. If you have a high-capacity machine, consider running a maintenance cycle with a washer cleaner or an empty hot wash every few months to keep residue from accumulating on the gasket. Finally, if you ever notice a musty odor, treat the boot area with a mild, diluted vinegar solution and dry completely before loading laundry again.
Troubleshooting after replacement and when to call a pro
If you still see leaks after a gasket replacement, re-check the kit compatibility, verify all clamps are properly engaged, and inspect the tub lip for damage. A cracked or corroded tub lip cannot provide a proper seal, and may require professional assessment or a more extensive repair. If you experience persistent leaks, call a technician, especially if you see copper stains, unusual noises, or the door does not seal properly despite a correct gasket installation. In some cases, moisture behind the boot can indicate a deeper problem with the tub or suspension system. Remember to document what you did and what you observed during testing; this helps a pro diagnose the issue quickly. If the unit is under warranty, contact the manufacturer rather than attempting a repair that might void coverage.
Tools & Materials
- Replacement front-load washer door boot gasket kit(Model-specific; verify compatibility with your washer’s model number.)
- Flat-head screwdriver(For removing screws and clamps.)
- Phillips screwdriver(For various fasteners on the front panel.)
- Needle-nose pliers(Helpful for clamps and pinch rings.)
- Plastic pry tools (non-marring)(To release clips without damaging plastics.)
- Bucket or shallow pan(Catch any residual water during removal.)
- Towels or rags(Keep spills under control and protect flooring.)
- Silicone lubricant (neutral/food-grade safe)(Light lubrication helps seating; follow kit guidance.)
- Flashlight(Illuminates hard-to-see areas behind the boot.)
- Gloves(Protect hands while handling sharp clamps.)
Steps
Estimated time: 60-120 minutes
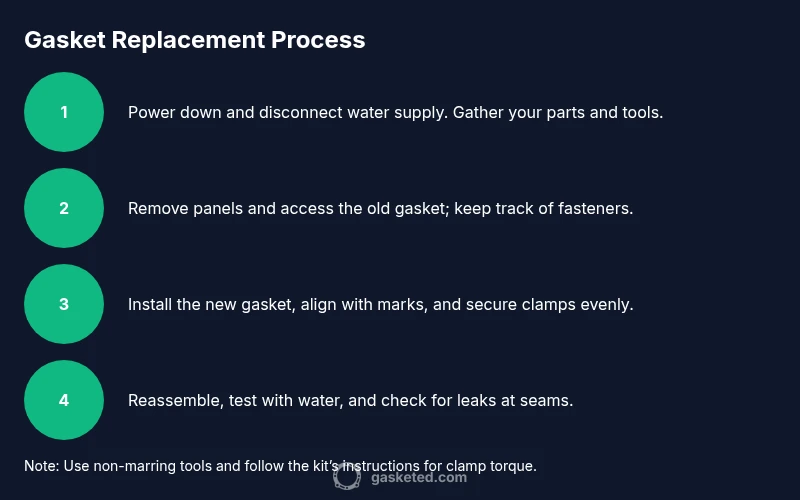
- 1
Power down and isolate the washer
Unplug the washer and shut off the water supply to prevent any accidental water flow during disassembly. This reduces the risk of electrical shock and water damage. Have a towel handy to catch any residual drips.
Tip: Take a quick photo of hose connections before detaching anything to aid reassembly. - 2
Access the door boot and front panel
Remove the toe kick or lower front panel as required by your model to access the door boot area. Be prepared for some water to come out; keep the bucket in place. Refrain from forcing panels apart to avoid damage.
Tip: Work slowly and keep track of screws by grouping them with a labeled container. - 3
Detach the old boot from the tub
Carefully loosen any clamps or spring bands securing the boot to the tub and the door frame. Gently pull the boot away from the lip, taking care not to tear the rubber.
Tip: If clamps are tight, use plastic pry tools to relieve pressure without scratching metal. - 4
Clean the tub lip and the boot groove
Use a damp cloth to wipe down the tub lip and the groove where the boot sits. Remove debris and dry the surfaces fully before proceeding to the new boot.
Tip: A clean seal is essential for preventing leaks—do not skip this step. - 5
Install the new gasket onto the tub lip
Slide the new boot onto the tub lip, aligning any marks with the tub’s alignment features. Start at one point and work around evenly to prevent twisting. Attach any required mounting features or clamps according to the kit instructions.
Tip: Leave the clamp marks aligned with the reference marks on the tub to ensure perfect fit. - 6
Secure the boot to the door frame
Fit the boot to the door edge, re-attaching it with the supplied clamps or clips. Ensure the boot sits evenly and does not pinch against the door.
Tip: Do not over-tighten clamps—excess pressure can deform the boot and compromise the seal. - 7
Reassemble the front panel and toe kick
Replace any panels or trim pieces you removed. Confirm that the door opens and closes smoothly without rubbing against the gasket.
Tip: Test the door alignment visually to confirm the boot seals evenly around the circumference. - 8
Test for leaks and finalize setup
Power the unit back on and run a short test cycle with water. Check the door seam and the base for any signs of leakage. If you see moisture, pause the cycle and re-check clamp tightness and gasket seating.
Tip: Start with a small load and low water level to minimize potential mess during testing.
Common Questions
Do I need to replace the entire door boot or just the gasket?
If you see tears, cracks, or stiffness in the boot, it’s best to replace the entire door boot gasket kit. This ensures a proper seal and prevents future leaks. In some models, the gasket is part of a single boot assembly, so replacing the kit is the simplest approach. Always verify compatibility with your model.
If the boot shows cracks or stiffness, replace the whole door boot kit for a reliable seal.
Can I replace a washer gasket myself if I’m not handy?
Yes, many DIY homeowners replace a front-load gasket safely by following model-specific instructions and using the right tools. Take your time, organize fasteners, and use non-marring tools to avoid damage. If you encounter unusual hardware or signs of tub damage, stop and consult a professional.
Yes, with the right parts and patience, you can do it yourself, but don’t rush if you hit a snag.
How long does gasket replacement take on average?
Most homeowners complete a gasket replacement in about 60 to 120 minutes, depending on the model and how easily clamps release. If you’re new to appliance repair, allow extra time for careful disassembly and reassembly.
Typically around one to two hours, depending on the model and your experience.
Will replacing the gasket fix leaks around the door completely?
A properly installed gasket usually removes door leaks, but persistent leaks can indicate other issues like a damaged tub lip or misaligned drum. If leaks persist after replacement, recheck seating and clamps and consider professional inspection for tub or frame damage.
Usually yes, but if leaks continue, there may be another problem.
When should I call a professional instead of DIY?
Call a pro if you notice severe rust, a cracked tub lip, or if the door alignment remains off after replacement. Also consider professional help if your model has nonstandard fasteners or electronics that feel risky to handle.
If you’re unsure or see deeper damage, a pro is the safer route.
Is there maintenance I should do to extend gasket life?
Regularly clean the boot and tub lip, avoid overloading the washer, and run a maintenance cycle every few months to prevent mold. Dry the boot after washing to minimize moisture buildup and inspect for wear at least twice a year.
Keep the boot clean, avoid heavy loads, and run periodic maintenance to prolong life.
Watch Video
Key Takeaways
- Plan ahead with model-specific parts and tools
- Ensure a clean seal by cleaning tub lip before installation
- Test thoroughly for leaks after reassembly
- Label screws and clips to speed future maintenance
- Maintain the gasket with regular cleaning to extend life