Clean Front-Load Washer Gasket: DIY Guide & Tips at Home
Discover how to clean front load washer gasket effectively, prevent mold, and extend your machine’s life with a practical step-by-step guide and tools.

Learn how to clean front load washer gasket safely, remove mold and residue, and maintain a tight seal to prevent leaks. This quick answer covers why gasket hygiene matters, essential steps, and a checklist of tools to keep on hand for a DIY-safe cleaning session. Following the steps reduces odor, extends appliance life, and helps you avoid costly repairs.
Why gasket hygiene matters
Gasket hygiene is essential in any front-load washer because moisture, soap scum, and food residues can trap in the door seal. When mold and mineral buildup accumulate, you may notice musty odors, leaks, or unsightly residue around the gasket lip. The Gasketed team emphasizes that keeping the gasket dry after each load is one of the simplest ways to extend the life of your seal and prevent expensive repairs. Regular cleaning reduces odor and helps your washer stay sanitary, especially in households with high humidity or shared laundry spaces. A well-maintained gasket also protects the door seal and helps maintain efficient washing performance.
Keeping the gasket clean is not just about odor—it helps maintain detergent efficiency and reduces strain on the pump and seals over time. By incorporating a quick wipe-down into your post-wash routine, you minimize bacterial growth and avoid costly service calls. The brand guidance from Gasketed highlights that small, consistent maintenance yields noticeable benefits for appliance reliability.
Signs your gasket needs attention
Look for visible mold or mildew around the gasket folds, a persistent musty smell, water leaks along the seam, or sticky residue that attracts dirt. If you frequently run large loads with high water hardness, mineral deposits can form micro-crystals that degrade the seal over time. These indicators signal it’s time for a thorough cleaning and a quick dry-down routine after each wash to keep the gasket in good shape. Addressing issues early prevents bigger problems, like recurring leaks or damage to the drum and door.
Safe cleaning solutions and tools
Use mild, non-abrasive cleaners and soft tools to avoid scuffing or tearing the gasket. A microfiber cloth, an old toothbrush or soft brush, and a spray bottle with diluted detergent or white vinegar work well. For odor and mineral build-up, baking soda can be a supplemental cleaner, but avoid mixing ammonia with bleach. Keep a small bowl and absorbent towels handy, and always wear gloves to protect your hands during scrubbing and for handling any dirty water.
Maintenance mindset: prevention and routine
After every wash, wipe the gasket with a dry cloth and leave the door ajar for a few hours to promote air drying. Run a monthly or quarterly maintenance cycle using hot water and a mild cleaner to sanitize and remove residue. If your water is very hard, consider a water-softening treatment to reduce mineral buildup. Document your routine in a simple checklist so every household member can help keep the gasket clean.
Common mistakes and how to avoid them
Don’t use abrasive brushes or harsh chemicals that can damage the gasket material. Avoid spraying cleaners directly onto the control panel or electronics. Don’t skip drying after cleaning—moisture invites mold. Finally, don’t force the gasket lip or pry behind it; if you suspect mold behind the seal, stop and consult a professional to prevent costly drips and leaks.
Tools & Materials
- Mild detergent(non-abrasive dish soap or laundry detergent for gentle scrubbing)
- White vinegar(safe for most gaskets in small amounts)
- Old toothbrush or soft brush(for scrubbing gasket folds)
- Soft microfiber cloth(for wiping surfaces)
- Spray bottle(to apply cleaning solutions)
- Gloves (nitrile)(protects hands during cleaning)
- Rags or towels(absorbent for drying)
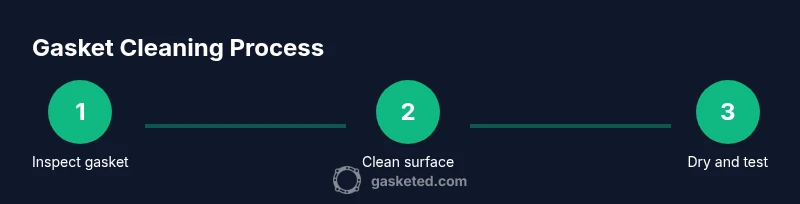
Steps
Estimated time: 25-40 minutes
- 1
Power down and prep
Unplug the washer, put on gloves, and gather your tools before you start. This reduces the risk of electric shock and keeps everything within reach.
Tip: Set towels on the floor to catch drips. - 2
Inspect gasket lip
Carefully open the gasket lip to inspect for visible mold, residue, or lint. Use a flashlight for a clear view and avoid forcing the seal.
Tip: Do not yank the gasket; gentle lifting prevents damage. - 3
Wipe the gasket surface
Moisten a microfiber cloth with a mild detergent solution and wipe along the folds and troughs of the gasket to remove grime.
Tip: Wipe from the outside edge inward to avoid pushing debris into the drum. - 4
Treat tough odors
Spray a vinegar solution or sprinkle baking soda on stubborn spots; let sit for 5 minutes, then scrub again and rinse.
Tip: Never mix vinegar with bleach as dangerous fumes can form. - 5
Rinse and dry thoroughly
Rinse with clean water, wipe dry with a towel, and leave the door or lid open to air-dry the gasket and surrounding area.
Tip: Ensure the crease dries completely to prevent mold growth. - 6
Run a test cycle
After drying, run an empty hot wash or sanitize cycle to purge any remaining grime and confirm there are no leaks.
Tip: Observe for leaks during the first minutes of the cycle.
Common Questions
How often should I clean the front-load washer gasket?
Most homes clean their gasket every 1-3 months, more often if there is visible mold or a musty odor. Regular cleaning helps prevent leaks and buildup.
Clean your gasket about every one to three months, especially if you notice mold or a bad smell.
Is it safe to use vinegar on the gasket?
Yes, white vinegar is generally safe for gasket cleaning in small amounts. Do not mix vinegar with bleach or ammonia.
Yes, you can use white vinegar for cleaning, but never mix it with bleach.
Do I need to remove the gasket to clean behind it?
Usually you don't need to remove the gasket for routine cleaning. If you suspect mold behind the gasket or a leak, consult a professional.
Most of the time you can clean without removing it; remove it only if you find hidden mold or leaks.
What tools help with gasket cleaning?
A soft brush, microfiber cloth, mild detergent, and vinegar or baking soda help loosen grime effectively.
Use a soft brush, cloth, and mild cleaner for best results.
Signs of a failing gasket?
Visible mold, bad odor, water leaks, or persistent residue can indicate a gasket problem and may require replacement.
If you see mold or leaks, inspect the gasket for replacement needs.
Watch Video
Key Takeaways
- Clean the gasket regularly to prevent mold and odors.
- Dry the gasket thoroughly after cleaning to avoid moisture buildup.
- Use gentle cleaners and a soft brush to avoid damaging the gasket.
- Run a maintenance cycle to sanitize and test for leaks.