How to Clean the Gasket in a Washing Machine: A Practical Guide
Learn how to safely clean your washing machine gasket to prevent mold, odors, and leaks. This DIY guide covers tools, steps, safety tips, and maintenance routines.

According to Gasketed, a clean gasket is essential for preventing odors and leaks in washing machines. This quick guide highlights safe tools, simple steps, and smart maintenance habits. By following these steps, you can keep the door seal fresh and extend the life of your appliance.
What a clean gasket does for your washing machine
The door gasket, especially in front-loading models, is a major trap for moisture, soap scum, and tiny debris. A clean gasket prevents foul odors, reduces the risk of mold, and minimizes the chance of leaks around the door. Regular attention to the seal also helps you spot wear before it becomes a costly repair. DIY gasket maintenance fits into a routine that anyone can perform with basic supplies.
Common gasket buildup and how it happens
Soap residue, body oils, and lint accumulate in the folds of the rubber gasket. In damp environments, mold can take hold in the creases, especially if the washer sits closed between cycles. Heavy usage, infrequent cleaning, and letting wet gaskets stay moist are the main contributors. Understanding these patterns helps you target the problem effectively and plan a quick cleaning ritual.
Safe cleaners and recipes for gaskets
Stick to mild, non-abrasive cleaners. A mixture of white vinegar and water or a soft paste of baking soda and water works well for most gaskets. Avoid bleach or solvent-based products that can degrade rubber. Always rinse thoroughly to remove cleaner residues, and dry the gasket after cleaning to discourage mold. Use a dedicated cloth for the gasket to prevent cross-contamination from other surfaces.
Cleaning steps for different washer types
Front-loading washers require opening the door and carefully pulling back the gasket folds to access the interior. Top-load machines may have a less accessible seal; still, wipe the exposed areas and inspect for trapped debris. For safety, never spray cleaners directly into the electronics area or behind the drum. Follow a consistent routine across models and consult your manual for any model-specific cautions.
Aftercare and maintenance to prevent mold and odors
After cleaning, dry the gasket thoroughly with a microfiber cloth and leave the door slightly ajar for a while to promote air circulation. Run an empty warm-water cycle with a cup of white vinegar every few months to maintain cleanliness, but avoid frequent chemical use. Regular inspections help you catch wear-and-tear early and keep your washer functioning efficiently.
Tools & Materials
- Microfiber cloths(At least 2 for switching and drying)
- Mild dish soap(For light cleaning)
- White vinegar(Dilute with water for interior spray)
- Baking soda(Make a soft paste for stains)
- Soft-bristled brush / old toothbrush(Reach folds and creases)
- Spray bottle(Mix cleaners and apply)
- Gloves(Protect hands from grime and cleaners)
- Towel or tray(Catch drips and protect surfaces)
- Optional: hydrogen peroxide(For stubborn mold, test first)
- Old rag or towel(For rapid wiping in tight folds)
Steps
Estimated time: 30-60 minutes
- 1
Power down and prep
Unplug the washer and shut off the water supply to prevent shock and leaks. Gather your supplies and place towels to catch drips before you begin.
Tip: Have a shallow tray handy if you expect drips from the gasket. - 2
Inspect gasket access
Open the door and gently pull back the gasket folds to inspect for mold, soap scum, or hair. Do not pry aggressively; use a plastic tool if needed.
Tip: Avoid tearing the folds; work slowly from the top and sides. - 3
Wipe away loose debris
Wipe the interior and folds with a damp microfiber cloth, using gentle motions to lift grime without forcing it deeper into creases.
Tip: Fold the cloth to reach tight corners and folds. - 4
Apply cleaning solution
Spray a vinegar solution or baking soda paste onto the gasket folds. Let it sit for 5–10 minutes to break down residue before scrubbing.
Tip: Do not oversaturate; avoid pooling behind the drum area. - 5
Scrub and rinse
Use the soft brush to scrub the folds, then wipe away residues with a clean cloth. Rinse with a damp cloth until no cleaner smell remains.
Tip: Rinse thoroughly to prevent remaining residues from attracting more grime. - 6
Dry and maintain
Dry the gasket completely and leave the door slightly ajar after use to promote air-drying and prevent mold.
Tip: Create a small routine: dry after each wash and clean monthly.
Common Questions
How often should I clean the washing machine gasket?
Aim to inspect monthly and clean when you notice residue, odors, or visible mold in the folds. Regular attention prevents buildup from becoming harder to remove.
Check the gasket monthly and clean when you notice odors or visible grime to keep your washer fresh.
Is vinegar safe to use on the gasket?
Yes. Diluted white vinegar is generally safe for rubbers and seals. Rinse well after treatment and avoid concentrated solutions on sensitive models.
Yes, use diluted vinegar and rinse thoroughly after use.
Can I use bleach on the gasket?
Bleach can degrade rubber gaskets and corrode metal components. Stick to vinegar or baking soda for routine cleaning and reserve bleach for other surfaces if recommended by manufacturers.
No—bleach can damage the gasket; use safer cleaners instead.
What are signs of a torn or worn gasket?
Look for visible cracks, tears, or gaps in the seal, frequent leaks from the door, or persistent odors despite cleaning. These indicate replacement may be necessary.
Cracks or tears, leaks around the door, or persistent odors mean you may need a gasket replacement.
Should I run a cleaning cycle after gasket cleaning?
Running an empty hot-wash cycle with a little vinegar can help refresh the drum and prevent future buildup. Avoid overusing cleaners in a single cycle.
Yes, a quick hot cycle with vinegar helps keep the drum fresh after gasket cleaning.
What if the gasket is hard to access or very dirty?
In some models, you may need to consult the manufacturer’s manual or seek professional service if access is limited or if you discover mold behind the gasket.
If the gasket is hard to reach, check the manual or contact a pro for help.
Watch Video
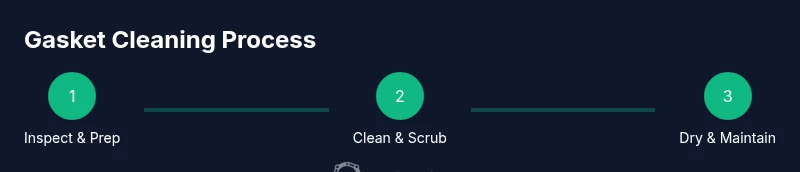
Key Takeaways
- Inspect and clean the gasket regularly.
- Use safe cleaners like vinegar and baking soda.
- Dry thoroughly and keep the door ajar after use.
- Establish a monthly gasket maintenance routine.
- Replace a damaged gasket rather than continuing to use a compromised seal.