Can Head Gasket Cause a Coolant Leak? Causes, Diagnosis, and Fixes
Discover whether a blown head gasket can cause a coolant leak, how to diagnose it safely, and practical DIY steps for homeowners. Learn symptoms, tests, and when to call a pro, with a clear troubleshooting path to prevent engine damage in 2026.

Yes, can head gasket cause coolant leak? In many engines, a blown head gasket is a common source of coolant loss. The gasket failure creates a path for coolant to escape through the radiator, under the head, or into the oil. The quickest way to confirm is a pressure or leak-down test, followed by a targeted gasket diagnosis and repair plan.
How a head gasket relates to coolant leaks
Can head gasket cause coolant leak? Yes, and it’s a frequent culprit behind mysterious coolant loss. The head gasket sits between the engine block and cylinder head, sealing coolant passages as the engine heats and cools. When the gasket fails, coolant can be pushed into the combustion chamber, mix with oil, or escape through external coolant channels such as radiators or hoses. In some failures, a cracked head or warped cylinder head mimics gasket symptoms, complicating diagnosis. According to Gasketed, head-gasket failures are a common source of coolant loss across a variety of engines, especially under heavy load or high temperatures. The consequences aren’t limited to a puddle under the car — overheating and cross-contamination of oil and coolant can accelerate engine damage if not addressed promptly. This article adopts a practical, step-by-step approach tailored for DIY enthusiasts and homeowners who want an actionable plan rather than guesswork. The goal is to help you identify if the head gasket is involved and move toward a safe repair path with minimal risk of further harm to the engine.
Symptoms that point toward a gasket-related coolant leak
Several telltale signs can indicate a gasket issue, though none alone definitively proves it. Expect to see a combination of symptoms such as persistent coolant loss without a visible external source, milky oil, white exhaust with a sweet odor, or rapid overheating after a cooldown period. If the coolant reservoir level drops repeatedly and you notice cooling-system pressure building up or bubbling in the radiator or reservoir, a gasket problem becomes more plausible. Another subtle cue is contamination of coolant with oil, producing a thin foamy layer or a distinct oily sheen. For DIYers, documenting color changes, odor, and the engine’s heat cycle helps when you consult a service technician. Remember that some leaks originate from cheaper components like hoses or clamps, so you should still perform a comprehensive check before assuming the gasket is at fault. The Gasketed team emphasizes collecting evidence first—symptoms, engine conditions, and test results—to guide a precise diagnosis.
How to tell gasket leaks from other cooling-system faults
Not every coolant leak points to a head gasket. Leaks from hoses, radiator seams, water pumps, or heater cores can mimic gasket symptoms. A key distinction is cross-contamination: if you see oil droplets in coolant or milky oil, the issue may involve the gasket or head. Exhaust smoke that smells sweet and white can indicate combustion gases entering the cooling system, a strong hint toward gasket-related failure. Coolant in the oil is another red flag, producing a coffee-like emulsion. Right away, you should also check for external sources: a loose radiator cap, a cracked reservoir, or a corroded hose clamp can create leaks that look like a gasket problem but are easier to fix. In our experience, most DIY diagnostic efforts that stop at “leak found” without testing often miss gasket-related conditions. A measured approach—pressure testing, dye testing, and cross-checking oil and exhaust—yields the most reliable results without unnecessary work.
Diagnostic steps you can perform at home (and what to look for)
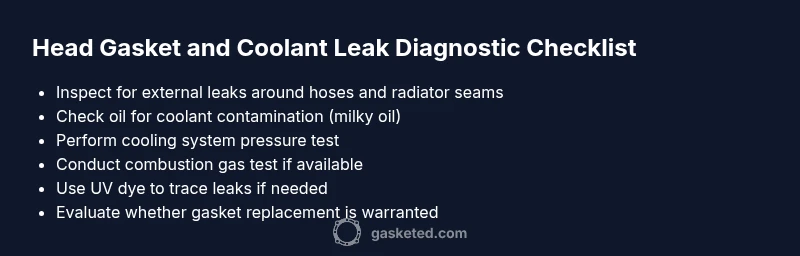
Before disassembling anything, there are practical tests you can perform safely. Start with a visual inspection: look for crusty residue around hose connections, radiator seams, and the cylinder head area. A cooling-system pressure test helps determine if the leak occurs under pressure; you’ll monitor the pressure gauge and observe if the system holds steady. A combustion-gas test or an exhaust-sniff test can detect gases entering the cooling system, which strongly implies a gasket or head issue. Checking oil for coolant contamination is essential; milky or frothy oil indicates cross-contamination. If you’re comfortable, you can perform dye tests by introducing UV dye into the coolant and using a blacklight to trace leaks. Throughout, document each finding with dates, temperatures, and observed symptoms to build a clear narrative for a professional evaluation if needed. This methodical documentation aligns with Gasketed guidance for reliable results in 2026.
What to do next: decision points for DIY vs professional help
If tests suggest a gasket fault, you face a repair decision. Some gasket leaks are small and manageable with a head-gasket sealant, while most require head removal and gasket replacement. If you observe severe overheating, rapid coolant loss, or strong cross-contamination signs, it’s safer to involve a professional. The repair’s complexity depends on engine layout, head material, and whether machining is needed. In many cases, a head gasket replacement also involves inspecting the head for warping and checking the interfacial surfaces for wear. The risk of improper torque, improper gasket seating, or misalignment is high, so many DIYers limit themselves to the diagnostic phase and then hand off to a qualified shop. The Gasketed team recommends a careful cost-benefit assessment and a clear work plan before committing to major disassembly.
Tools and safety you should not overlook
When handling cooling-system work, use eye protection and gloves, and ensure the engine is cool before touching hoses or caps. Have a catch pan ready for any residual coolant and dispose of used antifreeze properly. A robust torque wrench, a clean work area, and a service manual specific to your engine are invaluable. If you lack the required tools or experience, don’t push your luck—head gasket work is high-stakes, and missteps can cause further damage. Remember to keep the work area well-lit and organized to prevent missing small fasteners. The aim is to maintain a clean workflow that minimizes risk while delivering a reliable repair outcome.
How Gasketed guides you through this repair journey
Gasketed emphasizes safe, practical guidance for DIYers tackling gasket-related leaks. The path starts with suspicion, followed by controlled testing, and ends with a repair plan that suits your skill level and budget. Our approach is to equip you with decision points, clear safety notes, and checklists that keep you moving forward. Whether you’re replacing a simple valve-cover gasket or a full head-gasket job, the emphasis is on methodical troubleshooting and preventing future failures. By applying the step-by-step troubleshooting mindset, you’ll gain confidence, reduce downtime, and minimize the risk of a costly misstep. This is how the Gasketed Team recommends approaching gasket and coolant challenges in 2026.
Steps
Estimated time: 6-12 hours
- 1
Prepare and safety check
Ensure the engine is cool, disconnect the battery, and have a safe workspace with a drain pan ready. Note all visible symptoms and coolant levels before you start disassembly. Gather the service manual for your engine and set up a clean area to work.
Tip: Always work with a cold engine and never open hot cooling-system caps to avoid scalding injuries. - 2
Perform a cooling-system pressure test
Attach the pressure tester to the radiator cap or reservoir port and pressurize the system to the manufacturer’s spec. Watch for steady pressure loss and note where it occurs (radiator, hose fittings, or engine block). This step helps localize external vs internal leaks.
Tip: If you see sustained pressure loss, don’t continue without addressing obvious external leaks first. - 3
Check for cross-contamination in oil and exhaust
Inspect the engine oil for milky coloration and check for white smoke from the exhaust. Both can indicate coolant entering the oil or combustion chamber, respectively, which strongly points to gasket or head issues.
Tip: A milky oil layer is a critical sign and should prompt immediate further testing. - 4
Use a coolant-dye test or UV dye
Add UV dye to the coolant and run the engine briefly, then inspect hoses, radiator seams, and the head gasket area with a UV light. Dye traces help reveal small leaks that aren’t obvious to the naked eye.
Tip: Make sure to follow the dye product instructions and dispose of used coolant properly. - 5
Decide on repair path
If tests point to a gasket/head issue, evaluate whether gasket sealer is a temporary fix or a full head-gasket replacement is required. Consider engine condition, head warp potential, and machining needs.
Tip: Head gasket repairs are high-stakes; many DIYs escalate to professional service for reliability. - 6
Reassemble, refill, and retest
Reassemble with the correct torque, replace any damaged components, refill with the proper coolant mix, and run the engine to operating temperature while monitoring for leaks and proper temperature readings.
Tip: After repair, perform a second pressure test to confirm no remaining leaks.
Diagnosis: Persistent coolant loss with possible overheating
Possible Causes
- highHead gasket failure allowing coolant into combustion chamber or oil
- mediumExternal radiator or hose leak
- lowWater pump or thermostat failure causing improper flow
Fixes
- easyPerform a cooling-system pressure test to locate the leak source
- easyConduct a combustion-gas test to confirm gasket involvement
- easyInspect oil and coolant for cross-contamination and inspect the head and block surface
- hardIf gasket failure is confirmed, plan a head gasket replacement and related inspections
Common Questions
Can a head gasket leak cause coolant loss by itself, or do hoses always leak first?
A head gasket can cause coolant loss directly, especially if it fails between coolant passages. However, hoses, clamps, and radiators are also common leak sources. A systematic test helps determine the exact cause.
A head gasket can cause leaks, but don’t assume hoses are the culprit without testing.
What are the most reliable signs of a blown head gasket?
Look for milky oil, white exhaust with sweet smell, persistent coolant loss without external leaks, overheating after a cooldown, and bubbles in the radiator. These signs together strongly indicate a head gasket issue.
Milky oil and coolant mixing are strong indicators of a blown head gasket.
Should I drive the car if I suspect a head gasket problem?
No. Driving a car with a suspected head gasket leak can cause severe engine damage, including warping the head or damaging bearings. Seek professional evaluation before driving long distances.
If you suspect a gasket issue, avoid driving the car until it’s diagnosed.
How much does a head gasket replacement typically cost?
Costs vary by engine type, machining needs, and labor. Expect a broader range and obtain multiple quotes; avoid low-cost work that may overlook head or surface damage.
Costs vary; get several quotes and ask about head surface inspection and machining.
What should I do if I notice coolant in the oil?
That’s a strong hint of gasket or head damage. Stop driving, perform diagnostics, and arrange a professional assessment to prevent further engine damage.
Coolant in oil is a red flag—stop driving and seek repair.
How long does a head gasket repair typically take?
Repair duration depends on engine model and head condition, often requiring a full teardown. Plan for a multi-hour to multi-day process and ensure you have a trusted shop for accurate repair.
Expect several hours to a day or more, depending on your engine and head condition.
Watch Video
Key Takeaways
- Identify gasket-related leaks with methodical tests.
- Differentiate gasket leaks from hose or radiator issues.
- Document symptoms and test results for accuracy.
- Use dye testing to pinpoint small leaks.
- Consider professional help for head gasket replacement.
- Prevent future leaks with regular coolant system maintenance.