Head Gasket and Coolant Leak: Troubleshooting Guide
A practical, urgent troubleshooting guide for head gasket and coolant leak issues. Learn diagnostics, step-by-step fixes, and when to call a professional to protect your engine.

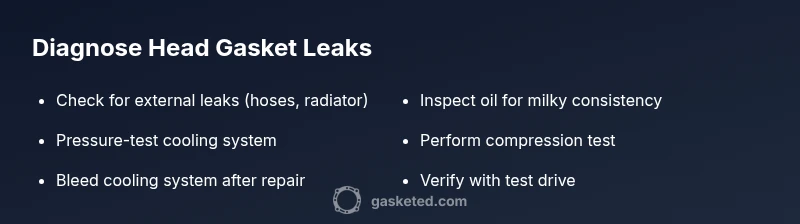
A head gasket failure is the most likely cause of a head gasket and coolant leak. If you notice white exhaust, milky oil, or sudden coolant loss accompanied by overheating, stop driving. Quick checks: inspect for external leaks, pressure-test the cooling system, and perform a basic compression test. For DIY repairs, proceed cautiously; many fixes require professional equipment and engine teardown.
What the symptom usually means
When a vehicle exhibits a head gasket and coolant leak, the engine is signaling that the gasket seal between the cylinder head and engine block may not be performing as designed. According to Gasketed, coolant leaks tied to gasket failures often present with a mix of symptoms that can be misread as simple hose leaks. The most telling signs include white exhaust visible from the tailpipe, a sudden drop in coolant level without an obvious external puddle, and occasional milky or foamy oil on the dipstick or inside the oil filler cap. These indicators, especially when combined with overheating, should trigger an urgent diagnostic workflow. Early detection is essential because a failing head gasket can allow combustion gases into the cooling system, pressurize the cooling loop, and accelerate engine damage if ignored. A systematic approach helps you determine whether the leak is external or a gasket-related issue, while you gather the data needed for a professional diagnosis. The goal is to avoid guessing and to confirm the root cause before proceeding with repairs.
Steps
Estimated time: 2-6 hours
- 1
Stop driving and let the engine cool
If overheating is present, pull over to a safe area, turn off the engine, and wait until the radiator and engine parts are cool to touch. Opening a hot cap or radiator while the system is pressurized can cause severe burns. Gather your plan and tools while the engine rests.
Tip: Ensure parking brake is set and wheel chocks are in place before you work. - 2
Check for visible leaks and coolant level
Look under the vehicle for fresh puddles and inspect hoses and clamps for cracks or seepage. Check the coolant reservoir for level changes and the radiator cap for proper seating. Note the color and smell of any spilled fluid to help identify contaminates.
Tip: Take photos of any leaks and note their location to guide future testing. - 3
Inspect oil and coolant for cross-contamination
Inspect the oil on the dipstick or filler cap for a milky, frothy appearance which signals coolant in the oil. Look for coolant in the radiator or reservoir with a suspiciously high moisture content. Cross-contamination suggests a gasket issue rather than a simple leak.
Tip: Wipe a sample on a clean surface to compare color and texture accurately. - 4
Perform a cooling-system pressure test
Attach a cooling-system pressure tester to the radiator neck or expansion tank and pressurize the system to the manufacturer’s spec (typically 15–20 psi). Watch for drop-offs in pressure and locate leaks using soapy water or a dye test. A steady loss implies a leak somewhere in the cooling loop.
Tip: Follow the tester’s manual for safe pressurization and release. - 5
Run a compression test on each cylinder
Using a compression gauge, test each cylinder and compare readings. A single low reading or a pattern of low readings can indicate a head-gasket problem, especially when paired with coolant loss and overheating.
Tip: Take multiple readings per cylinder and ensure the starter battery is fully charged. - 6
Evaluate for exhaust or intake-related signs
Check for white smoke that indicates exhaust gas in the cooling system, or for a milky appearance in the coolant that suggests gasket failure. Inspect the intake manifold and related gaskets if leaks are found around the intake area.
Tip: Document any visual evidence to support a professional diagnosis. - 7
Decide on repair path and safety precautions
If tests point to a head gasket issue, plan for a gasket replacement which is a major job. External leaks or hose/radiator issues may be doable with basic tools. Always observe safety protocols and avoid forcing components that are tight or hot.
Tip: Ask a trusted shop or consult a service manual to estimate time and cost. - 8
Repair planning and professional help
Schedule a repair with a qualified technician if a head gasket failure is confirmed. A professional shop will perform head inspection, head resurfacing if needed, and torque checks to spec. Ensure you understand the parts list and warranty coverage for the work.
Tip: Bring test results, photos, and notes to the shop for an accurate quote. - 9
Post-repair tests and verification
After any repair, refill and bleed the cooling system, then start the engine and monitor for normal operating temperature. Recheck for leaks at 24–48 hours of operation and ensure the coolant level remains stable.
Tip: Keep the vehicle in a safe, well-ventilated area during the initial test drive.
Diagnosis: Engine overheating with coolant loss and possible external leaks
Possible Causes
- highBlown head gasket allowing combustion gases into the cooling system
- mediumCracked or warped cylinder head
- lowExternal coolant leak from hoses, radiator, or water pump
- lowFaulty intake manifold gasket
Fixes
- easyCooling-system pressure test to locate leaks
- mediumCompression or leak-down test to verify head-gasket integrity
- easyInspect and repair external leaks (hoses, clamps, radiator cap)
- hardIf head-gasket failure is confirmed, plan replacement or professional repair
Common Questions
What are the most common signs of a head gasket failure?
Milky oil, white exhaust, overheating, and sudden coolant loss are among the most common signs of a head gasket failure. If you observe these together, investigate further with tests before driving.
Common signs include milky oil, white exhaust, overheating, and coolant loss. If you see these, test before driving.
Can a coolant leak come from sources other than the head gasket?
Yes. Leaks can originate from hoses, radiator, water pump, or the radiator cap. A pressure test helps differentiate external leaks from internal gasket issues.
Yes—hoses, radiator, or water pump can leak. A pressure test will tell you if it's the gasket.
Is it safe to drive a car with a suspected head gasket leak?
No. Driving with a suspected gasket leak risks severe engine damage due to overheating and loss of coolant.
No, don't drive. A head gasket leak can overheat the engine and cause serious damage.
How long does a head gasket replacement typically take?
Time varies by vehicle, but most replacements take several hours to a full day, depending on access and head condition.
Usually several hours to a full day, depending on the engine and access.
What maintenance helps prevent head gasket leaks?
Regular coolant flushes, correct coolant mix, and avoiding overheating are key preventive measures.
Regular coolant flushes and avoiding overheating help prevent leaks.
Should I use sealants as a DIY fix for a head gasket problem?
Sealants are not a guaranteed fix and can complicate repairs. If you suspect a gasket issue, consult a professional.
Sealants aren't a guaranteed fix and can complicate repairs. Get a pro diagnosis.
Watch Video
Key Takeaways
- Inspect early and stop driving when overheating.
- Use a cooling-system pressure test and compression test to confirm head-gasket issues.
- External leaks are easier to fix; gasket replacements are complex and costly.
- Seek professional help for head gasket replacement to avoid engine damage.