Why Head Gasket Leak: Diagnosis, Repair, and Prevention
A practical, urgent guide to diagnosing and fixing head gasket leaks. Learn signs, tests, step-by-step repair, safety tips, and prevention to protect your engine.

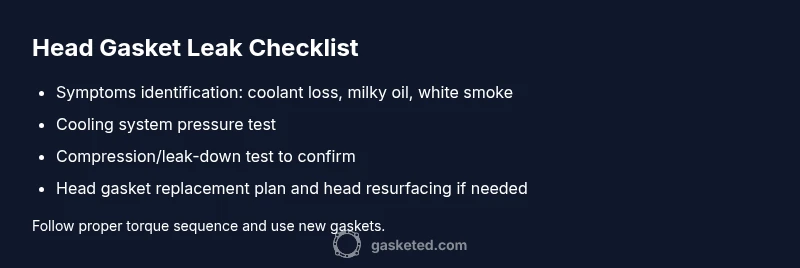
The most likely signs of a head gasket leak are coolant loss, white exhaust smoke, and oil that looks milky. Overheating or a failing cooling system is typically the root cause. For a quick fix, stop driving, perform a coolant pressure test, and begin planning a gasket repair or replacement. This article outlines a practical, step-by-step approach.
Why Head Gasket Fail: Root Causes
The question of why head gasket leak happens centers on heat, pressure, and the sealing surfaces within the engine. According to Gasketed, the head gasket sits between the engine block and cylinder head, and it must seal coolant passages, oil routes, and combustion chambers simultaneously. When heat or pressure exceed designed limits, the gasket can warp, crack, or lose sealing capability at critical passages. Common root causes include overheating caused by a blocked radiator, a failed thermostat, or low coolant levels; warped or cracked cylinder heads from prior overheating; and improper head bolt torque during installation. Aging gasket material can become brittle over time, especially in engines subjected to frequent high-RPM operation or aggressive driving. By understanding these factors, you can spot early warnings and avoid driving with a suspected leak, which risks more extensive engine damage. This is a clear reminder of the link between why head gasket leak and failures in cooling, lubrication, and combustion management.
Signs that Point to a Head Gasket Issue
Early indicators are often subtle but important. Watch for steady coolant loss without a visible leak, a drop in coolant level, or milky residue on the oil cap indicating oil-coolant mixing. More obvious clues include white smoke after startup, sweet antifreeze smell in the exhaust, or oil that looks emulsified. You may also notice overheating, bubbling in the radiator, or coolant appearing in the oil. These signs warrant a formal diagnosis because multiple symptoms occurring together point more strongly toward head gasket failure than a simple leak in a hose. Remember that some symptoms mimic other cooling issues, so rely on tests rather than feeling rushed to conclusions.
The Diagnostic Route: From Symptoms to Confirmation
Diagnosis begins with confirming the problem through tests rather than guesswork. Start with a visual inspection of hoses, clamps, and the radiator cap for external leaks. Next, perform a coolant system pressure test to see if the system holds pressure or if leaks are present. A compression or leak-down test can identify compromised cylinder heads or gasket passages, while a chemical block test detects exhaust gases in the cooling system. If the tests indicate a gasket failure, you’ll need to plan for a head gasket replacement and possible head resurfacing. Keep in mind that false positives can occur; a coolant dye test can help pinpoint leaks not visible to the naked eye. Document all findings for a clear repair plan. This methodical approach reduces risk and prevents unnecessary repairs.
Step-by-Step Repair Path for a Head Gasket Leak
Repairing a head gasket leak is a major job that requires careful planning and the right tools. Start by safely raising and securing the vehicle, disconnecting the battery, and removing components that block access to the cylinder head, such as the intake manifold, exhaust components, and timing cover. Inspect the cylinder head and block faces for warping using a straight edge and feeler gauge, and surface them if necessary. Install a new head gasket with the correct orientation, and torque the head bolts in the manufacturer’s sequence using the specified torque values. Reassemble components, bleed the cooling system, refill with fresh coolant, and perform a thorough leak check. If the head or block is warped beyond specs, or the engine has damaged valves or pistons, additional machine work or engine replacement may be needed. This is a high-difficulty repair that benefits from service manuals and professional guidance.
Safety, Tools and Common Mistakes
Working on the head gasket demands respect for high-temperature components and pressurized coolant systems. Always disconnect the battery before starting, and ensure the engine is cool before removing plugs or hoses. Use proper torque sequence and new gaskets, seals, and hardware. Be mindful of coolant spills and wear eye protection when dealing with chemicals and cleaners. Common mistakes include reusing old gaskets, neglecting precise head-surface resurfacing, and failing to purge air from the cooling system, which can cause overheating again. If you’re unsure at any step, seek professional help to prevent costly damage.
Prevention and Longevity: How to Stop Future Leaks
Preventing future head gasket leaks focuses on cooling-system reliability and proper engine operation. Regularly inspect hoses, clamps, and the radiator for leaks, maintain coolant at the correct level and mix, and replace the thermostat as needed. Use the recommended coolant type for your engine and flush the system on schedule. Avoid prolonged overheating by fixing overheating causes promptly, such as a stuck thermostat or a faulty radiator. When performing maintenance, ensure proper torque on head bolts and use gasket sealants only when specified by the manufacturer. Early preventive maintenance reduces the odds of a repeated failure and extends engine life.
Steps
Estimated time: 8-12 hours
- 1
Prepare and safety check
Park on a flat surface, disconnect the battery, and allow the engine to cool completely. Gather the right tools, including torque wrench, straight edge, and new gasket kit. Label wires and hoses for easier reassembly.
Tip: Organize fasteners with magnetic trays and take photos before disassembly. - 2
Drain and prep cooling system
Drain coolant and remove the radiator cap to relieve pressure. Disconnect hoses feeding the cylinder head area and prepare the work area to prevent spills. Inspect coolant for contamination.
Tip: Dispose of old coolant properly and measure volume to refill accurately. - 3
Remove head components
Remove the intake, exhaust, and timing components carefully to access the cylinder head. Keep track of timing marks and torque settings. Inspect the surfaces for debris that could affect sealing.
Tip: Take notes and photos of the timing chain/belt alignment. - 4
Inspect surfaces and gasket surfaces
Check the cylinder head and block faces with a straight edge for warping; replace or machine as required. Clean all sealing surfaces to a pristine finish before gasket installation.
Tip: If warped beyond spec, plan professional resurfacing. - 5
Install new head gasket and components
Place the new head gasket with correct orientation. Reinstall the head and torque bolts in the manufacturer sequence to the specified values. Reassemble intake/exhaust and sensors.
Tip: Use a fresh gasket sealant only if specified by the factory manual. - 6
Refill, bleed, and test
Refill coolant, bleed air from the cooling system as directed, and run the engine to operating temperature to purge air. Check for leaks and verify proper temperature and pressure readings.
Tip: Keep an eye on the temperature gauge during initial startup. - 7
Final checks and road test
Perform a road test after leaks are cleared and fluids stabilized. Recheck oil and coolant for signs of contamination. Reset maintenance reminders and share a diagnostic report with your records.
Tip: Document all steps and part numbers for future service.
Diagnosis: Coolant loss with milky oil and possible white steam
Possible Causes
- highOverheating due to cooling system failure
- mediumWarped or cracked cylinder head from prior overheating
- lowExternal coolant leak or intake gasket issue
Fixes
- easyPerform a cooling system pressure test to identify external leaks or cap issues
- easyConduct a compression or leak-down test to confirm gasket involvement
- hardPlan head gasket replacement with possible head resurfacing if warped
Common Questions
What are the most common signs of a head gasket leak?
Common signs include coolant loss with no visible leak, milky oil, white exhaust smoke, and overheating. Test results will confirm whether the leak involves the gasket or other cooling components.
Typical signs are coolant loss, milky oil, white smoke, and overheating. Tests can confirm if the gasket is the culprit.
Can I weld or seal a head gasket leak without removing the engine?
In some rare cases a professional might seal a minor external leak, but a true head gasket leak usually requires engine disassembly and gasket replacement.
Usually you need to disassemble the engine and replace the gasket.
How much does repairing a head gasket leak typically cost?
Costs vary widely by region and vehicle, and depend on whether machine shop work is needed for head resurfacing. Expect a substantial investment in parts and labor.
Costs vary a lot, depending on the engine and whether resurfacing is needed.
Is it safe to drive a car with a suspected head gasket leak?
No. Driving with a suspected head gasket leak can cause severe engine damage, including warped heads and oil contamination. Seek professional evaluation promptly.
No—it's risky to drive. Get a proper diagnosis before driving again.
What maintenance helps prevent head gasket leaks?
Regular cooling-system maintenance, using the manufacturer-recommended coolant, and timely replacement of worn hoses and thermostats reduce leak risk. Keep the coolant at proper levels and fix overheating promptly.
Keep the cooling system in good shape and replace worn parts before problems start.
What does milky oil indicate in relation to head gaskets?
Milky oil typically indicates coolant mixing with oil, a classic sign of head gasket compromise or a cracked head. Immediate diagnosis is advised.
Milky oil usually means coolant has mixed with oil, a red flag for gasket or head damage.
Watch Video
Key Takeaways
- Identify warning signs early to prevent engine damage.
- Use systematic tests to confirm gasket leaks before repair.
- Follow manufacturer specs for torque and gasket orientation.
- Consider professional resurfacing if the head is warped.
- Prioritize cooling-system maintenance to prevent future leaks.