What's the difference between a head gasket and a valve gasket? A practical comparison for DIYers
An analytical guide explaining what's the difference between a head gasket and a valve gasket, including location, role, failure modes, diagnostics, and DIY vs professional repair considerations.

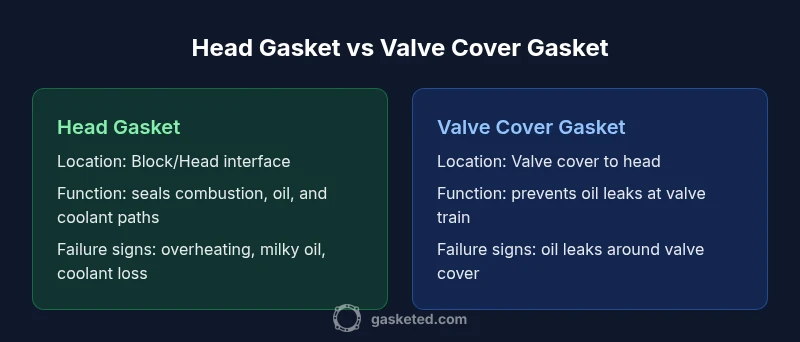
What's the difference between a head gasket and a valve gasket? In automotive terms, the head gasket seals the engine block to the cylinder head, managing oil and coolant passages and maintaining compression. The valve gasket (commonly the valve cover gasket) seals the valve cover to the head, preventing oil leaks around the valve train. This quick comparison sets up a deeper, practical guide.
What's in a gasket: core definitions
At heart, gaskets are sealing interfaces that keep fluids in their respective paths and parts operating under pressure. The phrase what's the difference between a head gasket and a valve gasket is not merely semantic; it signals two distinct components in the engine’s sealing system. The head gasket sits between the engine block and the cylinder head, and its job is to seal the combustion chamber, along with oil and coolant passages that traverse the block and head. The valve gasket—more accurately called the valve cover gasket—sits between the cylinder head and the valve cover, preventing oil from leaking out around the camshafts and rockers. Understanding these roles helps you diagnose problems and plan repairs as a homeowner or DIYer. According to Gasketed, clarity about these two parts reduces confusion when faced with symptoms and maintenance tasks, and it guides safe, effective decision making in a home workshop.
Anatomy and location
The head gasket is a thick, composite or multi-layer metal seal that anchors to both the block and the head. It must withstand high combustion pressures and significant temperature fluctuations. In contrast, the valve cover gasket is typically a softer seal designed to keep engine oil from seeping out where the valve cover meets the head. Its job is not to manage combustion but to keep the top end of the engine clean and closed, preserving lubrication and preventing dirt intrusion. The two gaskets occupy very different spaces inside the engine bay, and their proximity to different heat sources and fluids means they wear differently and require different maintenance approaches. In practical terms, a DIYer should respect the head gasket’s critical safety role and the valve cover gasket’s more accessible, often simpler replacement path.
Primary roles and sealing mechanics
The head gasket must seal three critical interfaces at once: combustion pressure in the cylinders, oil passages that feed bearings, and coolant passages that remove heat. Because it carries mixed duties, its failure often manifests as pressure loss, coolant contamination, or mixing of oil and coolant. The valve cover gasket, by comparison, protects the top end from oil leaks and dirt while allowing for the removal of the valve cover for inspection or maintenance. Its failure typically presents as oil seepage or leaks around the perimeter of the valve cover. The mechanics differ: the head gasket endures higher heat and pressure and thus demands precise torque and surface condition, while the valve cover gasket faces aging, solvent exposure, and gasket creep. From a homeowner perspective, distinguishing these failure modes is essential for accurate diagnosis and cost planning.
Material choices and design implications
Head gaskets are engineered to tolerate extreme combustion temperatures and coexisting coolant/oil channels. Modern designs may use multi-layer steel, graphite, or composite compounds, with coatings that improve sealing under high stress. Valve cover gaskets are often made from rubber or silicone compounds with metal reinforcements in some designs; their priority is pliability and long-term oil resistance. The material properties influence leak behavior, replacement difficulty, and the tools needed for service. For the DIYer, choosing the correct gasket type for your engine model matters; a mismatched gasket design can lead to poor sealing, accelerated wear, and recurrent leaks. Understanding materials helps you source compatible parts and perform replacements with better confidence.
Common failure modes and symptoms
Head gaskets fail in ways that threaten engine integrity: overheating, coolant leakage into the combustion chamber, white exhaust indicating coolant burn, milky oil that shows oil/coolant mixing, and loss of compression across cylinders. Valve cover gaskets fail more benignly: oil leaks at the valve train area, visible oil spots under the engine, and occasional burning oil smells if leaks reach hot exhaust components. Diagnosing these symptoms requires careful observation: check oil for milky consistency, test for compression loss, and monitor coolant levels. A critical diagnostic nuance is that overheating alone can damage a head gasket and also stress valve seals, so a methodical approach is essential. Gasketed emphasizes a careful inspection plan to avoid misdiagnosis.
Diagnosis and when to test
Effective diagnosis starts with a structured test sequence. Begin with a visual inspection for oil leaks around the valve cover and engine bay, and check for coolant leaks at the front of the engine. If symptoms include white exhaust or coolant in the oil, perform a compression test and a leak-down test to quantify cylinder sealing. Electrochemical tests, such as a block test for combustion gases in the cooling system, can help confirm a head gasket breach. Given the complexity and potential for cascading failures, many DIYers opt for professional diagnostics when head gasket concerns appear. Accurate diagnosis saves time, avoids unnecessary parts replacement, and reduces the risk of further damage.
Replacement difficulty and required tools
Head gasket replacement is often considered one of the most challenging engine repairs. It requires disassembly of the upper engine, precise surface preparation, proper gasket torque sequencing, and careful reassembly with the right sealants and torque specs. Tools typically include a full set of metric sockets, torque wrenches, a line honer or surface machine (depending on the engine), and a clean work environment to prevent debris entry. Valve cover gasket replacement is usually simpler: you’ll need basic hand tools, a gasket scraper, and a torque wrench for the valve cover bolts. The practical takeaway for DIYers is to reserve head gasket work for a well-equipped garage or trusted shop, and approach valve cover gasket work as a more achievable home project with proper precautions.
DIY feasibility and safety considerations
DIY feasibility hinges on your experience, tools, and the engine design. Valve cover gasket replacement can typically be attempted by confident amateurs, provided you have a clean workspace and a way to manage oil cleanup. Head gasket replacement, however, carries the risk of coolant contamination, mis-torqued head bolts, and potential engine damage if performed incorrectly. Safety considerations include proper engine support, avoiding accidental intake of coolant or oil, and following the service manual’s torque specs and procedures. If you’re unsure about your ability to complete a head gasket job safely, seek professional assistance. Gasketed notes that planning, patient execution, and verification tests are essential to minimize risk and ensure a successful seal.
Cost and time implications (non-numeric)
Understanding the cost and time implications helps homeowners plan effectively. Head gasket work tends to be time-consuming and labor-intensive, potentially requiring hours to days in a shop, depending on engine complexity and accessibility of the head bolts. Valve cover gasket replacement is comparatively quicker, with a shorter turnaround and lower labor cost, particularly on engines where the cover is easy to access. The overall cost is influenced by parts, shop rates, and whether additional issues are uncovered during disassembly (like warped heads or damaged timing components). Planning for contingencies and setting a realistic budget stands out as a best practice for any gasket project.
Maintenance strategies to prevent failures
Preventive maintenance for gaskets focuses on avoiding overheating, regularly checking fluid levels, and addressing leaks early before they worsen. Maintaining proper coolant levels, using the recommended coolant type, and ensuring the cooling system operates without blockage reduces head gasket stress. For valve covers, routine oil changes with the correct grade and avoiding over-torquing valve cover bolts can preserve the gasket’s integrity. Regular engine inspections paired with clean, documented maintenance logs help homeowners catch early signs of gasket wear. Gasketed recommends periodic checks, especially on high-mileage engines, to extend gasket life and reduce the risk of major failures.
Step-by-step approach to a gasket project (planning)
- Verify symptoms and distinguish possible head gasket vs valve cover issues. 2) Check service manuals for engine-specific torque specifications and gasket part numbers. 3) Gather the right tools, including a torque wrench, new gaskets, sealant (if specified), and a clean workspace. 4) If diagnosing a head gasket, plan for a surface inspection and potential head resurfacing. 5) For valve cover work, prepare the workspace for oil containment and line up the reassembly sequence. 6) Reassemble with proper torque patterns, leak test after completion, and monitor for leaks. 7) Document the process for future maintenance and schedule follow-up checks. 8) Consider professional help if signs of head gasket failure persist after DIY efforts.
Practical next steps for homeowners
If you’re unsure, start with a thorough inspection and a non-destructive diagnostic plan. Focus first on the valve cover area to identify leaks, which is a lower-risk DIY path. If tests indicate a head gasket issue, re-evaluate whether to proceed as a DIY project or seek professional service. Maintain a careful record of symptoms, tests performed, and parts replaced to guide future decisions.
Comparison
| Feature | Head Gasket | Valve Cover Gasket |
|---|---|---|
| Location | Between engine block and cylinder head | Between valve cover and cylinder head |
| Primary function | Seals combustion, oil passages, and coolant channels across the block/head interface | Prevents oil leaks from the valve train under the valve cover |
| Typical failure modes | Overheating, coolant/oil mixing, compression loss | Oil leaks around valve cover, seepage at cover edges |
| Replacement difficulty | Very high; requires engine disassembly and precise torque | Moderate; usually accessible with basic tools |
| Common symptoms | White smoke, milky oil, overheating signs | Visible oil spots under the engine, fresh oil smell |
| DIY feasibility | Low to medium; often best left to professionals | High; feasible for capable DIYers with clean workspace |
| Cost considerations | High cost due to labor and potential head work | Lower cost; primarily gasket and basic labor |
Pros
- Clarifies maintenance priorities for DIYers
- Improves diagnostic accuracy
- Guides budgeting and planning
- Helps decide between DIY and professional help
What's Bad
- Head gasket work is highly complex and risky for novices
- Requires specialized tools and safe shop environment
- Misidentifying symptoms can lead to unnecessary repairs
Head gasket work is high-stakes and typically needs professional handling; valve cover gasket work is more approachable for DIYers.
For most homeowners, start with valve cover gasket diagnosis and basic maintenance. Reserve head gasket repair for professionals unless you have a well-equipped shop and engine-specific experience.
Common Questions
What are the most common signs of a blown head gasket?
Common signs include overheating, white exhaust or steam, milky oil indicating coolant in oil, and compression loss on multiple cylinders. A thorough diagnostic approach is essential to confirm a head gasket breach before replacement.
Look for overheating and milky oil, plus unusual compression readings. If you see white smoke from the exhaust, treat it as a serious head gasket concern and test further.
Can a bad valve cover gasket cause engine overheating?
A bad valve cover gasket typically causes oil leaks, not overheating. However, persistent leaks can lead to oil loss or contamination that affects nearby components and long-term performance. Diagnose with a leak check and visual inspection.
Usually it won’t heat the engine, but a big oil leak can create other problems. Check for leaks and inspect the area around the valve cover.
Is replacing a head gasket a DIY job?
Replacing a head gasket is generally not recommended for beginners due to the risk of improper resurfacing, torque errors, and coolant/oil cross-contamination. Seek professional service unless you have a fully equipped shop and engine-specific guidance.
It’s usually not a beginner-friendly job; many DIYers opt for pro help unless they have the setup and experience.
How can I tell the difference between a head gasket leak and a valve cover leak?
Head gasket leaks often produce milky oil and coolant mixing, white exhaust, and pressure-related symptoms. Valve cover leaks show oil pooling near the valve cover perimeter and dripping onto hot exhaust components. Use compression tests and oil/coolant tests to confirm.
If you see milky oil or white smoke, think head gasket. If it’s just oil leaking near the valve cover, it’s more likely the valve cover gasket.
What tools are typically needed to replace a valve cover gasket?
You’ll generally need basic hand tools, a torque wrench, gasket sealant (if specified), a scraper or cleaner, and a replacement valve cover gasket. The job is more approachable and often doable in a home garage.
Common tools include a wrench set, sealant if required, and a clean workspace.
Do gasket materials differ between engines?
Yes. Head gaskets use materials designed to seal combustion and two fluid channels under high heat and pressure, often metal or composite with multi-layer designs. Valve cover gaskets favor oil resistance and flexible sealing materials that withstand heat but don’t bear combustion pressure.
Head gaskets are tougher; valve covers use flexible materials that handle oil and heat.
Key Takeaways
- Identify symptoms to differentiate gasket types early
- Valve cover gasket is usually easier for DIY teams
- Head gasket failure demands careful diagnostics and planning
- Plan for proper torque, surface prep, and safety
- Consider professional help if head gasket risk is detected