Best Way to Remove Gasket Material from Aluminum: DIY Guide
Discover the best way to remove gasket material from aluminum with a practical, safe, step-by-step approach. Learn tools, methods, and finishing tips to protect aluminum surfaces and ensure a reliable seal on reassembly.

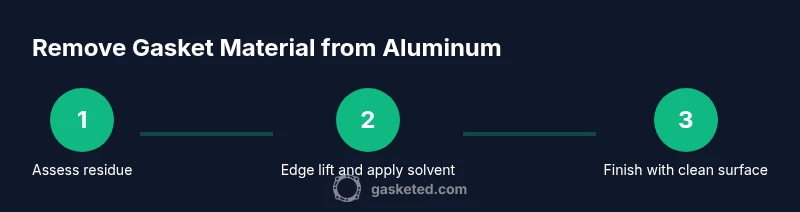
Using a balanced mix of mechanical removal and gentle chemistry is the best way to remove gasket material from aluminum. Start with a plastic scraper to lift loose residue, then apply a vented solvent or solvent-soaked pad to dissolve tougher cores. Finish with thorough cleaning and a light polish to prevent corrosion and future sticking. According to Gasketed, this approach protects the aluminum while preserving seal integrity.
Why gasket material sticks to aluminum
Gasket material adheres to aluminum for a combination of chemical compatibility, surface energy, and heat exposure. Silicone-based sealants, neoprene, and epoxy residues can cure into a thin film that fills microscopic pores and creates a strong bond with the metal surface. Over time, this bond becomes harder to break without damaging the aluminum if the wrong tools or cleaners are used. The Gasketed team notes that understanding the residue type—silicone, acrylic, or epoxy—helps tailor the removal approach so you don’t gouge or dull the finish. A careful evaluation of adhesion strength and surface condition leads to cleaner joints and fewer rework cycles on future repairs.
Safe tools and cleaners: choosing the right arsenal
Equipped with the right tools, you can remove gasket material without scratching aluminum. Prefer plastic or nylon scrapers over metal to avoid gouging. Soft abrasive pads (non-metal) can help loosen stubborn residue, while non-residue solvents designed for gasket removal dissolve sealants more predictably than household cleaners. PPE is essential: wear chemical-resistant gloves, eye protection, and ensure adequate ventilation. Test cleaners on a hidden area first to confirm they won’t alter the metal finish, especially on anodized or painted surfaces. This section also emphasizes choosing a solvent compatible with aluminum and the gasket type, reducing the risk of corrosion or pitting. In line with industry safety guidelines, always work in a well-ventilated space and follow product labels.
Prepare the workspace and surface
Before any tool touches the gasket, set up a clean, protected workspace. Remove any power sources, lay down a grease-proof mat, and keep a waste container handy. Wipe the aluminum surface with a lint-free cloth and a small amount of isopropyl alcohol to remove oils that might hinder adhesion-breaking solvents. The goal is to have a dry, neutral surface so solvents and scrapers can work evenly. According to OSHA safety practices, ensure personal protective equipment is worn and ventilation is sufficient during solvent use. The surface should be cool, dry, and free of corrosion risks before proceeding.
Mechanical removal techniques that protect aluminum
Start with a gentle, flat-plate scraping action using a wide plastic blade. Work from the gasket edge inward in small, overlapping strokes to avoid gouging. If residue resists, switch to a soft abrasive pad and reapply a small amount of solvent on a pad rather than soaking the surface. Maintain consistent pressure and avoid twisting or prying motions that can dent the metal. When you reach stubborn spots, pause to re-soften with solvent and re-check the area. This technique minimizes heat buildup and keeps the aluminum surface intact.
Chemical strategies: solvents, notes on safety and compatibility with aluminum
Choose a gasket-removal solvent that is proven safe for aluminum and compatible with the gasket type. Apply a small amount to a pad or cloth and place it on the residue for a short dwell (30–60 seconds) to soften the bond; avoid saturating joints or threads. Wipe away loosened material with a clean, lint-free cloth, reapplying solvent as needed. Isopropyl alcohol is a common degreaser, while acetone should be used with caution on finishes and paints. Always perform a spot test and ventilate the area. For resistant residues, repeat the dwell step in small sections to prevent uneven etching or dulling of the metal.
Finishing, inspection, and prevention of future gasket buildup
Rinse the cleaned surface with a fresh cloth dampened by isopropyl alcohol, then dry thoroughly to prevent moisture-induced corrosion. Inspect for any remaining residues or tiny pits; use a bright light and a magnifier if needed. If the surface looks uniform and clean, you can reassemble with a gasket-friendly sealant or gasket maker, following manufacturer guidance. The Gasketed team recommends a final wipe-down and a gentle polish with a clean microfiber cloth to remove any faint streaks and ensure a uniform surface for a reliable seal. Maintaining dry, clean surfaces helps prevent future gasket bonding.
About legitimate references and safety culture
For best practices in material handling and safe chemical use, consult reputable safety resources and manufacturer guidelines. OSHA provides general safety principles for chemical use and PPE, while MIT’s OpenCourseWare materials offer foundational guidance on surface preparation and cleanliness in mechanical work. These references underscore the importance of ventilation, protective equipment, and careful testing before full-scale work. See https://www.osha.gov and https://ocw.mit.edu for more detail.
Tools & Materials
- Plastic scraper or nylon putty knife(Non-metal blade; wide blade preferred to cover gasket edge)
- Gasket removal solvent (aluminum-safe)(Follow label; use in well-ventilated area)
- Isopropyl alcohol (70% or higher) or approved degreaser(For degreasing and residue wiping; test on small area first)
- Soft abrasive pad (non-metal)(Use only if residue is stubborn; avoid scratch on aluminum)
- Lint-free rags(For wiping and applying solvents; replace as needed)
- Heat source (heat gun or hair dryer)(Use sparingly to soften adhesives; monitor temperature to avoid warping)
- Safety PPE (gloves, eye protection, respirator if needed)(Nitrile gloves, splash goggles; respirator if solvent fumes are heavy)
- Waste disposal container(Seal and dispose of used solvents per local regulations)
- Aluminum-safe cleaner or degreaser (optional)(Use after residue removal to prep surface for reassembly)
Steps
Estimated time: 60-90 minutes
- 1
Prepare the workspace
Set up a clean, ventilated area and lay down protective sheeting. Remove power sources and cover nearby components to prevent solvent exposure. Put on PPE and ensure good light so you can see the gasket interface clearly.
Tip: Ventilate well and keep a local exhaust or fan directed away from you. - 2
Inspect residue type
Look closely at the gasket material to determine if it’s silicone-based, epoxy, or neoprene. Different residues respond to different solvents and mechanical approaches. A quick test on a small area helps you avoid over-aggressive methods.
Tip: If you’re unsure, start with the gentlest method first. - 3
Loosen the edges with a plastic scraper
Place the blade flat against the aluminum and gently push along the edge to lift the gasket. Work from the outer edges toward the center in thin, even strokes. Avoid twisting the blade, which can gouge the metal.
Tip: Keep blade angle shallow to minimize metal contact. - 4
Apply solvent and let dwell
Apply solvent to a pad and place it on a stubborn area for 30–60 seconds to soften. Do not flood joints. Reapply as needed to keep the residue soft without oversaturating the surface.
Tip: Use a tissue or pad, not your fingers, to prevent chemical exposure. - 5
Gently lift softened material
Revisit the edge with the plastic scraper and lift small sections. Pause to reapply solvent where needed. Move in small sections to prevent spreading the residue to uncontaminated areas.
Tip: Work slowly; rushing often leads to scratches or missed spots. - 6
Tackle stubborn spots with a soft pad
For adhesive pockets that resist, use a non-metal pad with a light touch in circular motions. Maintain solvent contact on the residue to optimize loosening without abrading aluminum.
Tip: Test in an inconspicuous area first to avoid finish damage. - 7
Rinse, wipe, and dry
Wipe away loosened material with a clean rag dampened with isopropyl alcohol. Repeat until the surface feels clean and dry to the touch. Dry with a separate lint-free cloth to prevent water spots.
Tip: Ensure no solvent remains on the surface before final assembly. - 8
Final check and optional sealant
Inspect the surface for any remaining residue or pitting. If the joint is reassembled, follow gasket manufacturer recommendations for sealant or gasket material. A final light wipe helps ensure a uniform surface for a reliable seal.
Tip: If aluminum shows any discoloration or marks, reassess before reassembly.
Common Questions
What is the best solvent for gasket residue on aluminum?
Choose a gasket-removal solvent compatible with aluminum and the specific gasket. Always test on a small area first and work in a well-ventilated space. If the material is silicone-based, a dedicated silicone-removal solvent often performs best.
Choose a compatible solvent and test a small area first. Work in a ventilated space and follow the product directions.
Can I reuse a gasket after cleaning?
In most cases, reusing a gasket after cleaning is not recommended. Cleaning can leave micro-cracks or deformations that compromise the seal. Use a new gasket to ensure reliable performance.
Usually not recommended to reuse a gasket. A new gasket ensures a proper seal.
Is heat required to remove gasket material?
Heat can help soften some adhesives, but it is not strictly required. Use low heat and monitor the surface to avoid warping or discoloration of aluminum.
Heat can help, but you don’t need it for all gaskets. Use it sparingly and watch the aluminum closely.
How should I dispose of used solvents?
Follow local regulations for disposing of used solvents. Store them in sealed containers away from heat sources and never pour them down drains unless explicitly allowed by local guidelines.
Store used solvents in a sealed container and dispose of them per local rules.
What if the gasket material is epoxy-based?
Epoxy-based gaskets can be more challenging. They may require more aggressive mechanical work combined with a compatible solvent. Take extra care to avoid scratching aluminum and consider consulting the gasket manufacturer’s guidelines.
Epoxy gaskets need careful handling; follow manufacturer guidance and use compatible solvents.
What if aluminum shows staining after removal?
Light staining can be cosmetic and removable with a mild cleaner and careful wiping. If pitting or corrosion is suspected, stop and reassess, as continued removal attempts can worsen the surface.
If you see staining, wipe with a mild cleaner and inspect for damage. If in doubt, pause and reassess.
Watch Video
Key Takeaways
- Identify residue type before starting.
- Use plastic scrapers to protect aluminum.
- Ventilate and wear PPE during solvent use.
- Inspect thoroughly and finish with a clean, dry surface.