How to Get Gasket Off Aluminum: A DIY Guide
This guide explains how to get gasket off aluminum safely, with prep steps, heat and solvent techniques, and residue-free cleanup for DIY repairs.

You can safely remove a gasket from aluminum by using patient, controlled techniques that avoid gouging or scratching the metal. Start by cleaning the surface, then gently lift a corner with a plastic card or nylon scraper, applying heat or a compatible solvent to loosen adhesive. Work slowly in small sections, re-seating the gasket or replacing it as needed.
How to get gasket off aluminum safely
The aluminum surface beneath a gasket deserves special care. According to Gasketed, aluminum is softer and more prone to scratching than many metals, so aggressive scrapers or metal tools can mar the finish or damage the sealing surface. Begin with a visual assessment: check for cracking, pitting, or corrosion around the gasket seat. If the area looks compromised, plan for a gasket replacement rather than a removal-and-reuse approach. In most DIY scenarios, you’ll encounter a mix of mechanical debonding and adhesive residues. Being methodical protects the aluminum and keeps the joint clean for a reliable reinstallation. The takeaway is to combine gentle lifting with compatible solvents and controlled heat, using only non-marring tools. This approach minimizes risk and yields a surface ready for a fresh gasket.
Prep and surface protection
Before touching the gasket, protect the surrounding aluminum from scratches and solvent splashes. Use masking tape to outline the gasket edge and cover nearby polished areas. Gather non-marring tools such as a plastic scraper, nylon pick, and a soft cloth. Ensure your workspace is well-ventilated and wear safety glasses and gloves. Dry-fit the gasket area by pressing a clean edge and noting any resistance. The goal is to maintain a pristine seating surface for reinstallation or replacement, while keeping adhesives and grit away from the metal.
Choosing the right technique for removal
A combination of heat, gentle solvents, and careful lifting usually works best for aluminum gasket removal. Start with mild heat to soften adhesive, using a heat gun on a low setting or a warm hair dryer held a few inches away. Apply a compatible solvent (isopropyl alcohol or a purpose-made adhesive remover) to the gasket perimeter and allow it to penetrate. Use a plastic scraper or nylon tool to lift the gasket edge in small increments, never prying with metal. If the gasket is stubborn, reapply heat and solvent in short bursts and pause to recheck for softening and liftability. Patience is key to avoid gouging the seating surface.
Dealing with residue and surface finish
Adhesive residue on aluminum can be stubborn. Wipe with a lint-free cloth dampened with solvent, then repeat with clean sections until the seat is visually clear. For tougher residue, use a dedicated gasket remover that’s safe for aluminum and follow the product’s instructions. After residue removal, inspect the surface for scratches or embedded grit. A light wipe with isopropyl alcohol ensures no film remains. Dry the area thoroughly before assessing whether the gasket can be reinstalled or if replacement is the better option.
Aftercare, reinstallation options, and final checks
Once the seating area is clean, decide whether to reuse the existing gasket if it’s undamaged or to replace it with a new one. If reusing, inspect the gasket for nicks or brittle sections and test-fit carefully. If replacing, match the original gasket type and thickness to maintain a proper seal. Clean the adjacent surfaces again to remove any remaining adhesive, then reassemble according to the original torque and seating recommendations. Finally, perform a leak check or pressure test as appropriate to confirm a proper seal and identify any imperfections early.
Troubleshooting and safety reminders
If you notice deep scratches, corrosion pits, or a warped gasket seat, stop and consider replacement. Aluminum surfaces can be damaged quickly by excessive force or metal tools, and even small imperfections can compromise the seal. Always work slowly, use protective PPE, and ventilate when using solvents. If a gasket stubbornly resists removal despite careful technique, step back and re-evaluate your approach rather than forcing the fit. Regular maintenance and using the correct gasket type help prevent future removal challenges.
Tools & Materials
- Plastic scraper or nylon putty knife(Non-marring edge; avoid metal blades)
- Gasket adhesive remover or isopropyl alcohol (70%+)(Test on a small area first)
- Heat source (heat gun or hair dryer)(Low heat; avoid overheating and warping)
- Lint-free cloths and wipes(For residue removal and drying)
- Masking tape or painter's tape(Protects surrounding aluminum)
- Safety glasses and gloves(Personal protection)
- New gasket (or gasket material)(Have on hand if replacement is needed)
- Soft brush or cotton swabs(For tight crevices)
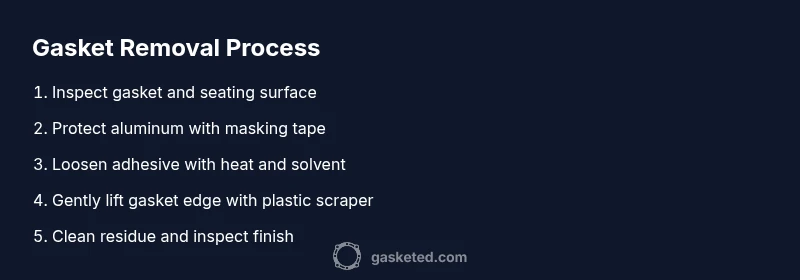
Steps
Estimated time: 30-45 minutes
- 1
Inspect and plan
Examine the gasket and seating surface for damage. Decide whether to reuse or replace the gasket based on wear and seating condition. Document the area with photos to guide reassembly.
Tip: Planning first prevents wasted effort and avoids accidental damage. - 2
Protect the aluminum
Apply masking tape around the gasket area to shield adjacent surfaces. Use a non-marring plastic scraper ready for use, and lay out your tools so they don’t scatter grit into the joint.
Tip: Masking tape saves nearby finishes from solvent splashes. - 3
Loosen adhesive safely
Warm the area briefly with a heat source to soften adhesive. Apply a small amount of adhesive remover or isopropyl alcohol to the gasket perimeter and let it penetrate for 1–2 minutes.
Tip: Avoid prolonged heat; overheating can warp aluminum. - 4
Gently lift the gasket edge
Slip the plastic scraper under a corner and lift gradually, working in small increments along the seal. Do not use metal tools that can gouge the aluminum.
Tip: Work slowly to keep the seating surface intact. - 5
Clean residue and inspect
Wipe away softened adhesive with a lint-free cloth, reapply solvent as needed, and ensure the surface is free of grit. Inspect for scratches or embedded debris that could compromise the seal.
Tip: A clean surface improves gasket seating and final seal quality. - 6
Decide on reinstall or replace
If the seating area is intact and the gasket is undamaged, reassemble carefully. Otherwise, replace with the correct gasket type and thickness for a proper seal.
Tip: Always test the joint after reassembly to verify a leak-free fit.
Common Questions
Can I reuse a gasket after removing it from aluminum?
Only if the gasket is undamaged, seated cleanly, and the aluminum surface shows no gouges. If in doubt, replace with a new gasket for a reliable seal.
Reuse only if it’s in good shape and the surface is clean. Otherwise, replace to ensure a proper seal.
What safety equipment should I wear when removing gaskets from aluminum?
Wear safety glasses, gloves, and ensure proper ventilation when using solvents. Keep tools non-marring to protect the aluminum.
Protect your eyes and hands, and work in a well-ventilated area when using solvents.
Which solvents are safe for aluminum gasket removal?
Isopropyl alcohol is common and generally safe for aluminum. For tougher adhesives, follow label directions on an approved gasket remover.
Isopropyl alcohol works for many gaskets; use commercial removers if needed and follow directions.
How can I tell if the gasket seat is damaged after removal?
Look for deep scratches, gouges, or corrosion around the seating plane. If present, replace the gasket and, if needed, the seating surface.
Check for scratches or pits. Replace the gasket and fix the seat if you see damage.
What should I do if the gasket won’t budge after solvent and heat?
Pause, reapply solvent, and rewarm in short intervals. If it remains stuck, reassess the approach to avoid damaging the aluminum.
If it won’t move, stop and re-evaluate rather than forcing it.
Watch Video
Key Takeaways
- Protect aluminum surfaces with non-marring tools.
- Loosen adhesive with heat and compatible solvent.
- Lift the gasket edge gradually to avoid gouging.
- Inspect and decide to replace or reinstall based on surface condition.
- Test the sealed joint after reassembly.